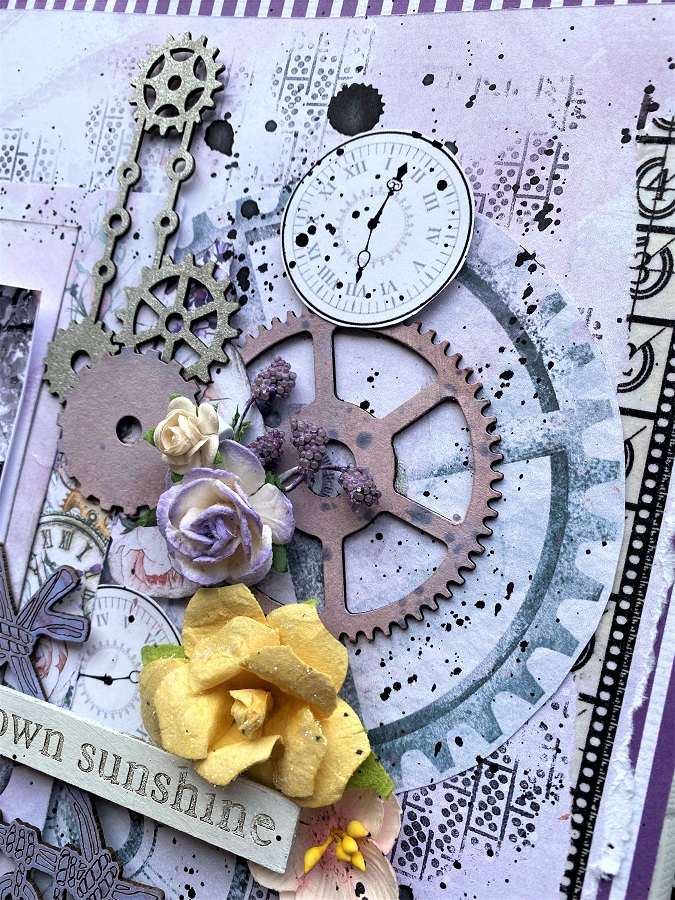
Em with you today and I have an 8x8 canvas to share with you. It has Steampunk vibes.
And here are the chipboard pieces used....
12x12 Weathered Clock Face Frames Steampunk Gears Medium Steampunk Gears small 6" Circle Zipper Frame set
I trimmed the medium Clock face to create an 'edge' to place on the base of my layers on the canvas.
The clock and the zipper frame both have the same finish. It started with a mix of complimentary colours in distress oxides, and then finished with a clear emboss.
The gears are painted with an acrylic ink in burnt sienna and raw sienna. I love how these sit nestles into the flower clusters.
The small elements really add to the completeness of the project.
I hope you enjoy this share and get inspired by some of the elements.
Have a great weekend and I will catch you all again soon.
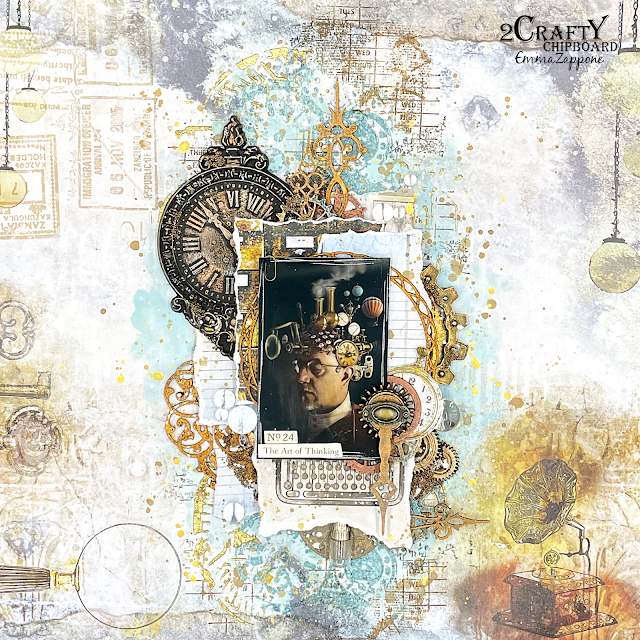
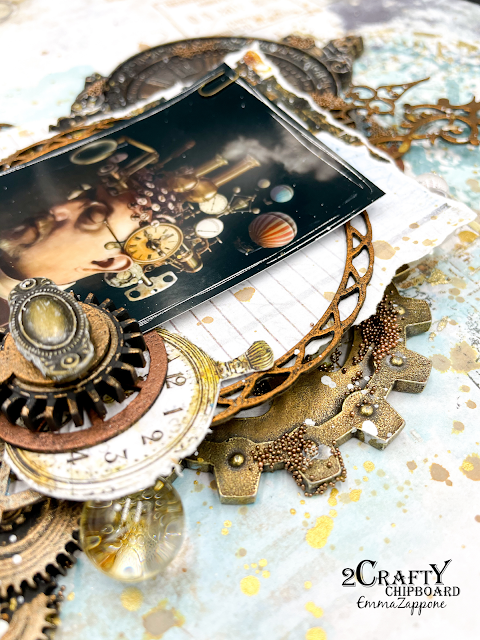
My project this month is an art journal page inspired by the moodboard at Mixed Media Place. Further down this post, there is link to a video tutorial of how the page came together.
Ive used several 2crafty chipboard pieces on my page: Checkerboard Clumps and Square Collage Panel to build layers and gears small & medium to embellish. As always, my first step was to gesso all the chipboard pieces. Can you see impressions of the square collage piece on the background? They were made by pressing down the chipboard while the gesso was still wet.
To match the pattern of the Checkerboard Clumps & gears, I've used similar pattern stamps on the background. The gears were coloured with sprays or inked with a stamp pad.
I hope you enjoy watching the tutorial.
Thanks for stopping by today.
Until next time, happy crafting,
Kripa
My first share this month is a canvas which now sits on my son's desk.
I love how easy it is to create texture and interest just by layering chipboard pieces.
To begin, I collaged some papers on the canvas and added texture paste and paints. On top of this I've built layers of chipboard on top of each other and tucked under the layers behind the photograph.
All
the chipboard pieces were coated with white gesso. Then, except the
checkerboard clumps, the rest of the pieces were painted on using
Colourarte Acrylic Silks. Some checkerboard clumps were left plain,
the rest were painted on with a brush loaded with Twinkling H2Os (watercolour).
2crafty chipboard used:
* Summertime
* Filmstrip Tiny
* Gears Medium
* Checkerboard clumps
* Steampunk gears tiny
* Steampunk gears small
'Love these kids'
The next project is a 12 x 12 scrapbook layout of my kids with something
out of my comfort zone - a lot of visible journalling..
In order to have lots of space for journalling, I centred the photograph and extended
the layout horizontally using the pretty Squiggly Hearts Cluster. Under the
Squiggly Heart Cluster on either side is a Film Strip - Tiny. Ive cut to
Sequins negative bits in two and tucked it around the photograph.
I wanted the {heart}in thetitle - I just {heart} these kids
next to the photograph,
so I cut it in two and layered them one below
the other. All the chipboard pieces have
been altered the same way -
first a layer of white gesso and then painted on with
Colourarte Vivid
Ultra Metallics using a make up sponge.
I
returned to my craft room after almost two months away last week and this was
the first project I made - a page to document my gratitude for the
timely help that the
universe sent us during times of crisis these last
few months.
There
are many layers of paint and texture paste on both pages. To create the
impressions on
the left side page, I pressed three Fluer De Lice ATC
pieces into wet texture paste , scratched
circles around them with a
palette knife and a few minutes later, carefully lifted out the first
two fluer pieces.
On
the other page, Ive written my gratitude with a fine tip applicator and
made a cluster of chipboard on top of it. There are still a few swirls
of brown visible under the chipboard pieces. The base of this cluster is
the negative from the Fluer de Lice ATC chipboard sheet. All of the
chipboard pieces were covered with white gesso on top of which acrylic
paint was applied using a palette knife. The only exception is the gear
chipboard under the ochre yellow fluer. It was painted on without gesso
and looks darker than the other brown pieces which adds subtle colour
variation.
2crafty chipboard used:
* Clock face frames
* Fluer De Lice ATC
* Vintage Clock Hands
* Steampunk Gears Small
* Steampunk Gears Medium
'Together'
My second layout was inspired by Case File No: 248 at CSI:
Colours, Stories & Inspiration which 2Crafty Chipboard is sponsoring.
To frame the photograph, Ive used Ava's frames chipboard. To balance the swirls on the frame,
Ive added one piece from the Leafy Shrub Set 1 on the other side of the frame and another
piece from the same set in the bottom left corner of the page.
Finally, a Mini Flourish bit was tucked under the fuzzy cut flower cluster on the right .
Here is the video of how this page came together. I hope you enjoy.