Showing posts with label friends. Show all posts

Sunday, October 6, 2019

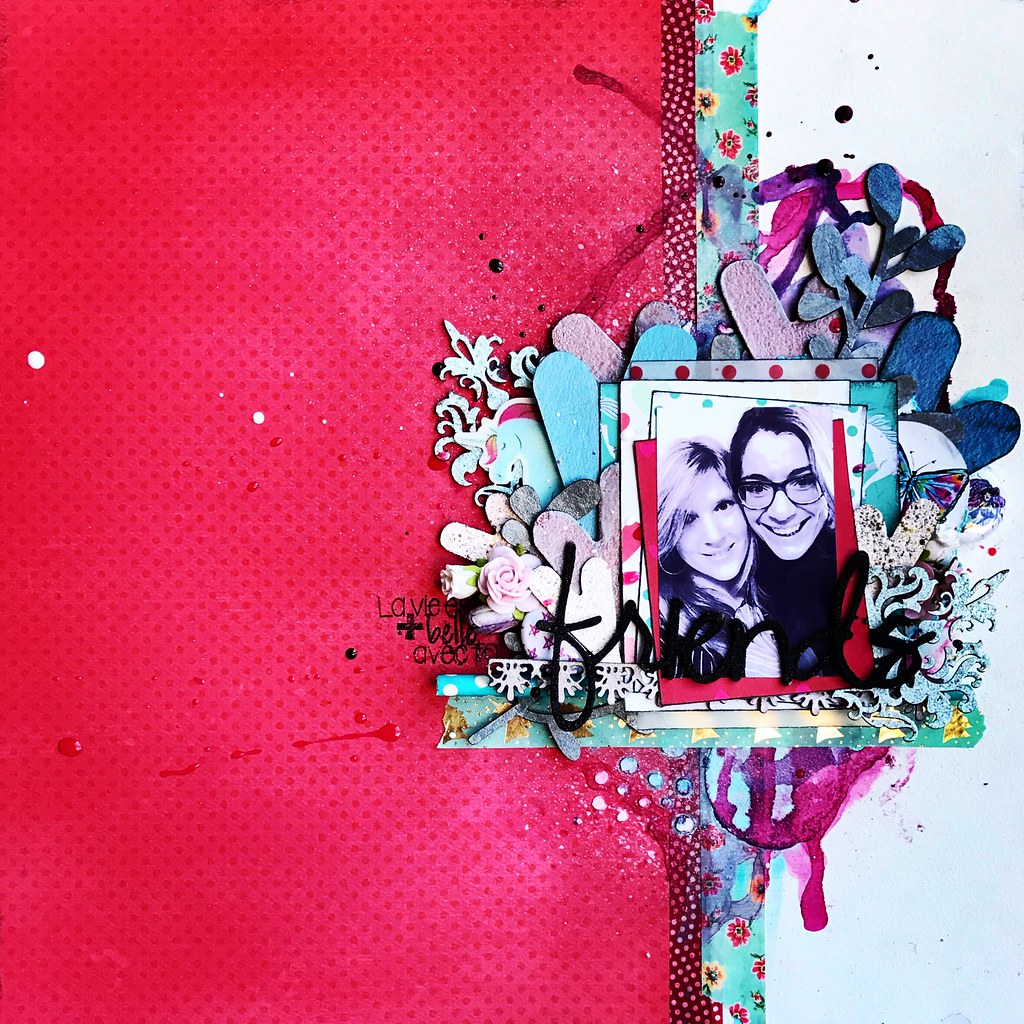
"Friends" by Tammy Klingner

Hi there creative souls.
Tam here today to share my latest design.......

"Friends"

For this layout, I wanted to steer away from my usual bright colours,
and have a go at using a more pastel colour palette.


I used the following 2Crafty Chipboard:

*NEW* "6" Floral Cluster Border"
"Lattice Leaves"
"Friends Loopy Font Title"
"Mini Branches"
"Polaroid Frames"


I firstly coated ALL pieces with white gesso.

I absolutely LOVE that NEW 6"Floral Cluster Border.
I couldn't wait to use it.
I coloured each flower individually with watercolour paint.
Once dry I added a few simple pen marks.


I just love the mottled look this technique creates.
Soft and lovely.

I did the same to the "Mini Branches"
I love the effect of the pen marks.
It gives them an arty/whimsical feel.


The "Polaroid Frame" was painted with a grey/silver watercolour 
and then swiped with white gesso.


I simply added white paint to the "Friends Loopy Title" and the "Lattice Leaves".
I wanted that fresh simplicity!


There you are, I hope you like this one.
It was fun to try something a little different.


I'll see you again soon.
You can find me on my BLOG.


Sunday, January 21, 2018

January Inspiration By Sabrina Turpin

"Life Documented"


Hello everyone!
I hope that 2018 is treating you well so far. It has been fantastic for me as I am 
absolutely thrilled to be joining the amazing 2Crafty team!

Let me introduce myself. I’m Sabrina Turpin, from Quebec, Canada, mom of two
 fantastic kids. I work in a daycare by day and I am a chipboard ninja by night!

For my first post, I’ll be sharing two new layouts. The first one, “Life Documented”, 
features my daughter having fun in a playground.


I inked and then used a transparent embossing powder on the
"Frame Madelines Flourish".


For the title I simply painted and inked it & the 
"Pointed Doiley Frames" I did the same.


Again on the "Tiny Leaf Stems" I did the same, just painting & inking as it looks so good.
These I used an embossing ink on the "Sharon's Butterflies".

For this page, I used the following 2Crafty Chipboards:

"Life Documented - title
Sharon's Butterflies
Frame Madeline's Flourish
Pointed Doiley Frames
"Tiny Leaf Stems"

"Friends"


My second page, "Friends", puts into the spotlight one of my closest friend.

For the "Funky Hearts" I embossed them with embossing powder.


The larger hearts were painted and inked & the smaller ones were
 embossed with embossing powder.


The "Twiggy Branch" was painted painted with acrylic metallic paints.


The border is from the "Lacey Border Set #1"& both that & the "Damask"
 were painted in acrylic paints.
The "Friends" title was embossed with embossing powders.

2Crafty Chipboard Products Used....

Funky Hearts
Damask
Lacey Border Set #1
Twiggy Branch
Friends - title-loopy font


Tuesday, November 21, 2017

November Inspiration and Picture Tutorial
by Debbie Burns

Hi everyone, Debbie here with you today to share my November projects. 

"Amazing Day"

I love fall colors with their deep rich tones.  I used a picture of a dear friend of mine and
was inspired by the colors in the picture. I applied some random misting on the background.


I embossed the Frame Handrawn Heart with a mixture of spice and chili powder.  On each side of my photo I added Addy's Butterflies, embossed with spice, sage and turquoise embossing powders. Beneath the butterfly is the new Swaying Branches embossed with a distressed brown powder.  


A close up of the Swaying Branches and Leafy Rounds Chipboard pieces.  
I added some twig and paprika microbeads.


Here I've used the new Amazing Day title embossed with brown and chili.

2Crafty Chipboard used:

Addy's Butterflies
Frame Handrawn Hearts
Amazing Day
Leafy Rounds
Swaying Branches


My next layout features my Grandmother and her friend.

"Friends"

I have a step by step picture tutorial:

Step 1

Mist the background paper with blue, green and light brown mists.  Add stamping.

Step 2

Layer papers and mat the photo.  Add Ariel's Spray Chipboard, embossed brown.

Step 3

 Place flowers around the picture and add Flourish Adornment 
Set 4 Chipboard pieces, embossed brown.

Step 4

Add Lattice leaves and Corner Twisted Vine chipboard, embossed sage with bronze glitter.
  Freda's Butterflies and friends title embossed with a blue grey embossing powder and glitter.

Here are a few closeups:


Lattice leaves, Corner Twisted Vines and Freda's Butterfly.


Corner Twisted Vine, Flourish Adornment Set 4, Lattice Leaves and Freda's Butterfly.


Lattice leaves and friends title.

2Crafty Chipboard Used:
Ariel's Spray
Corner twisted Vine
Flourish Adornment Set 4
Freda's Butterflies
Friends
Lattice Leaves

I hope I've inspired you today.
See you next month.
 . . . Debbie


Tuesday, December 8, 2015

December Shares With Beck BT


Hi, it's Beck Beattie here with my December inspiration shares
I had lots of fun with paint and sprays this month while creating my pages.  I have 
two different style pages for you showing some different uses for your chipboard.  
 
"Good Times With Friends"

You honestly don't need pattern paper to create fun pages.  After creating a fun 
watercolour background with the help of some texture paste stencilling, I added in
 my embellishing features being all chipboard except for a few sequins!  Yes just
 chipboard and paper - pretty cool huh!  
I coloured the title with StazOn Teal blue ink pad - so quick and easy and so effective!
 

I just love these 'dotty bits' and I cut them into little circles, added a little
Indigoblu English cottage Arisist's Acrylic Paint in 'Gold Finger'
(that paint coats the chipboard SO WELL) and added them as an embellishment to the page.  


Last I added some of these sweet birds that I simply added some thick gesso
(I love DecoArt Media Gesso for this - its nice and thick) with my finger
 dabbing it on for some added texture and adhered them to the page.


   2Crafty Chipboards Used:

Dotty bits 
Good Times
Birds set


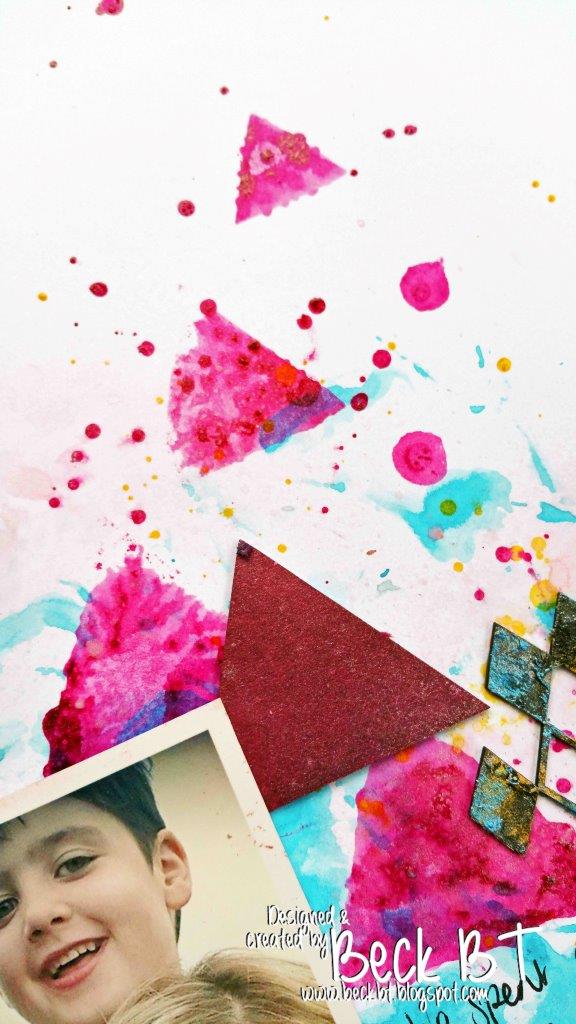
 "Together"

Here is a fun layout I created of me and my boys, I wanted  a little grunge,
 but also some girly fun in there too!

I had fun using the chipboard triangles to stamp into my background by adding some spray
 (I used 'Watermelon' by Fun Stampers Journey) to my kraft sheet and then stamping
the chipboard piece into it and then using to stamp onto the cardstock.  So not to waste
 the triangles I added them to my page as well!


Layers of meltallic rub (I used DecoArt Metallic lustre in teal and orange) create a fun grungy
 effect.  I first gave a coat of black gesso with some texture left to the chipboard pieces.


 Again I used Orange Metallic lustre on my title


2Crafty Chipboards Used:
Harlequin clumps
Traingle set
Mini words 2


I hope you enjoyed my share this month on the 2Crafty blog!  May you have a fun and 
restful time over the holiday season with friends and family.  May you be spoilt and
 cherish the holiday season full of joy and laughter!
 
 
Please remember to become a blog follower & leave a blog comment to
be eligible to go in our monthly draw for a great chippie prize pack.


Happy Crafting
xxx Beck BT
 
Photobucket