Showing posts with label Flourish Adornment Set 4. Show all posts

Saturday, June 4, 2022

Beautiful Memories Layout by Tania Ridgwell

  Hi there!  

Tania joining you today to share the first of my DT projects for June a Layout.

"Beautiful Memories"


2 Crafty Chipboard Used:

*Freda's Butterflies
*Ariel's Spray
*Flourish Adornment Set 4
*Memories
*Beautiful Loopy Font
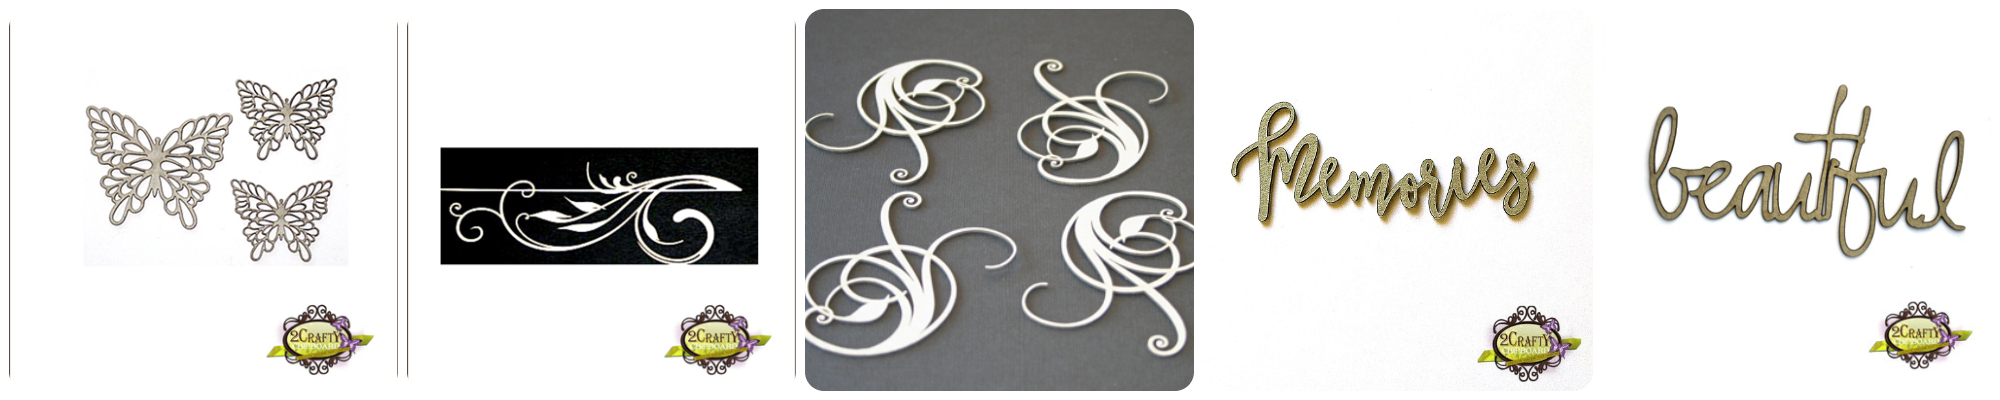

Once I had chosen my papers and created my background I set about painting my Chipboard in coordinating colours.   The Ariel's Spray & Flourish Adornments Chipboard are painted with Art Alchemy Opal Magic Green-Gold Acrylic Paint and the Freda's Butterflies, Memories & Beautiful Loopy Font Chipboard are painted with Art Alchemy Opal Magic Aqua-Rose Acrylic Paint.


I added my photo to the page, then added the Ariel's Spray along the bottom of the photo and arranged the fussy cut elements around the photo.  I tucked the Flourishes and Butterflies in and around the fussy cut elements and embellished my page using a variety of flowers to compliment the chipboard pieces I have used.


To finish my page I added the Beautiful & Memories Chipboard for the title.


That's all from me today, I hope I have inspired you all a little with my Beautiful Memories Layout.  

Until next time,
Thanks so much for stopping by.

Tania xx

Wednesday, May 18, 2022

Hello Beautiful Layout by Tania Ridgwell

Hello there! 

Tania with you today to share the second of my DT projects for May.
  I have created another layout.
  I just love the colours in this layout - especially the Gold!!!


2 Crafty Chipboard Used:

*Circle Heart Frames
*Flourish Adornment Set 4
*Hello Beautiful
*Delicate Lace Border


I just love this paper range and couldn't wait to use it and add lots of extra pops of gold to it.  Once I had created my background,  I chose my chipboard pieces and coloured them all with Inca Gold Paint.


I added my photo and tucked in the Circle Heart Frames between the paper layers and under my photo.  I then embellished around the photo using fussy cut elements and flowers.
I cut up the Delicate Lace Border and tucked pieces in between the paper layers and under the flowers.


I added a Flourish Adornment to each side of the flower embellishments at the bottom left of the photo.  To finish the page I added the Hello Beautiful Chipboard Title.


Thats' all from me today, I hope I have inspired you all a little with my Hello Beautiful Layout.  
Until next time thanks so much for stopping by.

Tania xx

Thursday, December 30, 2021

Choose to Shine by Emma Zappone

Hi everyone,
I can not believe that 2022 is just around the corner. How fast time goes!
But before it does come, today I share this layout using more awesome chippy.


Chipboard used.....

Flourish Adornment set 4
Anika Frame
Lattice Leaf Set


A soft layout calls for soft chipboard. The Anika frame was the perfect frame for this image and it's layers. All the chipboard pieces were primed with black gesso. And then had wax finishes.


The frame had 3 different waxes layered on it to bring out the soft tones in the flowers of the image.
As for the lattice leaves, I chose to leave them black. These were a striking difference from the coloured foliage and background.


This stunning flourish had a wax finish also. Again it added a little shine that complimented the colours in this composition.


I love these chipboard pieces together and how they are layered in amongst the paper layers. I also love how well they work with resin pieces. Chipboard that is so versatile, for every project.


I hope you have been able to take advantage of the holidays and have got your craft on. 
I also hope you have a safe and happy New Year and I will see you all soon in 2022.

Stay safe and crafty, Em xx


Thursday, January 21, 2021

"Pretty in Pink" By Chrissy Tingey

Hi everyone, I'm back with my second post for January featuring
some wonderful flourishes & border chipboards.

2Crafty Chipboard used…

Maggie’s Swirls
Flourish Adornment set 4
Fanciful Butterflies
Lacy Border set 1


 I love the beautiful Lacy Border Set and wanted to show them all off, so I hope
 my layout “design” has achieved this, the lacy border chipboards make such
 pretty edges to the different paper sections.
 With a quick coat of black acrylic paint they then coordinate beautifully.


I have used both sets of Flourishes and tucked them in and around my fussy
cut elements, I cut some of the bits off that would have been hidden and
dotted these around my layout to make good use of them.


I can never resist a butterfly, painted with black acrylic paint again to coordinate,
the beautiful "Fanciful butterflies" finish off my layout, there are two sizes in the pack,
so I have layered them up to give some height and dimension
 to my layout, I have then added a tiny pearl to each. They look so pretty.


I hope you have enjoyed my post and layout and I hope I have inspired you
 to use those pretty border chipboards

Thank you for stopping by - happy crafting!!
I’ll be back next month with two more projects

Chrissy xXx 


Monday, October 5, 2020

A Love Story
Loving Memory Layout
by Jenny J.

Hello everyone,

It's my turn on the blog and here is my layout for today.


2Crafty Chipboard Used.....


*Flourish adornment set 4
*A love story
*Mini Flourish bits
*View finder

First of all, as always, I've applied a coat of clear gesso on my background paper 
and then, heavy gesso through a stencil.
I've started my focal point with papers scraps and ephemeras.


Above, you will see my title word, "A love Story",
heat embossed in white.

All of three pieces from "Mini flourish bits" and "Flourish adornment set 4" 
are also heat embossed in white.  
You can see that in the following pictures.


The last chipboard here is a lovely "View finder" 


That piece is heat embossed also but with ivory powder.
Finally, I've aded flowers, art stones and homemade foliage and that was it for this time.


Hope it gives you some inspiration, see you next time!
In the meantime, stay safe!


Thursday, September 17, 2020

'Create Your Own Sunshine'
with Lisa Amiet


Hello all! I hope you are all well.

It's Lisa on the blog today with a layout to share with you.

I have used a photo of my daughter and her bestie!

"Create Your Own Sunshine"


2Crafty Chipboard used:


For this layout I have used some of the gorgeous
  'Moroccan Bits'
that I have embossed white,cut up and tucked into my layers.


I have also used one of the 'Flower Medallions',
also embossed in white. 


I have also used one of the 'Flourish Adornment Set 4',
embossed in white, in among my flower cluster. 
Love how it pops on the dark wood background.


I have built a little cluster on the other side of my page.


For my title, I have used one of the '6 x 4 Phrase Sticks Set 5',
which I have left raw because I like how the text looks when unfinished. 


I'm loving the white of the chipboard with the dark rich colours of the papers.
I hope you like it too!

Until next time!

Lisa


Wednesday, July 8, 2020

'Love Life With You'
layout by Rachael Funnell


Hello 2 Crafty Fans!
Rach back today sharing another layout
This romantic / lovely dovely page 
and have included some beautiful 2 Crafty Chipboard.....


Large Tribal Arrow
Flourish adornment set 4
6x4 Phrase Set set 4
Bead heart border
Mini Camera
A Lock from Keyholes & Locks set


Starting with my title using the
 "love life with you' stick from the  6x4 Phrase Set set 4 
using a sponge adding light coating of gesso...

Personally - I am obsessed with these phrase sets ...  
 when I am wanting to add a title but without the bulkiness
as the usual titles...  I think these are  GREAT!!!


Did the same to the Large Tribal Arrow
A light coat of gesso then inking light with
pale blue, before adding the 'Love life with you'
phrase set attaching it with foam tape...


 I then decided to add this lock 
I first inked lightly with rose gold ink then, 
cut the chain element and placed lock with foam tape..


The rest of chipboard pieces - 
Bead heart border, Mini Camera and Flourish
I have given them a couple of coats of gesso 
before adhering them to my page...


I'm really happy with the end result of this page...
 and I hope you got inspiration in some way...
 
Until next time!!!