Showing posts with label Mini Branches. Show all posts

Wednesday, July 16, 2025

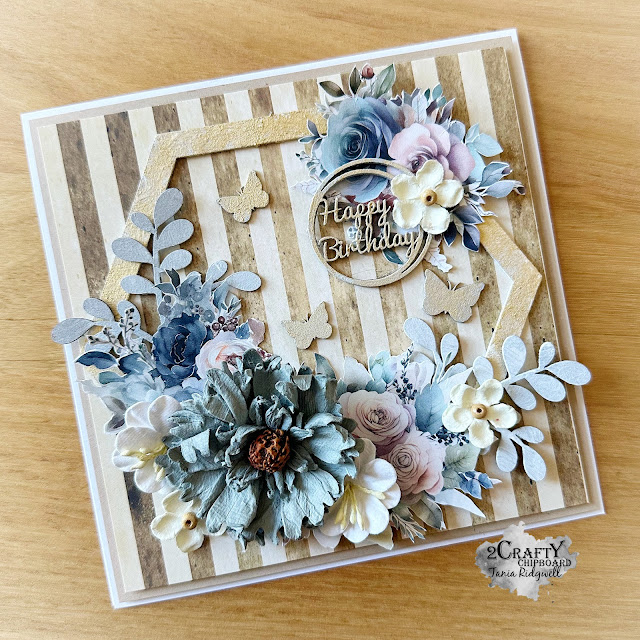
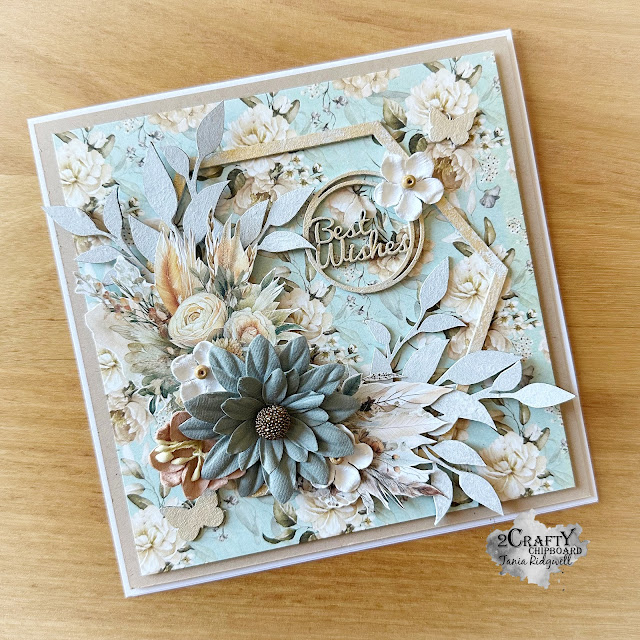
Grandma's Attic Cards by Tania Ridgwell

Hello there! 

Tania joining you today to share the last of my DT projects for July.
  I have created a set cards for my second share.


2 Crafty Products Used:

*Hexagon Outline Frames Set
*Frame Doodled
*Card - Word Circle Set - Sentiments
*ATC Butterflies
*Mini Branches
*Foliage Set 18


I created each of my card bases using the gorgeous Mintay "Grandma's Attic" Paper Collection. 

I first gave all the chippie pieces a couple of coats of gesso.  I then used coloured the Frames, Butterflies and Sentiment chippie pieces with Golden Glow Opal Polish.  I left the Mini Branches and Foliage chippie pieces as is with just gesso on them.

To construct each of the cards I added either a Hexagon or Doodled Frame chippie to each.  I 
then embellished them with die cut flower elements from the Mintay Flora Books 8 & 9 and paper blooms. I tucked in either the Mini Branches or Foliage chippies amongst the blooms and finished each card with a chippie Sentiment from the Card - Word Circle Set.

See each card below.


Thats' all from me today, I hope I have inspired you all a little with my Grandma's Attics Cards. 

 Until next time thanks so much for stopping by.
Tania xx

Wednesday, October 30, 2024

"Steampunk Halloween"
Mixed Media Pumpkin
with Amy

 Hi lovely creative peeps, 
I hope this post finds you well and that you are enjoying your day! Well I always enjoy my day while creating for 2Crafty Chipboard since I think it's unimaginable not to use their chippies on my work. For today I have a mixed media halloween pumpkin. Enjoy my post....

October Fun


Amazing 2Crafty Chipboard used: 
Giant Gears
Fine- Word Set ~ Months ~
Funtimes Mini Title
Mini Branches
Mini Word Set 1
 Corner Steampunk 6


The mini branches are treated with only two layers of green embossing powders for the other pieces I used some white gesso on them first and then added two layers embossing powder. For the word "fun" I added three layers on the lower part of the word.


This was such a fun project to create all the flowers are hand made {my new addiction} with fabric the pumpkin I had in my stash for a long time and I finally got to use it. I am also hooked on the fine words especially the months.  

Thank you so much for stopping by I will be back next month with another project hope to see you back then....I hope I have inspired to create something pretty and have fun while doing so. 

Meanwhile if you would like to see more of my work you could visit here: 

Amy's Pretty Papers

Thursday, April 4, 2024

Create Your Own Sunshine Altered Heart by Tania Ridgwell

 Hi there!

Tania joining you today to share the first of my DT projects for April. 
 I've altered a decorative wooden heart.


2 Crafty Products Used:

*Lace Doily Frame
*6x4 Phrase Stick Set 5
*Mini Branches


I purchased this awesome wooden heart and thought how perfect it would look all decked out with some gorgeous 2 Crafty Chipboard.  


The Mini Branches are coloured with Black Marble Dylusions Shimmer Spray and the Create You Own Sunshine Tilte chippie with 13arts Ayeeda Burnt Sienna Chalk Mist.  I kept the Lace Doily Frame raw.


Once the chippie pieces were all dry I set about decorating the heart. I added the Lace Doily Frame first and then focused on decorating down the left.
 I used lots of fussy cut elements from the Mintay Flora Book 8.  I added these to the heart along with assorted paper blooms and then tucked in the Mini Brach chippie pieces amongst them.  I finished off the heart by adding the Create You Own Sunshine Title across the Lace Doily Frame.


Thats' all from me today, I hope I have inspired you all with my project.
  Until next time thanks so much for stopping by.
Tania xx

Tuesday, October 17, 2023

Love Layout by Tania Ridgwell

 Hello there!

Tania joining you today to share my second Design Team project for October.
  I have created a layout for final share for the month.

"Love"

2 Crafty Products Used:

*Ginny's Flourish Set
*Love - Fine Script
*Mini Branches
*Window Shutter Set 2


I used the gorgeous Paper Rose Dear Isabella Collection to create the base for my Layout.

  
I painted the Window Shutter Set 2 Chippie first with a coat of Gesso and once dry coloured it with Opal Magic Violet-Gold Paint.  I built up the layers under my photo with some patterned paper.  I cut the painted Window Shutter chippie in half and added it to the paper layers and then added my photo.


I gave all the chippie pieces a coat of gesso and once dry the Love title was painted with Opal Magic Violet- Gold Paint and the Ginny's Flourishes with Dylusions Laidback Lilac Paint with some Opal Magic Green-Gold Paint randomly dabbed on.   The Mini Branches were coloured with Heidi Swapp Chartreuse Spray.
I then embellished my page with lots of fussy cut elements and added lots of pretty blooms.  I tucked in the Mini Branches and Ginny's Flourishes amongst the embellishment clusters.  To finish my page I added the Love title to the bottom left corner of my photo and few fussy cut butterflies.


Thats' all from me today, I hope I have inspired you all with my Layout. 
Until next time thanks so much for stopping by.

Thursday, July 13, 2023

"Amazing Day" by Amy Voorthuis

 Good morning amazing 2Crafty friends, 

Today I would like to show you all a very colorful layout and this time I used the amazing NEW "Postcards from Paradise" collection by Prima {swoon} and some beautiful NEW & older 2Crafty Chipboard pieces. The picture I have used here is from Jeroen & Abbey in Greece last year. We have had rough couple of months and we have some ahead that's why you haven't seen much of my work lately. Hopefully I will make that okay with you all.

Amazing Day

 2Crafty Chipboard used: 
Sabina's Frame Set 
Fern Leaf Set 
Foliage Corners 
Amazing Day
Squiggle Arrow Set 
Mini Branches 


On the beautiful "Sabine's Frame Set" I added some matt golden eyelets in the already prepared circles after that I added some sheer lace but before all that I used some pretty matte pink acrylic paint to color it. For the phrase I used the same color pink and after I attached it to the upper right corner of my layout and used my sewing machine to stitch over it. 


 On the rest of the chipboard pieces I used some white gesso and some different green matte, metallique acrylic paints on some I have added some waxes. On the Foilage Corners I used two different shades of green and some cute green pearls. Inthe end I added some leaves, pearls and word strips. 

Thank you so much for your visit today and if you would like to see more of my work please visit here:

Much love and happy crafting...

Tuesday, June 13, 2023

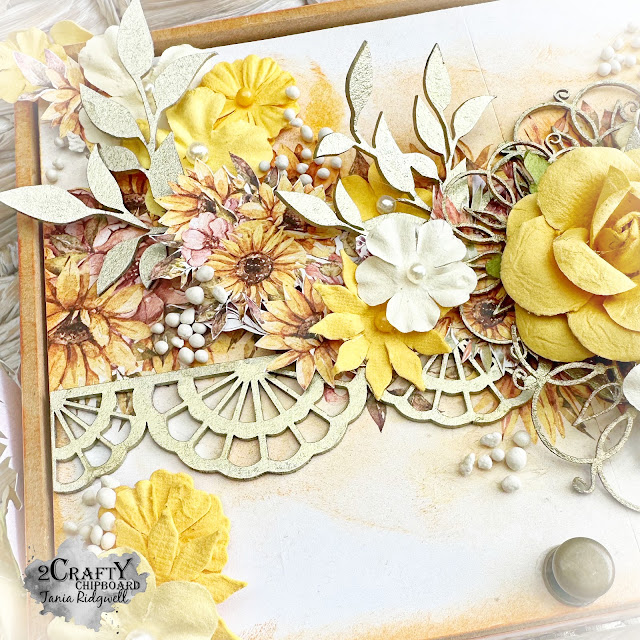
Altered Card Box by Tania Ridgwell

Hi there! 

Tania with you today with the last of my DT projects for June. 
 I have been having a lot of fun making Beyond the Page Projects, so I have another one
 to share. 
I have altered a Card Box.


2 Crafty Chipboard Used:

*Charlotte Flowers
*Doily Border
*Mini Branches


I have used the stunning Paper Rose Sunflower Garden Paper Collection to decorate this Card Box. 
I just love this collection - who doesn't love Sunflowers!!


I really wanted my Chippie pieces to really pop on the box so I painted them all with Monte Arte Gold Paint.  I cut the Doily Border in half and added one half along the top of the box and the other half along the bottom panel of the box. I then decorated the box with lots of fussy cut elements and beautiful blooms.  I cut some of the Charlotte Flowers and Foliage in half and tucked them into the flowers on the top of the box.  I also added a Charlotte Flower to the bottom left panel of the box and then popped some flowers around it.  To finish of my Card Box I randomly added some Art Stones around the Flower and Chippie clusters.


Thats' all from me today, I hope I have inspired you all with my little Beyond the Page Card Box project.  Until next time thanks so much for stopping by.

Tania xx


Tuesday, May 30, 2023

'Your Heart, My Heart' - by Emma Zappone

 Hello 2Crafty friends.
Em with you today, and I'm finishing the month off with a little 'foxy' layout.


Using beautiful soft earthly, autumn tones this page features some stunning chipboard elements.

Lets check out which pieces I chose here......

Mini Branches
Chicken Wire Barbed small
Stitched Lace Border


I decided to keep a couple of the chipbord pieces simple by painting them with an acrylic paint.


The chicken wire, was painted in an orange acrylic with a sepia wax brushed over the top.


The stunning Lace Border was started with a cream acrylic and then finished with a light coating of Firebird wax.


I also cut the border into smaller parts to use in two locations.


And those wonderful very versatile branches were initially painted with acrylic, but I wanted a shiny finish so chose to add metallic foiling flakes for a real shine.


I really love how the foil flakes add a little more drama and autumn shimmer.


I hope this page inspires you a little. Thanks so much for joining me today.

See you again next week.
Em xx