Showing posts with label Addy's Butterflies. Show all posts

Thursday, August 8, 2024

Happiness is This by Tania Ridgwell

Hi there!
Tania joining you today to share the first of my DT projects for August.  I have created a layout.

"Happiness is This"


2 Crafty Chipboard Used:

*Thin Square Stacked Frames
*Addy's Butterflies
*Swaying Branches
*6x4 Phrase Stick Set 5

 I have used the gorgeous Celebr8 Cherished Memories Collection to create the base for my layout.  I fussy cut the gorgeous wreath for the focal point of the background page.


I coloured the Addy's Butterflies & largest Stacked Square frame chippies with Heidi Swapp Blush Color Shine Spray.  The Swaying Branches chippies were coloured with Opal Polish Green Paint. 


Once I added my photo,  I added the Stacked Frame over top.
I added lots of paper blooms to the top right and bottom left of my photo.  I tucked one of each of the Swaying Branch chippies into each side of the bottom flower cluster.  I added the Add's butterfly chippies tucking a couple into the flower clusters and the rest randomly around my page.
 I finished of my page by adding the "Happiness in This" title which I left raw, across the top of my photo.


Thats' all from me today, I hope I have inspired you all with my Layout. 
 Until next time thanks so much for stopping by.
Tania xx

Wednesday, October 4, 2023

Choose Happy Step x Step Layout by Tania Ridgwell

Hi there!

Tania joining you today to share a layout I created for my first share for October.  I have a short step x step photo tutorial for this layout.  I have to apologise I'm missing one of my photos for my step x step I had a little mishap with my phone - technology and I don't always see eye to eye!!! LOL

"Choose Happy"

2 Crafty Products Used:

*Choose Happy
*2023's
*Addy's Butterflies
*Tahnya's 6" Border
*Photo Adornment - Formal Flourish Set 3


I chose the gorgeous AB Studio's Somewhere Collection for this Layout.  To create the background page I tore the top and bottom edges of the papers and distressed the edges. I added some texture to the page using the Tim Holtz Stripes Stencil.  I also added some script stamping in black ink around the page and randomly flicked on some Dylusions White Linen Spray.  Once dry I added a couple of distressed papers layers for my photo to sit on.  


I first gave all my chippie pieces a coat of gesso.  I painted the Choose Happy, Addy's Butterflies and 2023 chipboard with Acrylic Opal Magic Green Gold paint and while they were still wet I also painted on a coat of Heidi Swapp Charteuse Color Shine to give a bit more of a brighter green look.  I also painted the Tahnya's 11" Border and Photo Adornment - Formal Flourish Set 3 with the same Opal Magic paint and while these were wet I randomly dabbed on Heidi Swapp Blush Color Shine over different areas of the chipboard.  Once I was happy with the colours of all my chipboard pieces I set about arranging them onto my page tucking them in and under paper layers and adding the Choose Happy Title to the bottom right of my page.


I used the fussy cut page from the collection and added lots of fussy cut flowers to the page tucking these in and under the chippie pieces and paper layers.  
I added my photo and then embellished around my photo with more fussy cut elements.  
To finish off my page I added some flowers around the fussy cut elements, tucked an Addy's Butterfly into each of the flowers and then added 2023 to the bottom left of the photo.

Some close ups....


Thats' all from me today, I hope I have inspired you all with my Layout. 
Until next time thanks so much for stopping by.

Friday, September 9, 2022

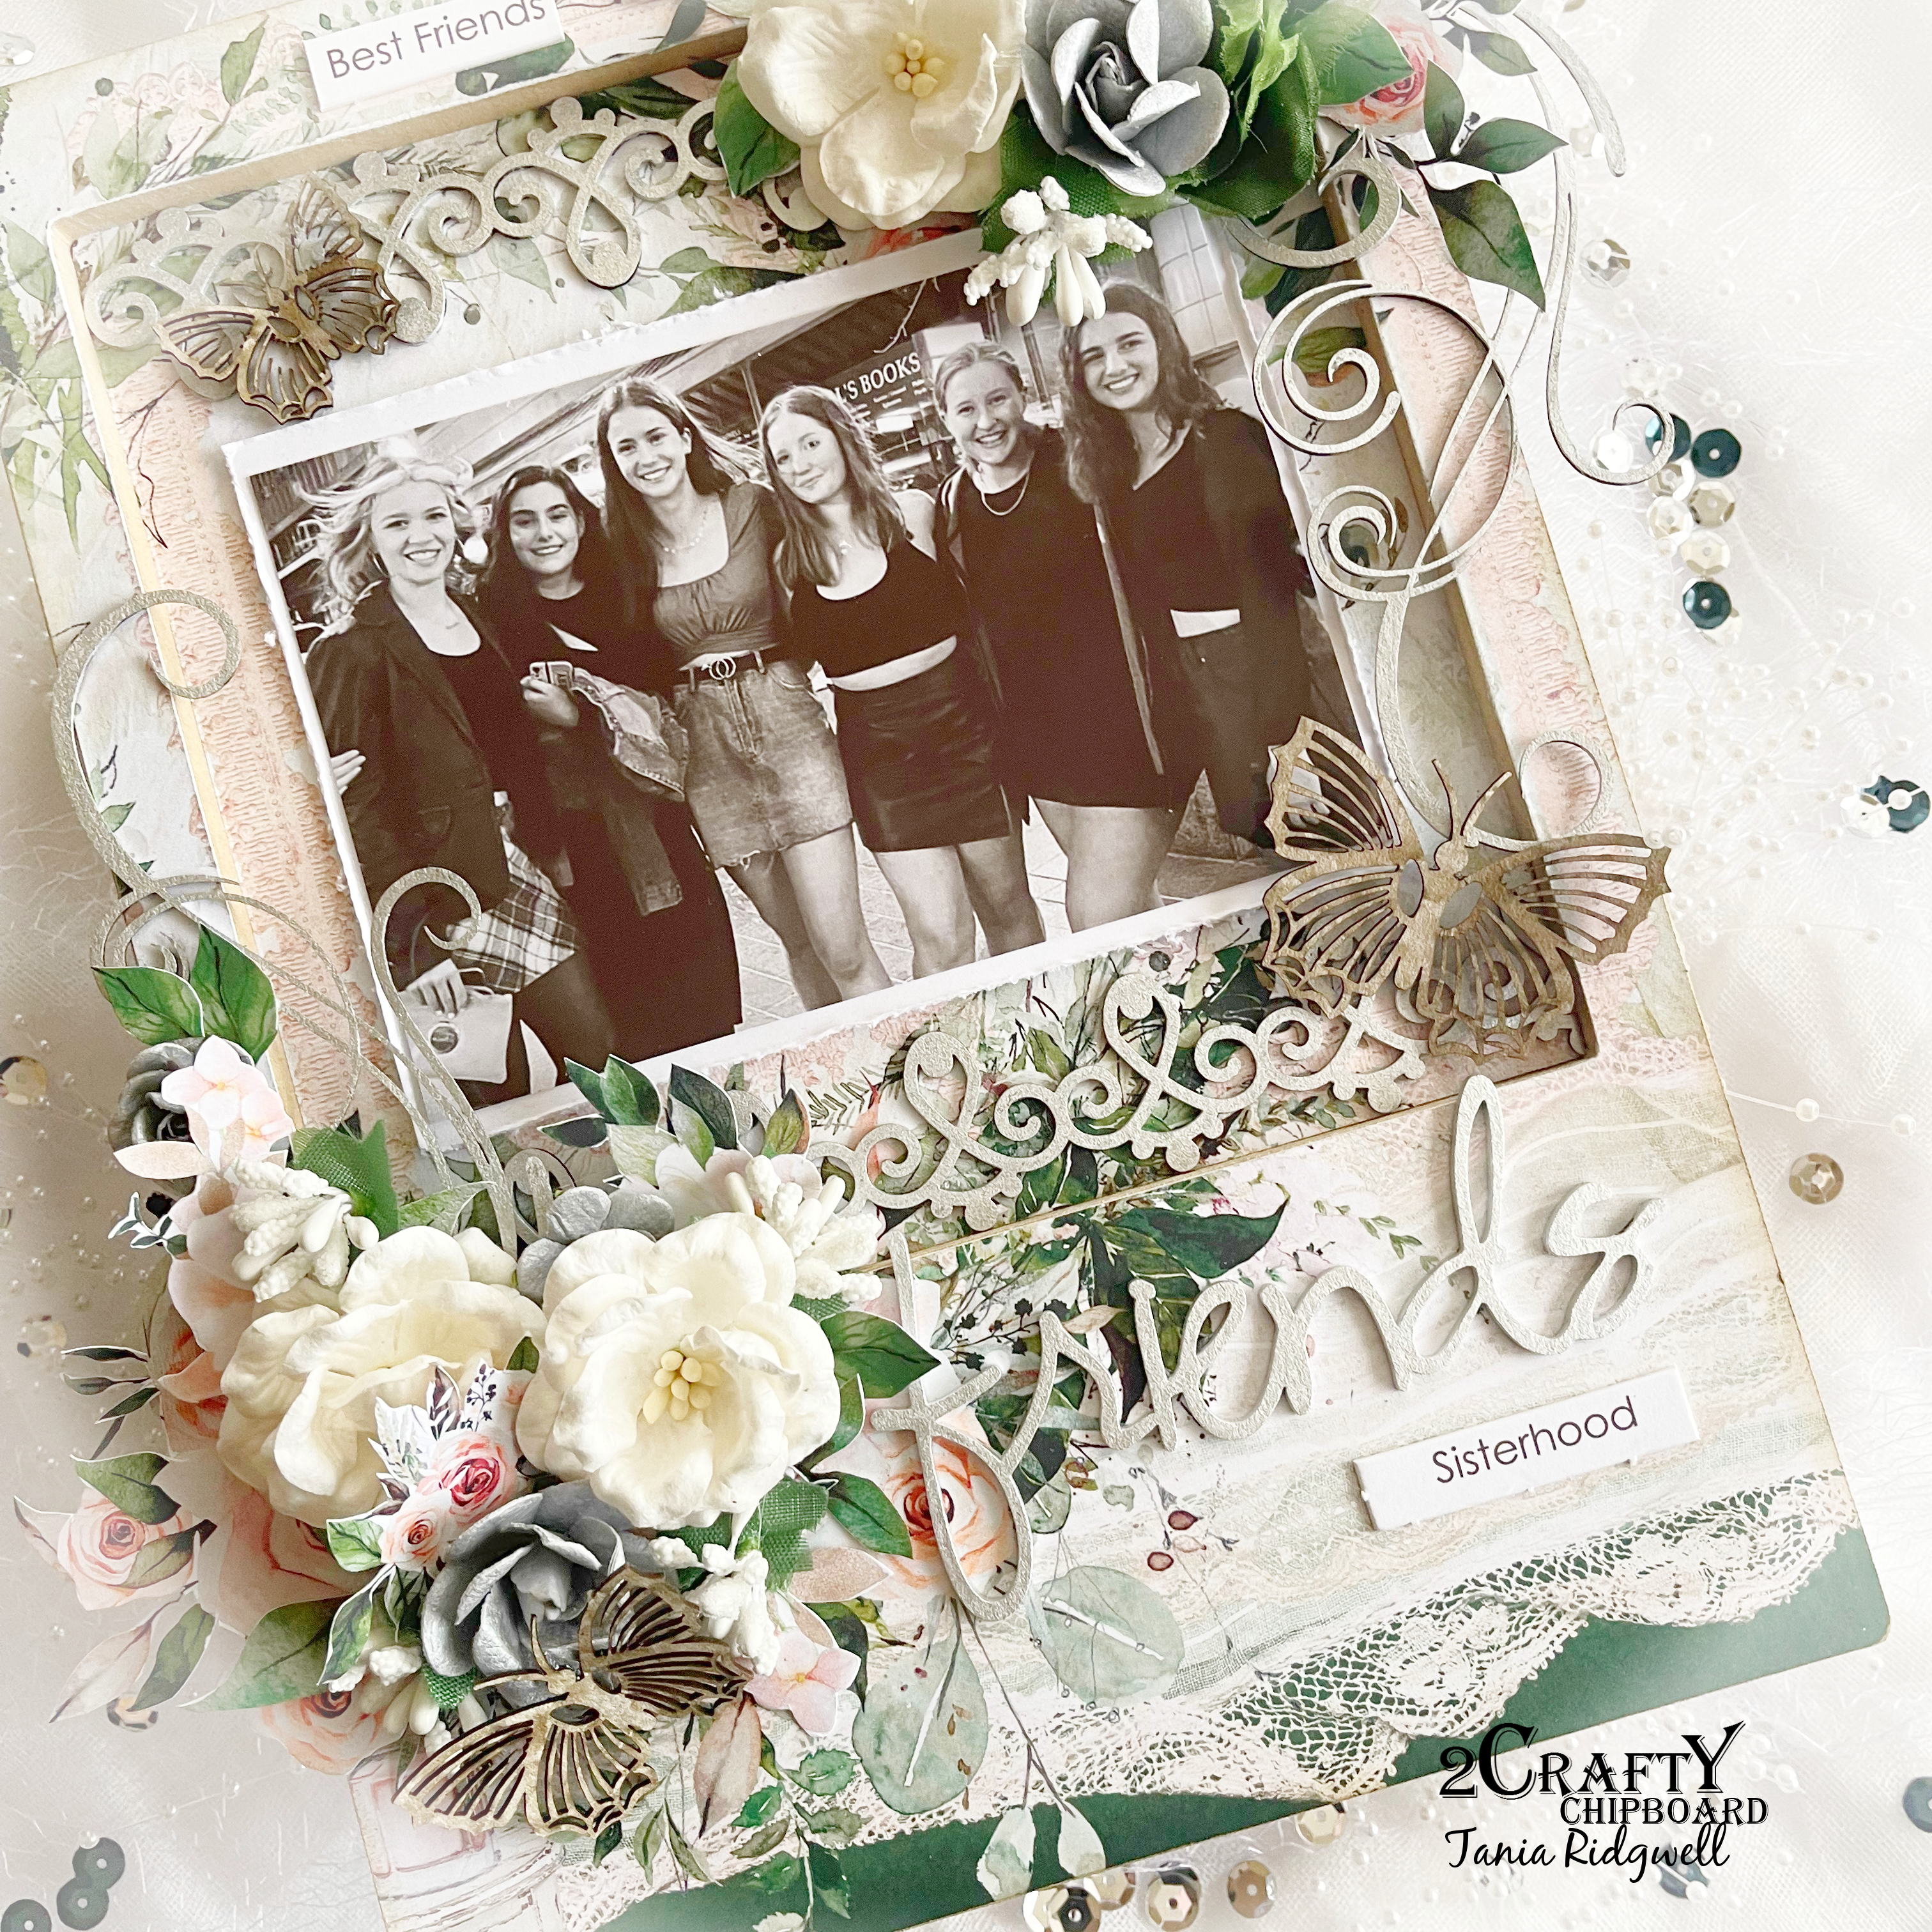
Friends Altered Polaroid Frame by Tania Ridgwell

Hi there!

Tania joining you today to share the first of my DT projects for September.
  I have created an altered Polaroid Frame for my first share.

"Friends Frame"


2 Crafty Chipboard Used:

*Kate's Border
*Friends Loopy Font
*Addy's Butterflies
*Sammi's Swirls


I kept the frame raw and decorated it with Mintay Lady Papers.


I added my photo to the frame centre.  I painted the Friends, Kate's Border and Sammi's Swirls chippies with Silver Paint.  I cut the Kate's border in half and added one piece along the top and the other along the centre of the frame.  I added a two flower clusters to the top right and bottom left of the frame and tucked in a Sammi's Swirl into each of them.


I added the friends title to the right side of the frame and finished it off by adding some raw Addy's Butterfly chippies to the frame.


That's all from me today, I hope I have inspired you all a little with my Altered Polaroid Friends Frame.  
Until next time,
Thanks so much for stopping by.
Tania xx


Monday, May 2, 2022

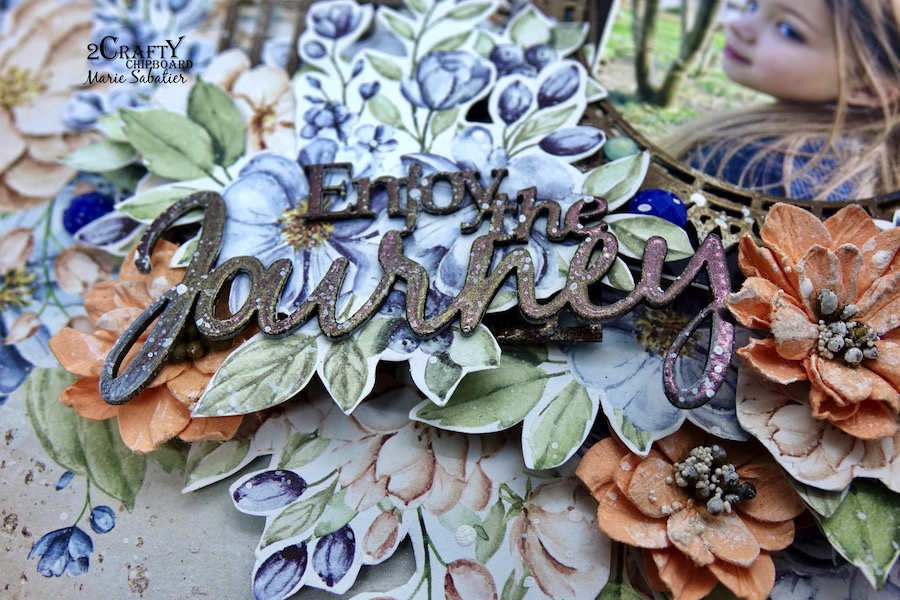
"Enjoy the Journey"
Layout and tutorial video by Marie Sabatier


Hello faithful friends of 2Crafty.

Like every beginning of the month, I am happy to meet you again to present
my new inspiration.
A spring layout with lots of chipboard. 

"Enjoy the Journey"


I made a video tutorial that you can watch HERE


The 2Craftychipboard used:

- Enjoy the Journey
- Iron Gates
- Pointed Doily Frames 1
- Addy's-Butterflies


Always the same process, I add a layer of white gesso on each chipboard.
Which I then embellished with Lindy's Gang "Bratwurst Brown" embossing powder.

I start by placing the "Iron Gates" chipboard, it is splendid and gives all its
importance to my layout.
It adds texture to the background and is the focal of my arrangement.


I love layering chipboards and embellishments to give relief. 

For me the photo is very important that's why by surrounding it with this
magnificent frame in chipboard it remains the essential.


"Enjoy the Journey" because my granddaughter had just had her hair cut! 
It was necessary to immortalize!


Thank you again for your loyalty and see you tomorrow for a new inspiration.


Monday, April 4, 2022

Love, Adore, Dream Frame by Tania Ridgwell

Hi there!

Tania joining you today with the first of my DT shares for April.
  I have altered a wooden frame.


2 Crafty Chipboard Used:

*Circle Word Tag Set 1
 *Border Fancy Set 2
*Addy's Butterflies 
*Mini Decorative Frame Set 6
*Mini Title Stick Set 3 


Once I had coated the frame with a couple of coats of gesso and decorated the inner panels with patterned paper I set about embellishing it with lots of 2 Craft Chipboard goodness.


I used Prima Blue Lagoon Metallic Wax to colour the Mini Decorative Frame Set B.  The Fancy Set 2 Borders and Addy's Butterflies have been coloured with black mist.
Once I had added photos I embellished the frame with flowers and chipboard pieces.


I used several of the Circle Word Tag Set 1 chipboard and also a piece from the Mini Title Stick Set 3 which I kept raw to finish off the frame.


That's all from me today, I hope I have inspired you all a little with my Altered Frame.  
Until next time,
Thanks so much for stopping by.

Tania xx

Friday, September 11, 2020

Dream by Marie Claude Rodier

  Hello lovelies!

September means back to school here in Canada, as every year,
 I take a picture of my boys before they leave for their first day. 
But this year, I didn’t get the photoshoot I had in mind... Because this year, my eldest 
officially became a teen! And this means rare pictures, and fewer good ones, too!
Nonetheless, I used an older one... when he was a little bug, all smiles
and ready for one of mommy’s special poses
.
« Dream... Today & Everyday »


« Today and everyday » was first embossed in blue. When it was dried, I applied 
a second coat of embossing powder with a light teal. The bubbly effect was
 created by overheating the powder with my heat gun.


Addy’s Butterflies were both covered with bronze wax and completed with a few
 touches of denim wax and white gesso here and there.


Dream tag from Circle Tag set 1 was covered with Bronze wax and dry brushed with white gesso.


 Mini Flourish Bits were embossed in light teal.


Scroll 3 pieces were covered with bronze wax and finished with white gold and peacock waxes.


2Crafty product used...
Today & Everyday
Scroll 3
Addy’s Butterflies
Circle Tag Set 1
Mini Flourish Bits


Until next time, be happy and be creative!

Marie Claude
xx


Friday, July 10, 2020

"This Is The New Normal
By Sabrina Turpin

Hello 2Crafty fans!

Summer season is well underway here in Quebec but it's a very strange one this year.
 2020 is unlike anything we ever seen or experienced in our lifetime.
 One little virus made it so we can't fully be ourselves, we can't do all the things we 
like to do, hug the people we love to hug.
 But all in all, we're glad that our family is together and we haven't lost any loved ones.
We're rediscovering joy in the little things of life. 

"This is the New Normal"


On the "Lace Doily Frame", I used my finger to apply a teal wax. 
Then, on top of it, I applied watercolour navy paint.


On the "Addy's Butterflies", I applied a navy wax and a white pearl embossing powder on top of it.
 On the "6x4 Phrase Sticks Set 1", I applied 2 coats of teal embossing powder. 
For the "Maggie's Swirl", I used pink-gold shimmering paint and added a pink embossing ink on top.


For the title, "This is the new normal", I used a midnight-gold embossing ink.

I used the following 2Crafty chipboards in this layout:

Lace Doily Frame [fr0130]
Maggie's Swirl [m00336]
Addy's Butterflies [m00581]
6x4 Phrase Sticks Set 1 [m0870]
Covid-19 [cov004]


That's all for me today!
I hope you enjoyed this layout and that it gave you ideas for your own creations! 
I'll be back soon with more inspiration to share with you guys.
 Until then, stay safe and if you're under lockdown, then it's the perfect time for more crafting!

 See you in a few weeks!