Hello 2Crafty friends & followers!
I hope you are all well & ready to be inspired!!
It is HELEN back with you today to share a few projects,
starting with a layout inspired by the monthly mood-board
challenge over at Prima.
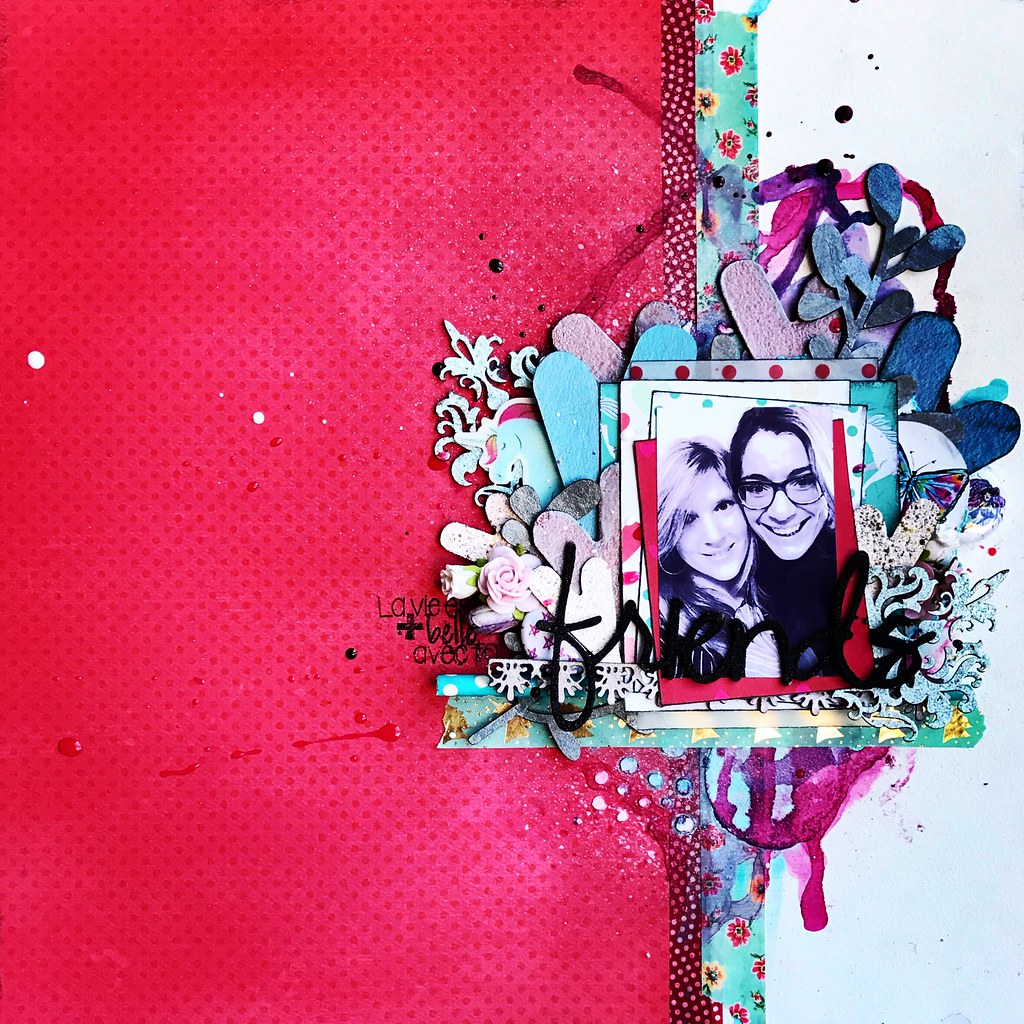
As you can see I managed to use FIVE pieces of gorgeous
2Crafty Chipboard on this page & absolutely love the tactile
addition of it! Let's take a closer look shall we...
I used a couple of TINY LEAFY STEMS that are not that tiny,
as you can see! And they come in a multi-pack so are great value!!
I painted them roughly with some texture paste, using a spatula,
then rubbed some gelato onto some parts & blended with a baby-wipe.
I love the messy look it creates & still seeing parts
of the raw chipboard peeping through!
I used another TINY LEAF STEM coming out from underneath my
stack of papers beneath my photo, using exactly the same technique.
Also notice above that I used the PRECIOUS title & simply pressed
it loosely into my black archival ink pad then rubbed some texture
paste onto it in random places for texture & to brighten it up!
For my "Love"title {Photo Adornment - Love Flourish} I first dabbed it
with texture paste then went over it with a black photo-marker pen
{writes over just about anything!} using some messy/doodly lines
& some cross-hatch shading, to define it, then rubbed in some gold
gelato to soften it up a bit & add some shine.
I also added some gold gelato to my "Precious" sub-title
& adore the lovely glimmer it gives. Not too garish at all
& GOLD is just so IN right now.
To the right of my photo I tucked in an "Edgar Swirl" photo adornment.
I treated it in the same way as my "Precious Love"title & love the
subtle touch it adds. It comes in a double-pack so I have one
left for another project - yay!
A closie of my texture paste/gelato technique...
Both techniques used on this layout shown above.
Have you ever thought about "scratchy-doodling"on your chipboard?!
I want to do it more now - it was fun & looks COOL I think!!
--------------------------
My next project is an OTP {Off-The-Page} project made as a gift for a friend.
I was going to make her a canvas but mysteriously "mislaid"ALL my canvases
LOL in my studio so used a Ferrero Rocher box instead :) {I have since
found the canvases by the way...!!} but the acrylic box worked really well!!
I made use of quite a few pieces of 2Crafty Chipboard on this piece too.
Along the left I have the Elegant flourish - cut into 3 separate pieces,
above & below the photo & also coming down from the edge of the frame.
Then along the right hand side I have used the Madeline Flourish Frame.
For all the chipboard here I have used the same technique, I have first
sponged it with good quality gesso for a smoothish finish, then stamped
freehand {no acrylic block} using my favourite Finnabair stamp from Prima.
My inspiration for this project came from the Prima BAP {sketch} for this month.
It was full of hexagons which is what inspired me to use the hexagon stamp.
Stamping on chippie is a really fun technique & always looks so intricate &
effective yet is super easy :)
Above you can see the elegant flourish on the left & the Madeline Flourish Frame
on the right {well a tiny portion of it!}
I love how the end of the Elegant flourish looks like the butterfly's trail :)
The fencing I've used is also from 2Crafty - Ornate Fence & comes as
a 12"border but of course can be cut up & customised to suit your page.
For continuity I repeated the hexagonal stamping on the background as well
as on the chipboard so that, in parts, it blends in, which I think looks awesome!
In keeping with the movement of the flourish I added some whispy
cheesecloth underneath my main quote photo too. This was really
SUCH a fun project to create & I cannot WAIT to hand it over!!
------------------------------
Lastly I am sharing a project that is from a recent Guest Designer
gig at Colour, Stories, Inspiration {CSI} a few months ago.
For all the details you can check it out on my blog HERE if you are interested.
The 2Crafty Chipboard I used here is the Twiggy Branches.
I love how versatile it is as it is quite big so can be cut into
many smaller pieces. The rounded leaves reminded me of the plants
we get here by the sea so I thought they tied in well with my beach photo.
For this very pale page I just sponged the chippie lightly with some white
acylic paint & stapled the pieces on in parts to go with the masculine look
as well as to bring in more silver to tie in with my title.
I used to be scared of chipboard years ago because it wasn't "ready"!
In other words I had to DO something with it before I could use it...
NOW I LOVE it for that very reason! A touch of paint, glitter, gelatos,
stamping, texturing, embossing...there really is no embellishment as versatile.
I hope you have enjoyed my shares today & I will be back with more
2Crafty inspiration in July. Keep crafting with 2Crafty :)
HELEN