Showing posts with label Lace Doily Frame. Show all posts

Thursday, April 4, 2024

Create Your Own Sunshine Altered Heart by Tania Ridgwell

 Hi there!

Tania joining you today to share the first of my DT projects for April. 
 I've altered a decorative wooden heart.


2 Crafty Products Used:

*Lace Doily Frame
*6x4 Phrase Stick Set 5
*Mini Branches


I purchased this awesome wooden heart and thought how perfect it would look all decked out with some gorgeous 2 Crafty Chipboard.  


The Mini Branches are coloured with Black Marble Dylusions Shimmer Spray and the Create You Own Sunshine Tilte chippie with 13arts Ayeeda Burnt Sienna Chalk Mist.  I kept the Lace Doily Frame raw.


Once the chippie pieces were all dry I set about decorating the heart. I added the Lace Doily Frame first and then focused on decorating down the left.
 I used lots of fussy cut elements from the Mintay Flora Book 8.  I added these to the heart along with assorted paper blooms and then tucked in the Mini Brach chippie pieces amongst them.  I finished off the heart by adding the Create You Own Sunshine Title across the Lace Doily Frame.


Thats' all from me today, I hope I have inspired you all with my project.
  Until next time thanks so much for stopping by.
Tania xx

Monday, October 10, 2022

'No Grit, No Pearl' by Emma Zappone

Happy weekend 2Crafty friends.
Emma with you for today's project share. 


And these are the chipboard pieces I chose....

Flourish Adornment Set 5
11" Celia Frame
Lace Doily Frame


Striking chipboard to really compliment my picture and papers.


Let's talk about the finishes on the Flourish's first. Yet again I love a simple yet fun finish. I painted these with Black Gesso and once dried stamped emboss ink and added a cream emboss powder over the top. I chose a stamp with a small texture to really add some pattern to the chippy.


The Celia frame is just stunning and for this piece I painted it in an Impasto brown first. I added the paint with a sponge to create a slightly raised texture to the paint as it dried. Then I added some wax in white Gold. This over the brown acrylic really helped add a vintage/antique feel.


I really wanted to add a small amount of the lavender colour which comes through the cat in the image chosen for this layout. So I added a few layers of colour to the Lace Doily and chosen resin pieces.


The Doily pieces were painted black to start with and then I painted a lavender acrylic but wiped back a little also, as I didn't want it to be super purple. I then added a couple of waxes over the top including a lavender wax to help nurture the colour. 


Thanks again for joining me today and I do hope my project has been a little inspiring.

I hope you have a lovely weekend.

Stay Crafty, Em xx


Thursday, August 18, 2022

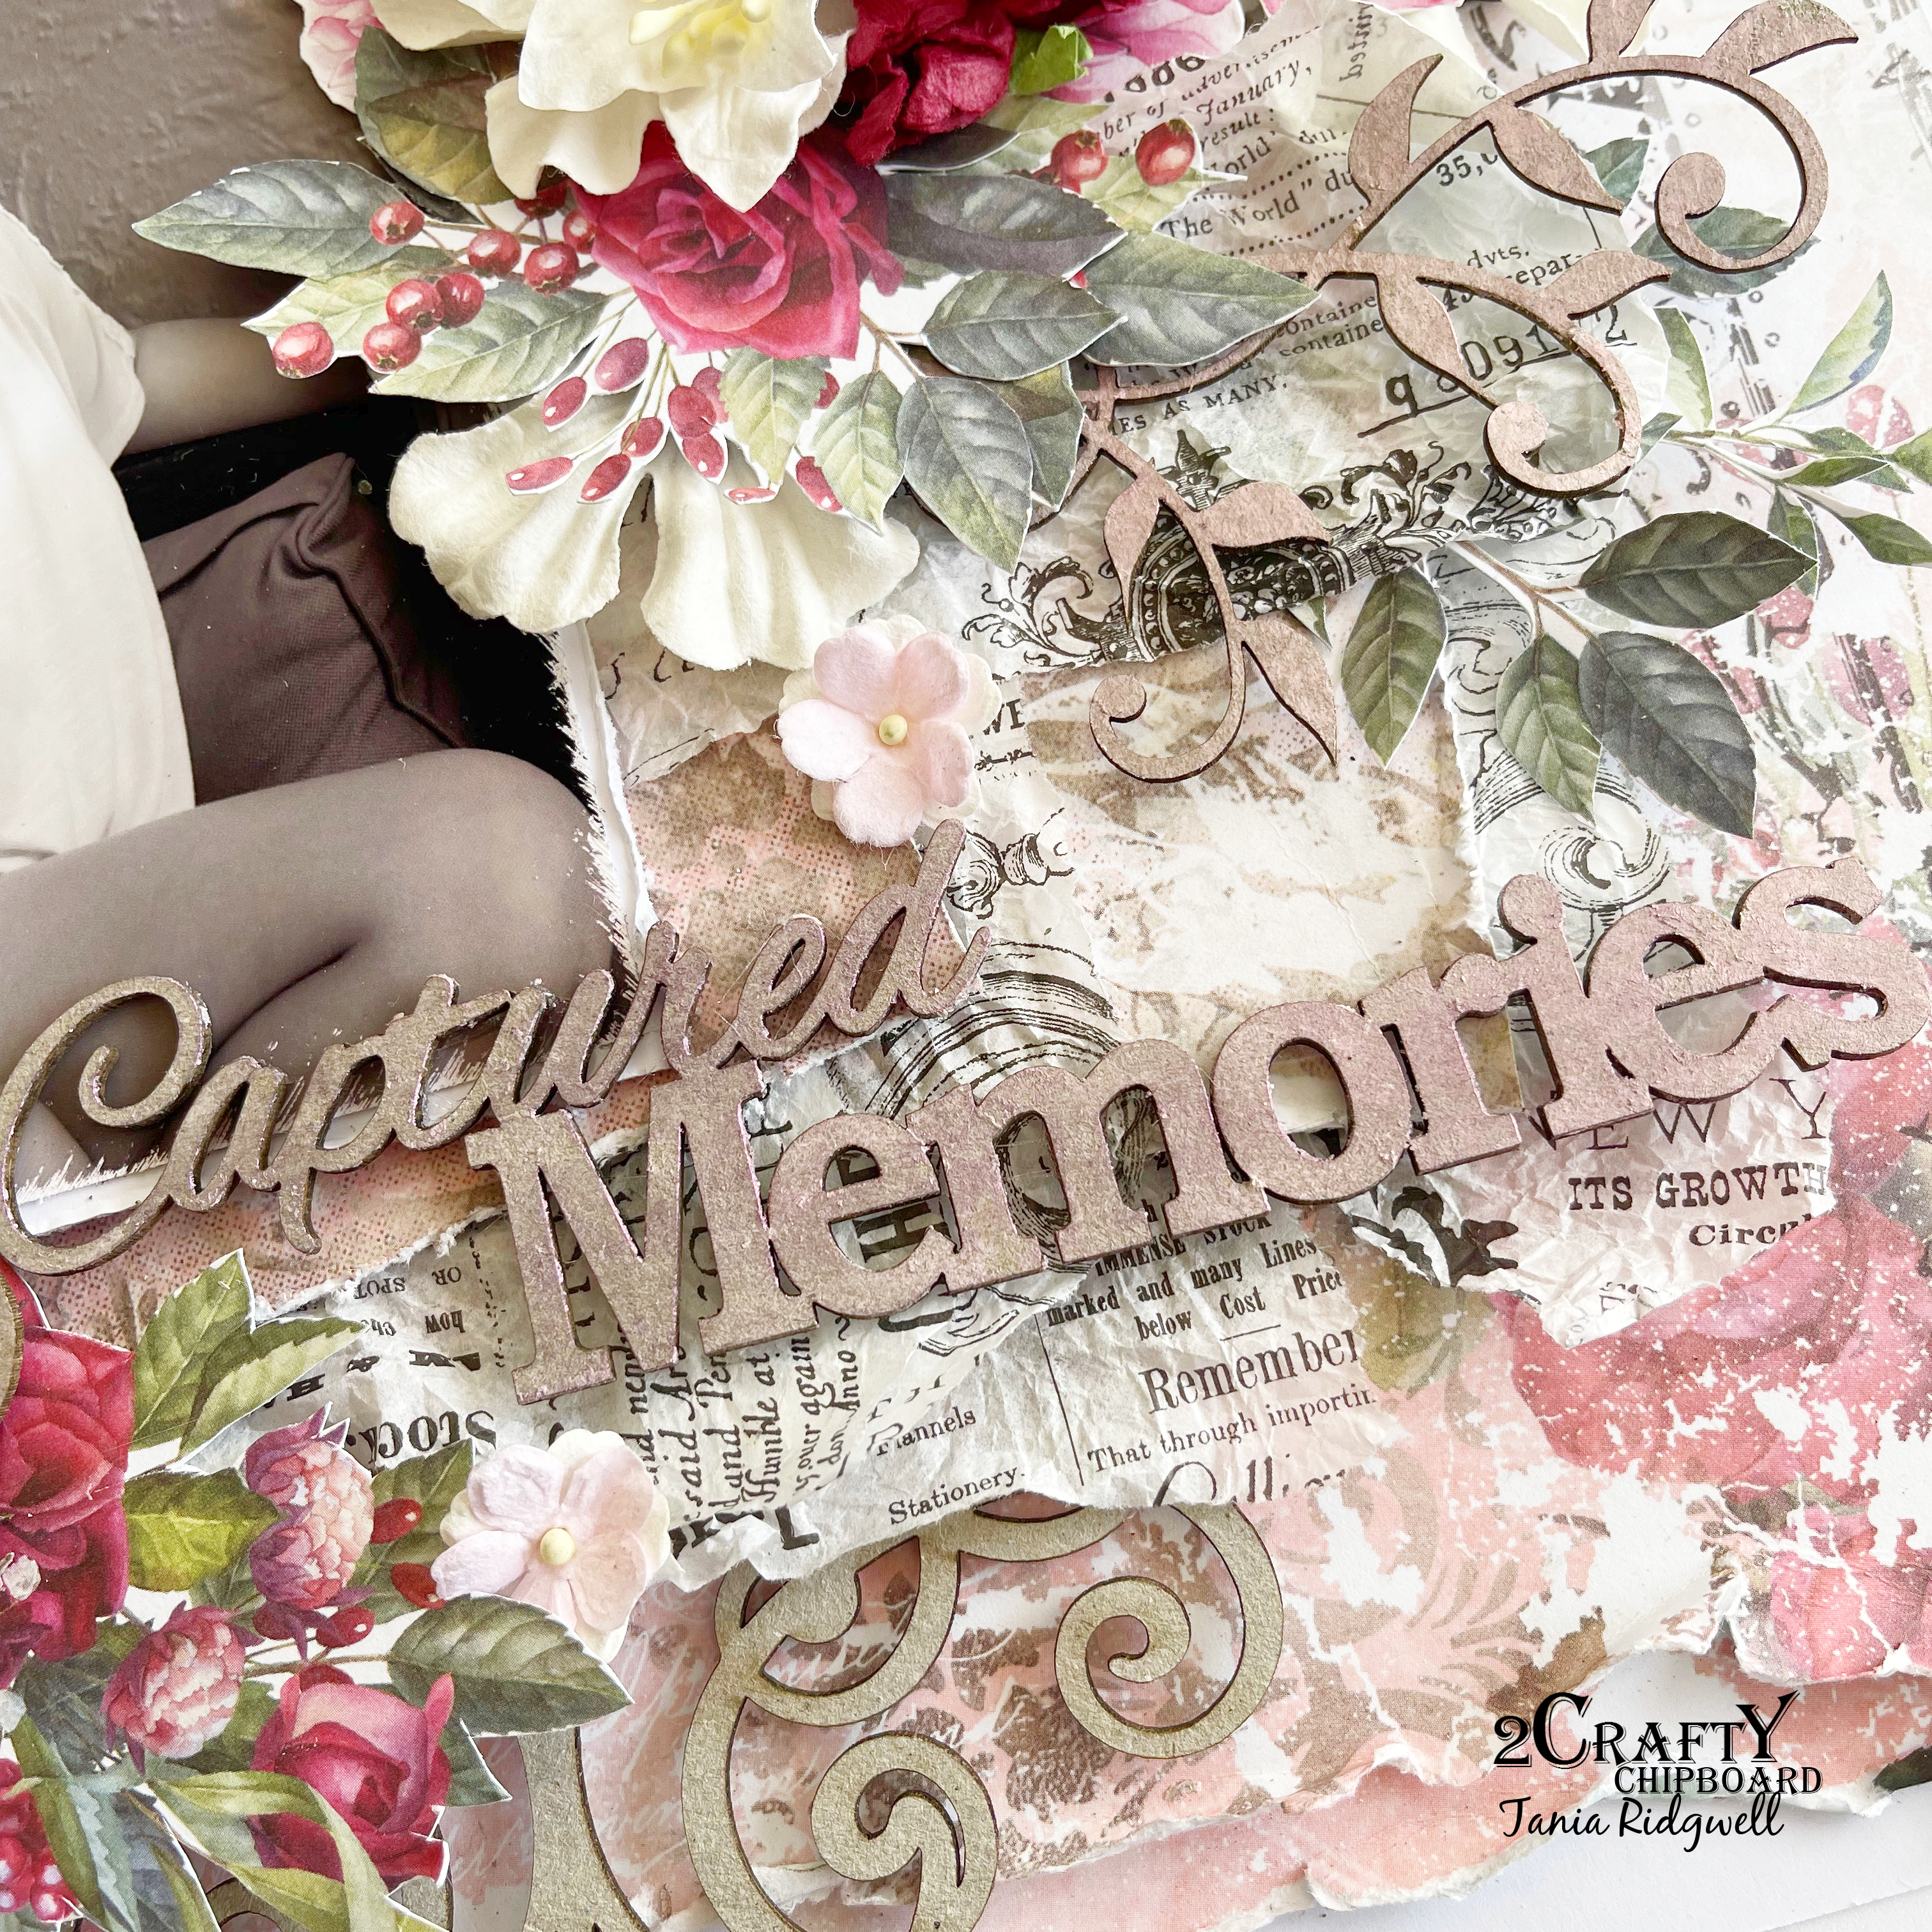
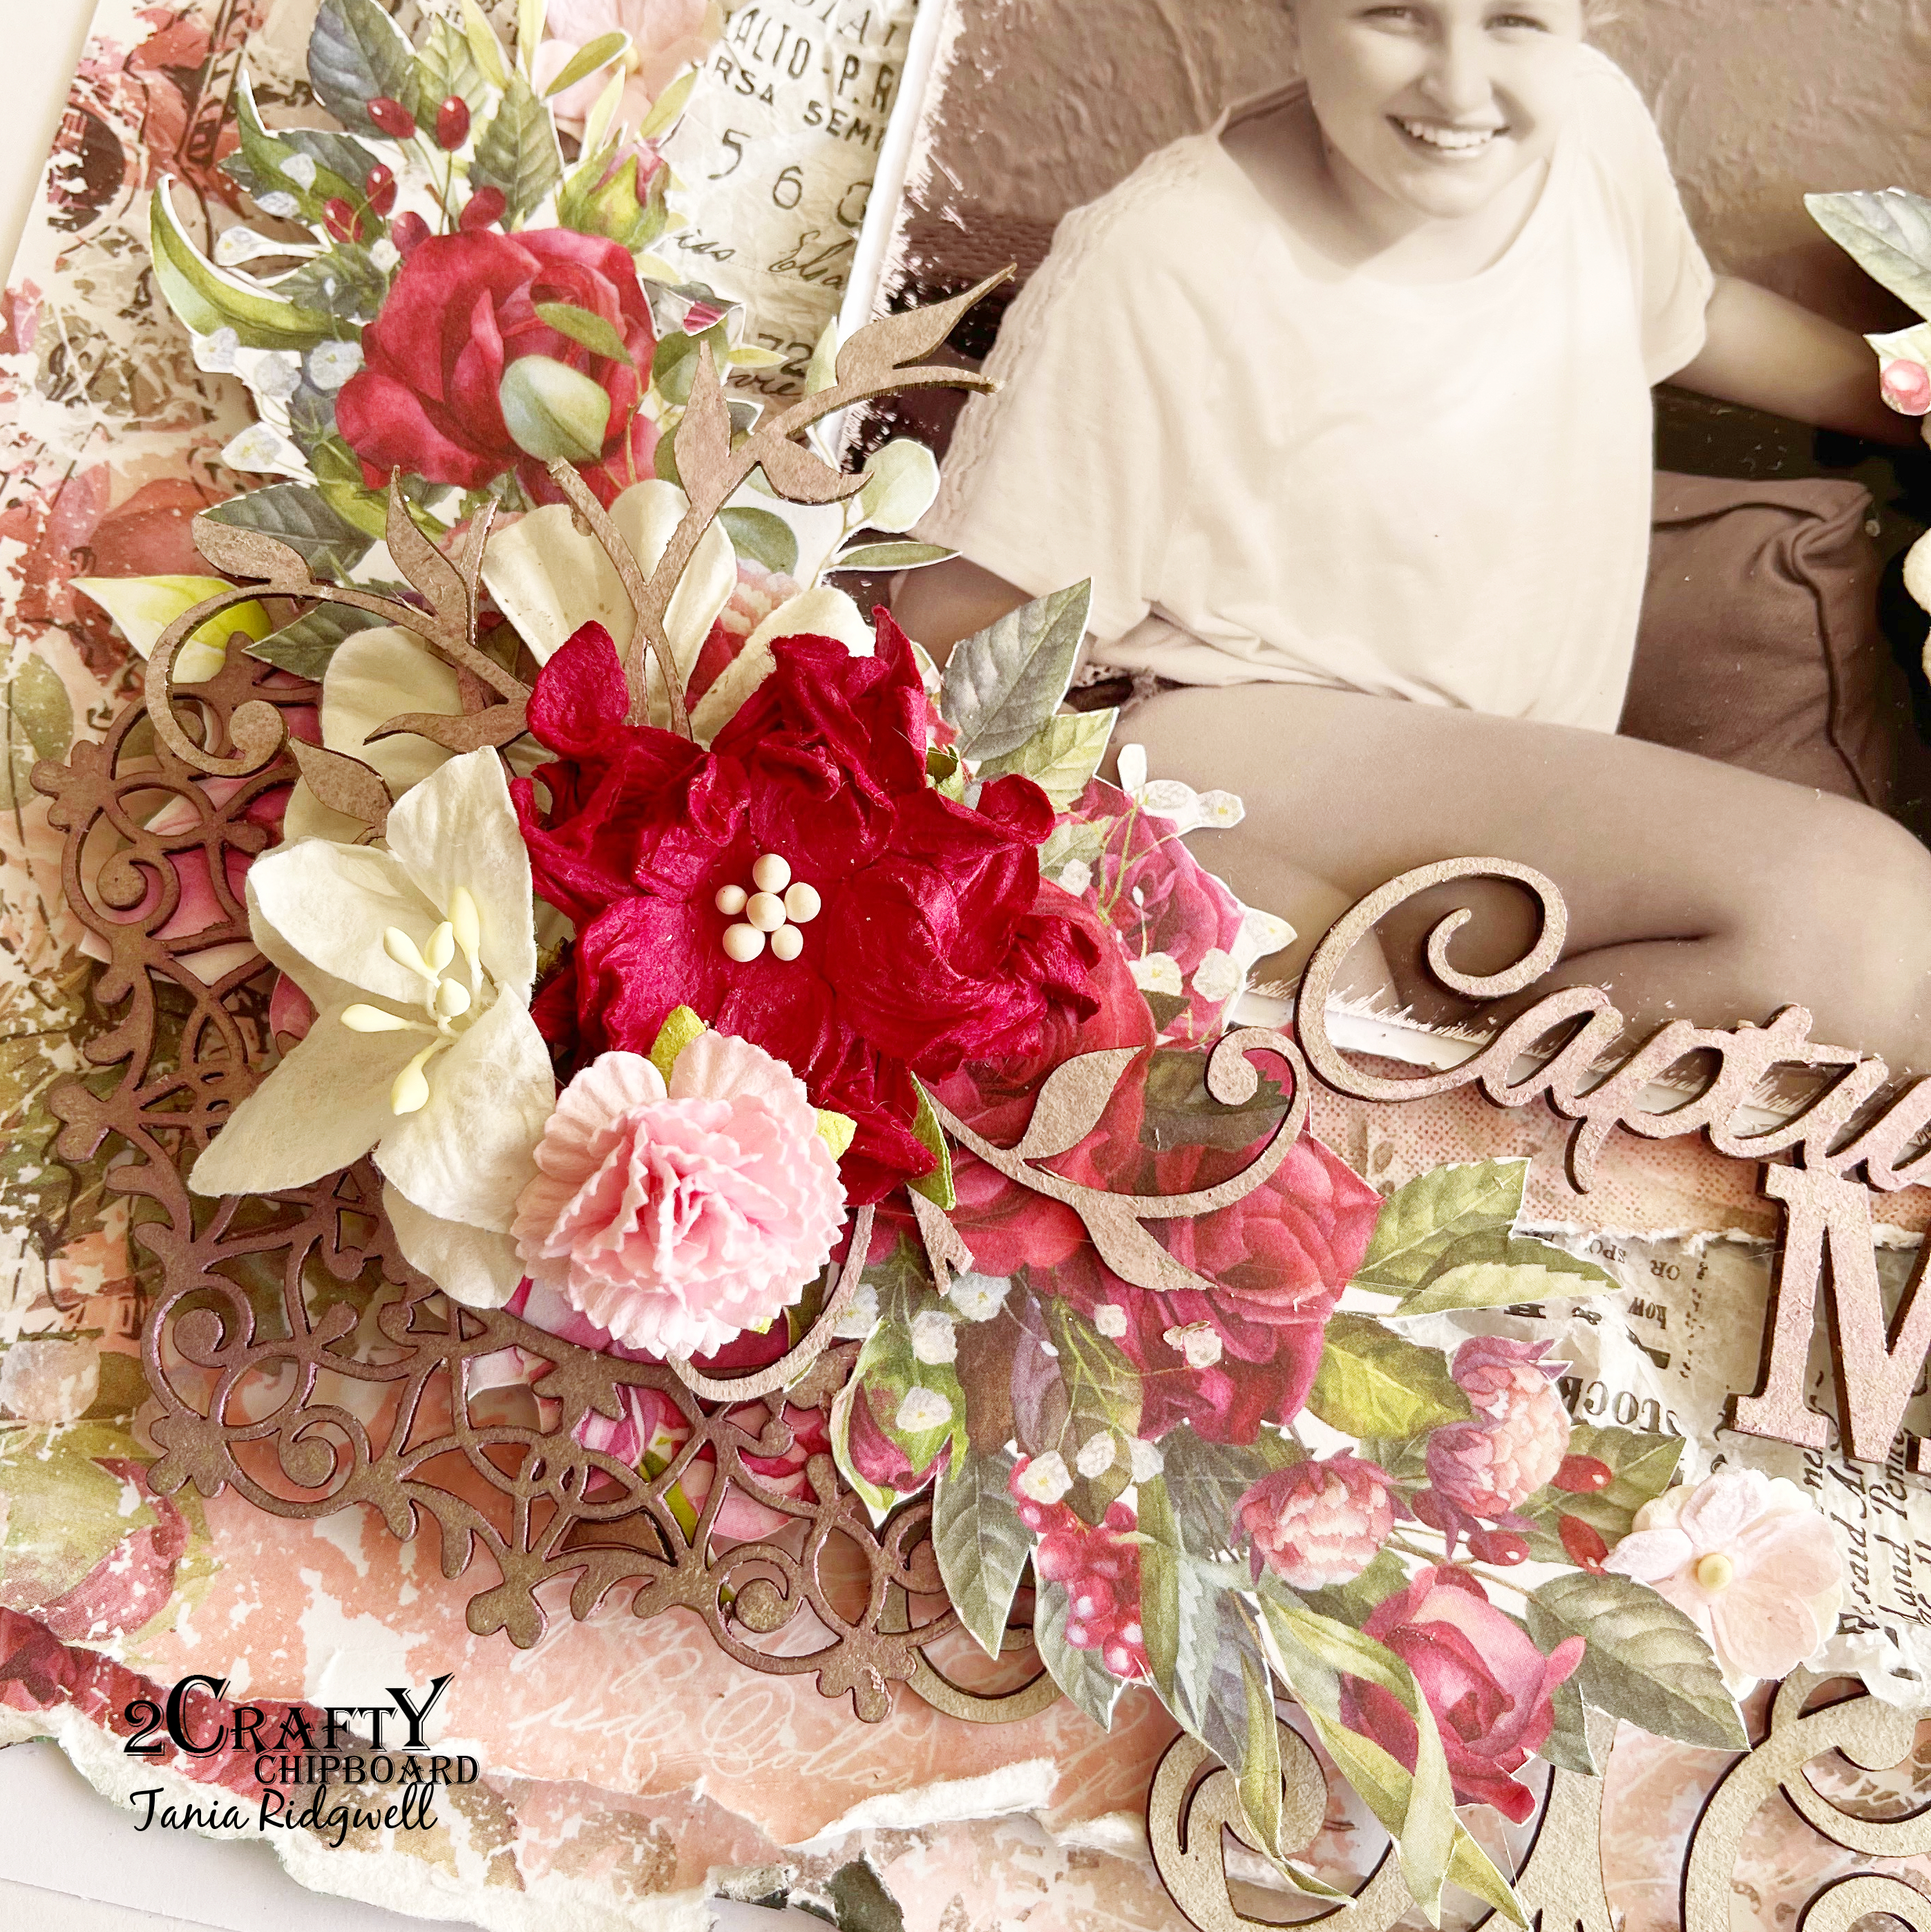
Captured Memories Layout by Tania Ridgwell

Hello there!

Tania with you today to share the second of my DT projects for August.  I have created a layout.

"Captured Memories". 

2 Crafty Chipboard Used:

*Captured Memories 
*Angie's Vines
*Wrought Iron
*Lace Doily 

Once I had created my background I set about putting my page together. I first added some paper under the photo to build up some layers .


I coloured the Captured Memories, Angie's Vine's and Lace Doily with Prima Wax Rose Gold.  I added lots of fussy cut elements and assorted flowers around the photo.  I cut up the Angie's Vines and the tucked pieces in amongst them.


I added the Captured Memories title to the bottom left of the photo.  To finish off the page I added a raw Wrought Iron chippie to the top and bottom of the layout, tucking them under the paper layers.


Thats' all from me today, I hope I have inspired you all with my Layout.  Until next time thanks so much for stopping by.

Tania xx

Saturday, October 31, 2020

That's My Moon Baby - By Emma Zappone

Hello!

Emma here with you on this last day of October.
Today I share a piece of Art that is a little different from my normal style.
Using little Mixed Media and plenty of Chipboard I love this Over sized eclectic Tag. 


Here are the amazing chipboard pieces i used.....

Frame Louisa's
Clock Face Discs
Fancy Clock Hands Set 2
Lace Doily Frame


Keeping the Tag very 'Clean' i decided to make the chipboard illuminate and keep the papers clean.
So i painted all the chipboard in Black Gesso to prime them.


Then once they were dried, I started to simply apply a selection of complimentary waxes to bring them alive and 'pop' from the papers.


I applied this finish on all of the chipboard pieces. Simply yet effective. And I adore those clock hands so much i just had to use them as a focal point on my massive clock.


I hope this inspires you a little and you get some creative time this weekend.

I will see you all again soon.

Emma xx


Tuesday, July 21, 2020

Sweet Cheeks
By Marie Claude Rodier

Hello,

Strawberry picking is one of my kids favorite summer activities.
My youngest eats as much as he can... constantly searching for the biggest and tastiest ones.

Instead of using a warm color combo, I opted for black and white color
combined with blue, teal and brown tones.
 And of course, I integrated a lot of 2Crafty chipboards.

Sweet Cheeks


Sweet Cheeks was painted with teal acrylic paint and highlighted with white gesso.


Summer Lovin' for Mini Title Stick Set 4 was dry-brushed with gesso and silver wax.


A few touches of  silver wax was used on Foilage Set 6.


Leafty Shrub Set 1 was partially covered with white gesso, teal watercolor and silver wax.


Lace Doily Frame was lightliy painted with brown acrylic, partially covered with teal watercolor and finally covered with white gesso and silver wax.


2Crafty Product used...
Sweet Cheeks
Leafty Shrub Set 1
Lace Doily Frame
Foilage Set 6
Mini Title Stick Set 4


Until next time, be happy and be creative!
Marie Claude
xx

Friday, July 10, 2020

"This Is The New Normal
By Sabrina Turpin

Hello 2Crafty fans!

Summer season is well underway here in Quebec but it's a very strange one this year.
 2020 is unlike anything we ever seen or experienced in our lifetime.
 One little virus made it so we can't fully be ourselves, we can't do all the things we 
like to do, hug the people we love to hug.
 But all in all, we're glad that our family is together and we haven't lost any loved ones.
We're rediscovering joy in the little things of life. 

"This is the New Normal"


On the "Lace Doily Frame", I used my finger to apply a teal wax. 
Then, on top of it, I applied watercolour navy paint.


On the "Addy's Butterflies", I applied a navy wax and a white pearl embossing powder on top of it.
 On the "6x4 Phrase Sticks Set 1", I applied 2 coats of teal embossing powder. 
For the "Maggie's Swirl", I used pink-gold shimmering paint and added a pink embossing ink on top.


For the title, "This is the new normal", I used a midnight-gold embossing ink.

I used the following 2Crafty chipboards in this layout:

Lace Doily Frame [fr0130]
Maggie's Swirl [m00336]
Addy's Butterflies [m00581]
6x4 Phrase Sticks Set 1 [m0870]
Covid-19 [cov004]


That's all for me today!
I hope you enjoyed this layout and that it gave you ideas for your own creations! 
I'll be back soon with more inspiration to share with you guys.
 Until then, stay safe and if you're under lockdown, then it's the perfect time for more crafting!

 See you in a few weeks!


Friday, June 19, 2020

"Layout Love"
by Elena Martynova

Hello and welcome to the 2Crafty blog today. 
 I hope this post finds you well and safe.

Today I am sharing with you a layout with a beautiful 
wedding photo which I found on Pinterest.

"Love"


I wanted to use a dark background to make all the bright details
 of the layout look brighter and more expressive.
I started my layout by choosing a few chipboard pieces.
I covered title Love and Lace Doily Frame with 
my favorite embossing powder by Lindy's "That's Marble-ous".

I used a another powder for the Roxy's Flourish Vine :
"Chalk it up".
With this powder, I also made stamping on the background.


I alternated between paper layers and a chipboard to achieve the necessary layering. 
At the end, I added a few flowers.

Here are some more close ups...


Thanks so much for stopping by. I hope you enjoyed my page.
 Stay safe and keep creating!

2Crafty Products Used
 

Have a nice day!
Сheers, Elena.

Sunday, June 7, 2020

Your Story Matters - Emma Zappone


Hello Friends,
For today's share I have created a canvas.  
I used some absolutely glorious chipboard elements on this piece.


 Here are the chipboard pieces used:

Foliage Set 7
Lace Doily Frame
6" Floral Cluster Border


As you know I like to keep the chipboard finishes fairly simple.
For these ones I did add a few finishes on them, but still simple.


For the Doily frame I inked it first with a distress oxide and then embossed with a gold powder. Not perfectly as I still wanted to see pockets of the matte colour coming through off the oxide ink.


I did this for the Floral border and the foliage pieces also.
Then with a copper wax I lightly rubbed over sections of the chipboard to add a slight 'highlight' on them. Simple but effective.


Once my composition was complete, with a dry brush and some white Gesso I lightly brushed over them to add a soft wash look.


Lastly I flicked black, gold and white liquid acrylic over the whole project and I love how it sits on the chipboard.

I loved using these chipboard pieces for this project and love the completed project also.

Hope it has inspired you just a little bit?

Enjoy your day and I look forward to seeing you again soon.
Emma xx