Showing posts with label View Finder. Show all posts

Friday, August 8, 2025

Double Trouble - Laura Gilhuly

 Hi everyone!
Laura back today to share another masculine layout I created of our sons!


2Crafty Products used:


Double Trouble
Tickets
View Finder
Moroccan Bits
6" Circle Revolution Frame
Aged Film Strip
Chevron Bits
Page Tab Set


I primed all the chipboard with clear gesso including the center section of the revolution frames.


I then covered the chipboard with a mix of lumberjack plaid, rustic wilderness, and scorched timber distress inks that I sprayed with water then allowed to dry naturally.  I inked the outer edges of each piece with the scorched timber ink also


I wanted to use the highlights of red from the awesome papers because Ty's bike he built was red and I love the highlights it provided and it made the title stand out.


Thanks for stopping by


Monday, October 5, 2020

A Love Story
Loving Memory Layout
by Jenny J.

Hello everyone,

It's my turn on the blog and here is my layout for today.


2Crafty Chipboard Used.....


*Flourish adornment set 4
*A love story
*Mini Flourish bits
*View finder

First of all, as always, I've applied a coat of clear gesso on my background paper 
and then, heavy gesso through a stencil.
I've started my focal point with papers scraps and ephemeras.


Above, you will see my title word, "A love Story",
heat embossed in white.

All of three pieces from "Mini flourish bits" and "Flourish adornment set 4" 
are also heat embossed in white.  
You can see that in the following pictures.


The last chipboard here is a lovely "View finder" 


That piece is heat embossed also but with ivory powder.
Finally, I've aded flowers, art stones and homemade foliage and that was it for this time.


Hope it gives you some inspiration, see you next time!
In the meantime, stay safe!


Thursday, July 2, 2020

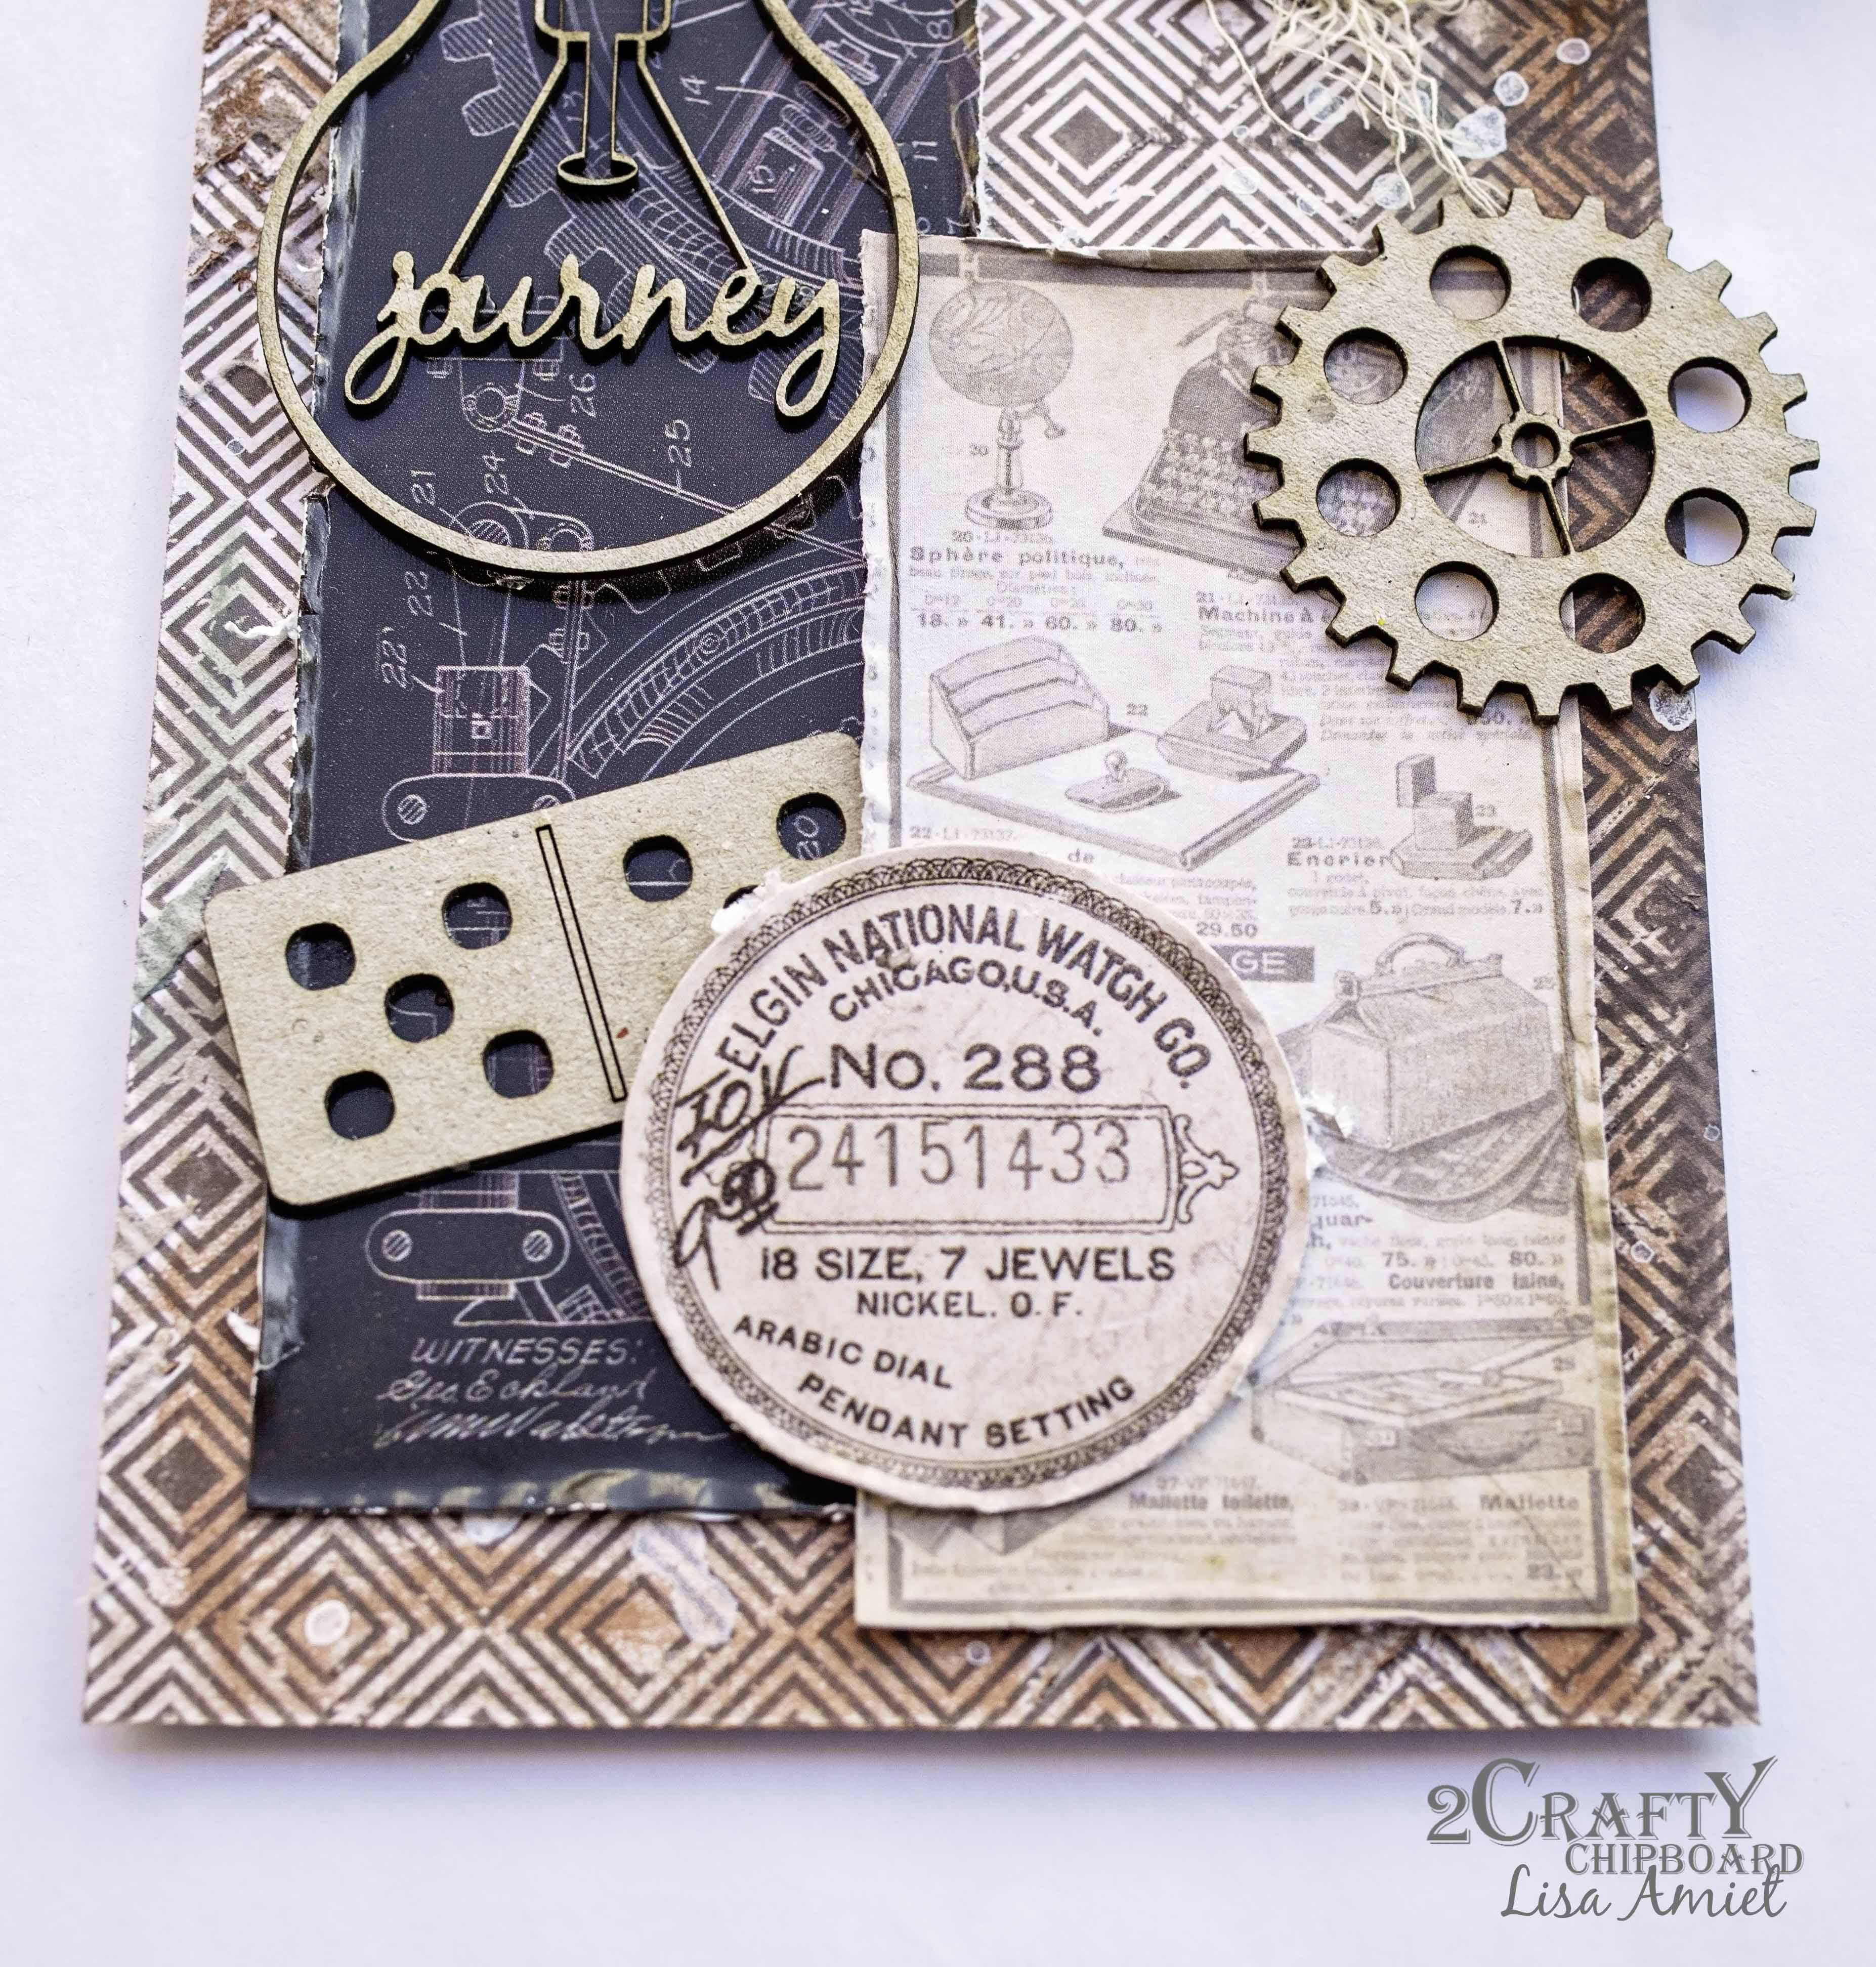
'Grunge Tags' with Lisa Amiet


Hello everybody!
It's Lisa here today to share some grungy inspiration with you.
I have created a pair of gift tags,
perfect for the men in my life :)


2Crafty Products used:


For my first tag I have started with a mixed media background ,
I have used one of the 'Sequins Negative Bits' pieces, 
that I have roughly inked in black & brown.


I have also used one of the 'Steampunk Gears Medium',
and one of the 'Dominos',
that I have left raw and adhered into my layers.


I have also used one of the 
'Light Bulb Word Set 1',
which I have also left raw to go with the grungy feel.
Along with one of the 'Mini Family Icons'.


For my second tag I have used the same papers and grunge feel, 
I have used one of the 'Brick Panel',
that I have cut into pieces and finished with black embossing powder.


I have also used one of the 'Scrabble Tiles',
left raw and on my layers.


I have used another of the 'Steampunk Gears Medium'
and the 'Light Bulb Word Set 1', 
that I have inked brown.


To finish I have used one of the 'View Finders'
left raw in among my layers.

I hope that you like what I have created,
and that it inspires you to get crafty today!

Until next time!

Lisa 


Thursday, December 20, 2018

'Hello'
Scrapbook Layout By Kripa Koushik

Hello friends,

Today is my final post for 2crafty as my term with them finishes this month. I have had
 a great time working with this fabulous team lead by Vanessa and supported by Di.
 I also thank all of you for your loving comments and encouragement.

"Hello"

My layout today is inspired by CSI Case 268 which
2crafty chipboard is sponsoring this month.


The base is a collage of vintage red and green pattern paper over which I've added some Lindy Stamp Gang mists and stamping. All the chipboard pieces were first coated with white gesso. In the below close-up two pieces are visible - View Finder and the title which is from Arrow Word Set 2.

The View Finder chipboard had some teal paint on it (probably painted for another project but never used). To conceal it, I painted over to make it look neutral and as close to the colour of the wood grain background pattern paper. The word 'Love' from the Arrow Word Set 2 was also painted the same way and then the word was coloured with red stamp pad.


One more piece behind the layers on the left side is the word Hello from the Word Bubbles Set. After painting with white gesso, Ive stamped over with red ink and a script stamp.

My final selection of chipboard is tiny arrows from the Mini Fast Forward Arrows Set.
They have been inked with black archival ink and used to direct the viewer towards the
 photograph on the top right corner of the layout.


2crafty chipboard used:
- View Finder
- Word Bubbles
- Arrow Word Set 2
- Mini Fast Forward Arrows

Thank you all for visiting us today. 
I wish you all a very Merry Christmas and a Happy New Year in advance!

Creative Hugs,
Kripa


Thursday, September 20, 2018

FUN - Shaker Mini Album
With Kripa Koushik

Hello friends,

My second project this month is a shaker mini album, circular in shape using
 two very pretty 2crafty chipboard pieces - Fun Disc and Play disc to mak
e the front cover and back covers of the album.


 For the covers both front and back, the chipboard was first coated with white gesso and then using Colourarte Silks, painted an ombre effect. Each layer of paint was air dried and then painted on again for about 4 layers. After the paint was completely dry, it was assembled into a shaker disc.

 To allow for the sequins to move easily, I've used two layers of foam tape between the chipboard disc and pattern paper. I punched a hole through a circular piece of foam tape and wedged it between the acetate and pattern paper. On top of the acetate is a hole saver so that the circular foam tape wont be seen. This is so that the sequins wouldn't fall off through the eyelet hole. 


I know everyone will want to remove the covers and give them a shake, so Ive used ribbons to hold the pages together making it easy to flip through as well. The album follows the format of photo page followed by journaling on the backside. These close ups were taken before the album was assembled, so each page and matching journaling panel could be captured in one frame. 


This page and photograph are my favorite from the album so far. The bottom most layer of 
chipboard is a Number Panel cut in two and tucked underneath layers of pattern paper.

 Next, Ive cut a piece from the left over negative of the Polaroid Assortment Frames
 and covered it with pattern paper(green with blue stars). Another such piece has been
 used on the matching journaling panel of this page. 

Finally, a piece from Airplanes was coloured red with an ink pad and
 embossed with clear embossing powder.


The 6" sea life frame set was coated with white gesso and painted on with acrylic paints.

For the fish, a tiny bit of neon orange paint was blended with the yellow paint. 

I've also tucked in small pieces of Fishing Net Bits on either side of the photo panel.
 For the journaling page, Ive added a turtle from the Sea Creatures chipboard set.


This final page happens to be my son's favorite and is from the book parade held at his school recently. All the chipboard pieces used on this page - Triangle clusters, a piece from View finder and a piece from the Glasses set were coated with gesso and then painted over with acrylic paints.

I hope you enjoyed reading about and seeing close ups of my project today. 
Thank you for stopping by.

Wishing you a creative week,
Kripa Koushik
www.thecolourpress.blogspot.com 


2crafty chipboard used:
- Fun Disc
- Play disc
- Airplanes
- Glasses Set
- View Finder
- Sea Creatures
- Number Panels
- Fishing Net Bits
- Triangle Clusters
- 6" Sealife frame Set
- Crazy Stitched Panel
- Polaroid Assortment Frames


Thursday, November 9, 2017

November Projects & Video Tutorial
By Kripa Koushik

Hi friends,

Christmas Cards

My first project share is a set of 3 Christmas Cards. 
They are not exactly a set as they all use different background techniques but
they are all Christmas themed.


I started by heat embossing on black cardstock with clear embossing powder. Next, one of the frames from the Polaroid Assortment Frames Chipboard Set was covered with pattern paper. The numbers 2 & 5 have been cut out from the Number Panels Chipboard and painted with Colourarte metallic gold paint. The stars also painted gold are from the ATC Tiny Hearts and Stars Set.


My favourite of the three is this card. Tucked under the vellum Santa is a silver painted star from the Handrawn Stars Chipboard set. The rest of the silver stars are from the ATC Tiny Hearts and Stars Set.


For the final card in the set, one of the Majestic Reindeer's has been painted gold. The 
stars from ATC Tiny Hearts & Stars has been heat embossed with red embossing powder
 to match the finishing of the sentiment.


2crafty Chipboard Used:
- Number Panels
- Handdrawn Stars
- Majestic Reindeer Set
- ATC Tiny Hearts & Stars
- Polaroid Assortment Frames 


 Lets Hear It For The Boys - Scrapbook Layout

My second share this month is a layout of two cheeky & noisy boys
who are busy having a screaming contest!

There are a ton of different 2crafty chipboards on this layout. 4 pieces from the 
Polaroid Assortment Frames form the main composition. A piece of the
 Numbers Panel has been tucked behind the photographs on either side. 

   Doodled Arrows set draw the eyes from the chipboard title down to the photographs. 
To compliment the pattern paper words, Ive used two pieces from Word Bubbles Set - Cool & Fun. Finally, I've added a piece of a Video finder chipboard and a cog to complete the layout.

I hope you enjoy the video tutorial of how the page came together.

TO VIEW VIDEO CLICK HERE


2crafty Chipboard Used:
- Cute Cogs
- View Finder
- Word Bubbles
- Numbers Panel
- Doodled Arrows
- Polaroid Assortment Frames
- Lets hear it for the boys Title Chipboard


Until next month, happy creating.

Cheers,
Kripa