Today I have chosen to make a page with this picture of my little grandson "LEO" who was born on August 29th. I thought I would use this beautiful chippie moon and the dreamcatchers I so love.
Here are the 2Crafty chipboards I used...
- Word this boy
- Love you to the moon
- Dreamcatchers
I applied a layer of white gesso on each chipboard.
For the moon I applied a coat of white acrylic paint
in fine grain paste to bring relief.
For dreamcatchers I applied a dark blue embossing powder
for a mixed media effect I added a little white gesso,
golden wax mini pebbles and glitter.
For the title I also apply powder embosser white glitter.
I just love the titles, and This Boy is a wonderful example of the awesome detail in these titles.
I applied a coat of clear embossing powder and heat set with Baked Texture Azura Sea Embossing powder. I love the colour it turned out to be.
The small banner "Memories" from the ATC word Banner Set 2, I colored in the letters with a black fine tip market and went over with clear wink of stella to add some shimmer. I also detailed the banner with a black marker too.
I wanted to color Breannas Swirl as close to the 49 and Market blooms as i could, so i dabbed them with clear embossing ink and heat embossed with Maze embosssing powder and dabbed a bit of Ancient Amber onto it while it was still hot.
I cut the Swirl in half and used part at the bottom of my flower layers and on the side of my flower layers peeking out from under neath the paper layers.
This is designed using some of their fabulous chippies and papers are from
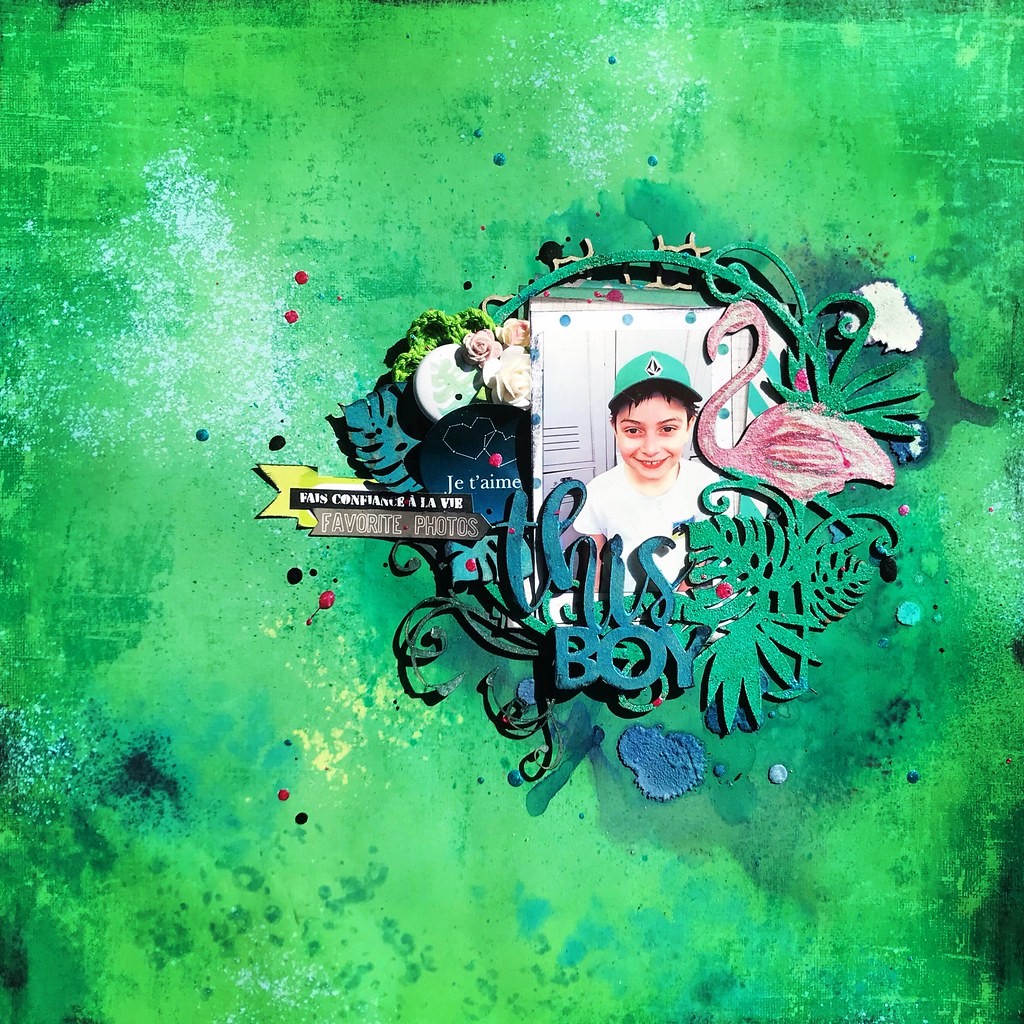
It is time to reveal my first layout of the month. In Canada, it is spring time and we
are actually seeing the sun peeking out for the first time, so it inspired me to do a green
layout! This one showcases my son Liam, fresh out of his swimming training.
Here we can see the beautiful leaves of the Flamingo frame set. I've prepared them
with turquoise embossing ink and I painted the Mini Flourish Bits with silk green paint
and placed them underneath the Flamingo frame set.
For the This Boy title, I used some metalized blue paint, applied with my finger.
That's what gives it this nice uneven look.
This is another shot focusing on the Mini Flourish Bits.
Now, for the masterpiece of the Flamingo frame set, I first painted the flamingo with
metallic silver paint. Then I used two kinds of pink inking pens to draw the feathers.
Then I used a black inking pen to draw the feather highlights. For the rest of the
Flamingo frame set around the flamingo, I used some green embossing powder.
2Crafty Chipboard Used...
FR0108 Flamingo Frame set 6"
W00425 This Boy
M00722 Grid bits
MB006 Mini Flourish Bits
I hope that you'll be inspired by this colorful mix. And don't be afraid to give your
boys layouts a touch of pink! It'll bring out some more cheerfulness!
I have a couple of layouts and a VIDEO tutorial to share with you all.
First up I have a layout titled:
'This Boy'
A layout about my boy and his gift with children.
I used the following 2Crafty Chipboard:
"6 inch Revolution Frames"
"Chevron Bits"
"This Boy Title"
I applied black gesso to the "6" Revolution Frame" and then embossed it with a
distressed rust emboss powder. This gave it a grungy metal look.
I applied the same emboss powder to some of the 'Chevron Bits', but achieved a totally different look by simply applying white gesso first, instead of black gesso.
It looks much more rusty and copper in colour than the circle frame.
To the other parts of the 'Chevron Bits' I added various ink colours until I achieved a grungy look I was happy with.
I just love the versatility of 2 Crafty Chipboard!!
For the 'This Boy' title, I applied black gesso and then clear emboss powder to the 'this' part.
To the 'boy' section, I used various ink colours until I achieved the grungy look.
I love the titles with two different fonts, and I love finding different ways to alter them.
I've created a video, so you can see EXACTLY how this page unfolded.
I hope you enjoy it.
I'd love some feedback!
My second creation this month is titled:
'Sightsee'
I used the following 2Crafty Chipboard:
'Sightsee Title'
'Fir Xmas Tree'
'Thistle Shrub'
'Summer Leaf Stems'
I painted the 'Summer Leaf Stems' with a few coats of white gesso and tucked them in between my photos.
Next I grabbed the two 'Fir Xmas Trees' and trimmed off the star on the top and the pot on the bottom.
They are the perfect shape for my layout (minus the Xmas feel) as this layout is about taking our USA family to my step-dad's home. He lives in a forest, surrounded by Pines and Gums so these trees were perfect.
I then applied watercolours in various shades of green to achieve a dappled look.
To the 'Sightsee Title', I added a variety of Inks until I achieved a grungy, earthy colour I was happy with.
I placed this on top of my cluster.
I also added in the 'Thistle Shrub'
I left this raw, as I felt it went well with the earthy natural tones of the layout.
I really love all the natural fibres in this layout, and I enjoyed altering the chipboard to match in with this.
I have an extra share today - a layout I recently created for Scrap the Girls and their current Challenge Challenge- all about 'Me'.
I used the following 2Crafty Chipboard:
"Gigi's Flowers"
"Mini Branches"
"This is Me Title"
I applied Black Gesso to the title 'This is Me'.
I then applied some Finnabair Opal Magic in Aqua/Rose to just the 'Me' section.
I applied black gesso to the 'Mini Branches' and tucked these throughout the layout.
I applied a few coats of white gesso to the 'Gigi Flowers' and scattered these through the layout.
Lots of vibrant colour, lots of journaling. Very ME!!
So that's it from me this month, if you'd like to see more you can head over to my BLOG
Hi all, today I'm here to share two layouts that I have made this month.
This Boy
I also made a video tutorial for this layout so please enjoy.
First up is my take on a masculine layout with flowers.
2Crafty Chipboard used:
Star Circular Frames
Star Bubble Set
ATC Tiny Hearts & Stars Pack
This Boy title
TO VIEW VIDEO CLICK HERE:
I love the all the different star chipboard pieces in the 2Crafty range, so on this layout
I used 3 different star chipboards.
Close up of the gorgeous Circular Star Frames and the cute Star Bubble Set.
This layout was made using 49&Market papers and flowers.
Love
Next up is a layout featuring both my kids.
2Crafty Chipboard used:
Elsa Frame
Word Circle Set 1
Ariel's Spray
Chloe's Vines
I coloured the Elsa Frame with an embossing powder in Aged Ivroy,
I then cut the frame in half and placed it under my photo.
I used embossing powder to colour all my chipboard pieces on this layout. On the
Ariel's Spray I used a light purple embossing powder. Then a shabby white powder
on the Love title from the Word Circle Set 1.
On the Chloe's Vines I used 3 different embossing powders. To get the multi colour effect I first used Versamark embossing ink on the chipboard, next I sprinkled the embossing powder in patches until I had all 3 colours on before I heat set the powder. The colours I used were, gold, beige and teal.
This layout was made using 49andMarket papers and flowers.