Showing posts with label Pretty Flowers. Show all posts

Thursday, June 13, 2024

'Never Stop Believing' - by Emma Zappone

Hi there 2Crafty friends.
Em with you today with a small Mixed Media panel.


Here are the awesome chipboard elements used.....

Pretty Flowers
Mollies Butterfly Set
Foliage Set 7


I painted all the chipboard pieces with some Color Glow powders, that left a beautiful shimmer to them.


Look at all that awesome shimmer!


I love the way these powders sit on the chipboard. These I chose not to prime first, so that the water that mixes with the powder, soaks into the chippy a little and mutes the colour but leaves all the shimmer.


I love the calmness this panel creates.


I hope you have been inspired a little today.

I hope to catch you all again soon.

Till then, Em xx


Monday, October 9, 2023

'Travel the World' by Emma Zappone

Welcome to a new week everyone.
Em with you all today.


This page is full of clustering and soft colours.
Let's check out the chipboard used.....

Fern Leaf set
Corner Lorena
Foliage Set 7
Pretty Flowers


I wanted the focus on the left side of the picture, to compliment and add to the floral composition within the image.
I chose to start with a piece of the foliage 7 and a Lorena Corner. These were painted with complimentary acrylics and distress oxides. With a silver wax finish. These were my starting layers.


Next I really wanted the Flowers to pop against the teals. The base part of the flower was painted in a liquid acrylic and the top layer a complimentary orange acrylic. Before I glued the 2 elements together, I stamped a ticket stamp with white ink to add some extra visual interest. 


These really are a special feature for me.


Finally to add to the foliage feels, I added one of the Fern pieces in the same orange as the base of the flowers. And Also with a light amount of stamping to tie all the elements in together.


I think the combo of chipboard used on this page is one of my favourites so far.


I hope this has inspired you to get a little crafty this week. 
I will catch you all again later in the month.
Have a great day.

Stay Crafty, Em xx


Monday, March 20, 2023

Her Smile Layout by Tania Ridgwell

Hello there!

Tania joining you today to share the last of my DT projects for March.  I have created a layout.

"Her Smile"

2 Crafty Chipboard Products:

*Her Smile
*11" Round Flourish Frame
*Thin Hexagon Stacked Frames
*Pretty Flowers


I used the gorgeous Mintay Bloomville Collection to create the base for my Layout.


I cut the 11' Round Flourish Frame in two and as I wanted it to stand out on the background paper I kept it raw.  I gave the rest of the chipboard pieces a coat of gesso and once dry I painted them all with Blushed Peach Opal Polish.  I then randomly sprayed the Pretty Flowers and the Hexagon Stacked Frame with white Linen Dylusions Spray. I covered the Her Smile Chipboard with the White Linen Spray so it just had a slight tinge of the Blushed Peach Opal Polish.


I built up the layers under my photo with some patterned paper and fussy cut elements and then added the Hexagon Stacked Frame over my photo.  I embellished the page with lots of yummy blooms and added some texture with art stones and prills.  I finished off my layout by adding the Her Smile chippy title.


Thats' all from me today, I hope I have inspired you all with my Layout.  Until next time thanks so much for stopping by.

Tania xx

Wednesday, March 2, 2022

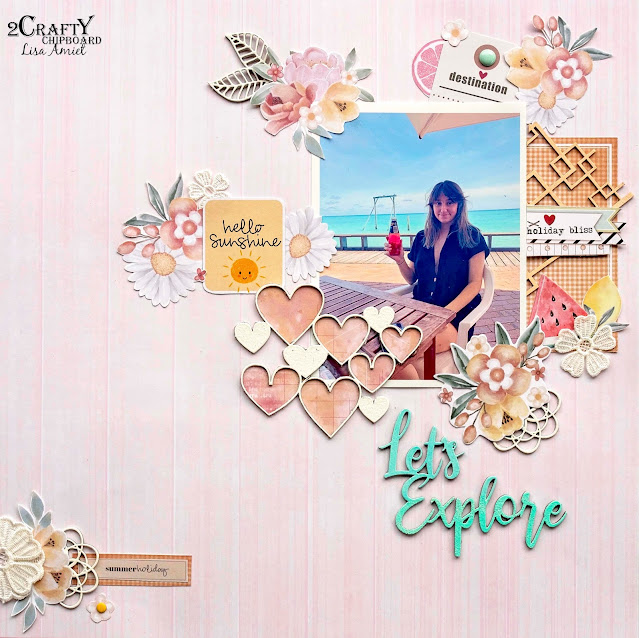
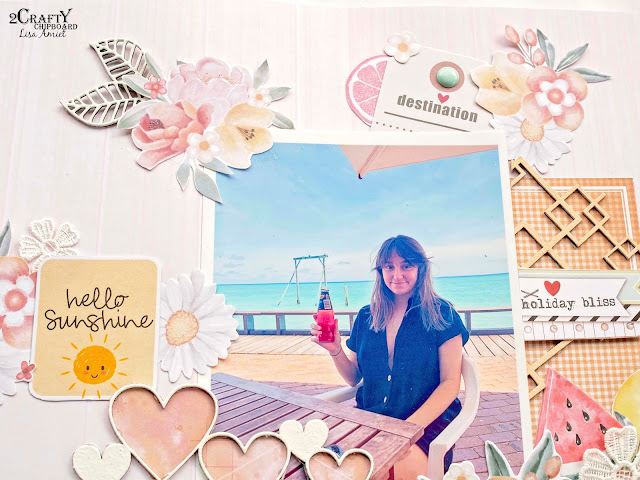
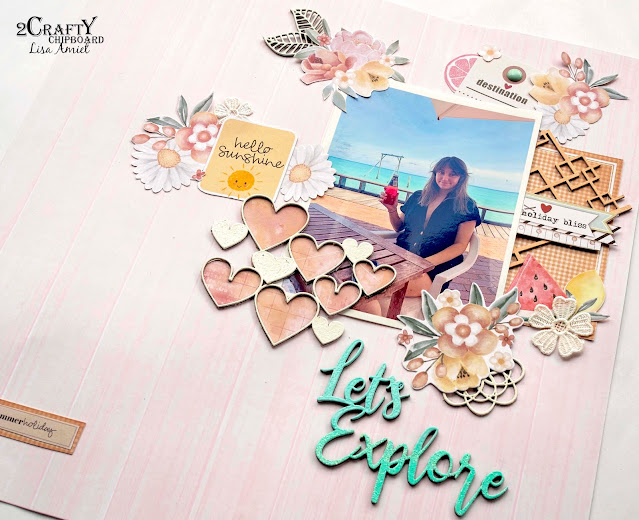
'Let's Explore' with Lisa Amiet


Hello 2Crafty lovers!
It's Lisa here today to share some
summer-loving inspiration with you.


2Crafty Products used:


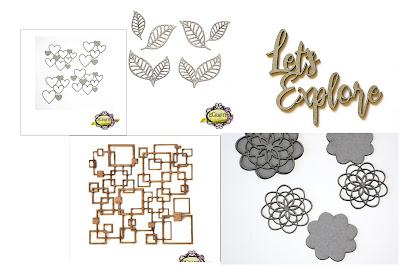
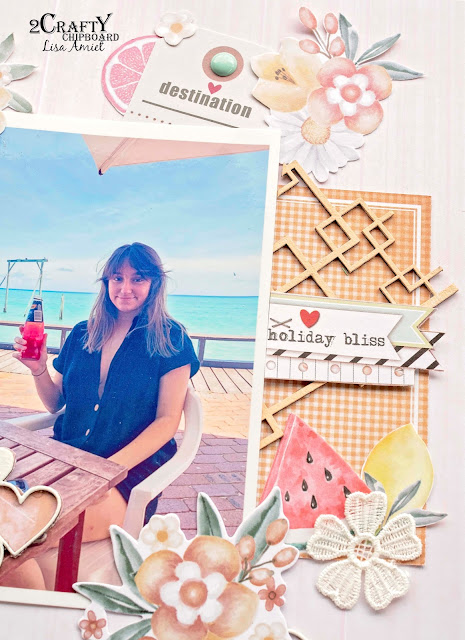
For this layout, I have used a piece of the 'Square Collage Panel', 
which I have cut to size and painted in a pale peach to match my papers.
I have then layered this next to my photo.


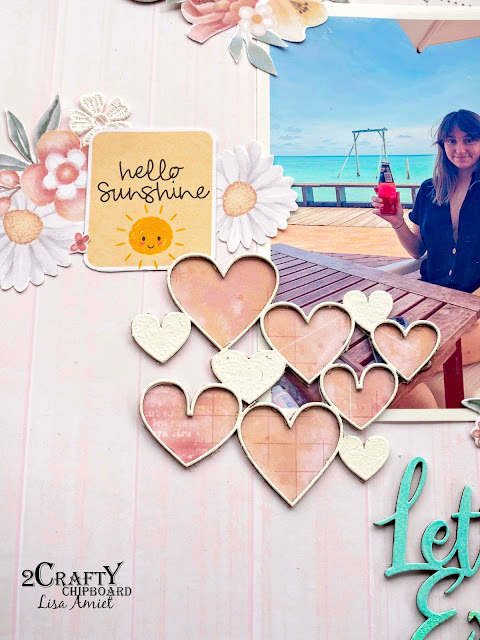
On the other side of my photo, I have used one of the 'Heart Clumps',
which I have embossed in white, and backed with patterned paper.
This was a bit trickier than I thought lol, so it's not perfect.


I have also used a couple of the 'Lattice Leaves',
also embossed in white. 


I have also used some of the 'Pretty Flowers', one I have used in my corner cluster,
both have been embossed in white. 


For my title, I have used the 'Let's Explore', in that gorgeous font.
I have given it a bit of an ombre effect, 
with the bottom half being embossed in a sparkly aqua embossing powder. 


I love the bright summery feel to this layout,
I hope this brings you a little sunshine today!

Until next time!

Lisa x


Saturday, June 22, 2019

Fun in the Sun
by Sabrina Turpin

Hello 2Crafty fans!

Here to share my layout "Fun in the Sun"


This week I would like to show you a layout I recently made as a Guest Detective for CSI,
 accepting the challenge for their "Case file no. 286".
 Here the theme looked like good summer fun and this was perfectly fitting as we're
 just starting summer here up north!


For the "Pointy Flower", I applied pink ink and then traced the border with black ink.


On the title, "Fun in the Sun", I applied gray pearl metalic paint and traced the border with black ink.


On the negative of the "Pretty Flowers", I applied honey-colored ink and then stamped an hawaiian leaves pattern with black embossing ink. For the "Fern Leaf set" at the back, I applied 2 coats of teal-green embossing powder to make them all nice and shiny.

In this layout, I used the following 2Crafty chipboards:
Pretty Flowers [M000574]
Fern Leaf Set [M00798]
Fun in the sun [W00422]
Pointy Flower [PA0021]


That's all for me today! I hope you enjoyed this layout and that it gave you some ideas for your own creations! Have fun exploring the various techniques of preparing your chipboards! See you soon with more ideas.


Wednesday, August 22, 2018

Cherish yesterday by Sabrina Turpin

Hello 2Crafty fans!

This month, 2Crafty is sponsoring over at  More Than Words blog and I was invited to take part in some of the challenges as a guest designer. 
The challenges was "Vintage" and "Yesterday". 
They inspired me to create a nice layout around one of my wedding pictures. 


I wanted to create a vintage ambience around my black and white picture, by using a wood textured background along with a dull color palette as well as by applying a patina finish on some of the chipboards. 


In the background, I've placed the "Circle Lace Panel" which I left at its natural chipboard color. 

On top of the "Circle Lace Panel", I've put the "Frame Yvette's", on which I used a vintage bronze enamel Powder.


For the "Foliage Set 1", I've applied amethyst-colored ink roughly and traced the contour with black ink. On the "Pretty Flowers", I've applied some amethyst embossing ink then applied pearly white embossing powder on top.

For the title, "Cherish", from the "Fine Word Set 1", I used metallic silver embossing powder and traced the contour with black ink.

In this layout, I've used the following 2Crafty Chipboards:


Frame Yvette's [fr0083]
Circle Lace Panel [660034]
Fine Word Set 1 [m00656]
Foliage Set 1 [m00567]
Pretty Flowers [m000574]

I've really enjoyed taking part in this challenge! I hope you like the result and that it gave you some new ideas for your own creations!
 See you soon.


Monday, April 20, 2015

A Canvas for April - By Margaret Mifsud


Hello everyone and welcome to the 2Crafty Chipboard Blog.  So nice of you to drop by.

I have something a little different to share with you this month.  Instead of my usual cards I have actually created a canvas this time.  I know I have done a couple of canvases before but they were very small, this one is a bit larger.  It measures 9" x 7". It's the first time I have attempted  one this size so I hope you will be kind.  LOL!!


I have created this to go on the wall in my new Craft Room (when we actually get it done)
and I wanted something with a vintage look.  I actually followed a tutorial by
 Gabrielle Pollacco for this and, although my canvas doesn't really look anything like
hers, I have used  pretty much the same techniques.


In this cluster I have used Foliage Set 1 and Leafy Rounds.  Added some flowers and some metal washers and beads.  All of the chippies were coated with gesso before I glued them down onto the canvas and then it was just a matter of spraying them with acrylic paints.  When everything was dry I randomly painted over different areas with gold Twinkling H2O's.


For the cluster at the bottom I used Flourish Adornment Set 5 and one piece from
 the Pretty Flowers.  I also added flowers, metal washers and beads to this cluster.


At the top left hand corner of the canvas I used part of the Decorative Rod Set 2.  I didn't
 need the whole piece so I simply cut off one end to use here.  The rest will be used
 on another project.  I have also added a tiny bird from the ATC Birdcage 1. 


A better look at the Foliage Set 1 ...


... and a look at some of the texture.


I so enjoyed creating this canvas and using these fabulous 2Crafty chippies made it so much
easier to decorate.  I also experimented a little with my photos.  I took a small leaf
out of Helen Tilbury's book and gave them a frame.  I kinda like it.

To take a look at all the fabulous chippies 2 Crafty have to offer  HERE is the link.
 There is such a wonderful choice of different designs that you are bound to find
exactly the shape and size you need for your project.

2Crafty products used

 Foliage Set 1

 Pretty Flowers

 Leafy Rounds

 Flourish Adornment Set 5

 Decorative Rod Set 2


ATC Birdcage 1


Thank you so much for visiting and

remember to find a 2Crafty stockist near you simply send an email to ... 
salesat2crafty@optusnet.com.au

Take care and God Bless.


Photobucket