Showing posts with label Square Collage Panel. Show all posts

Wednesday, March 2, 2022

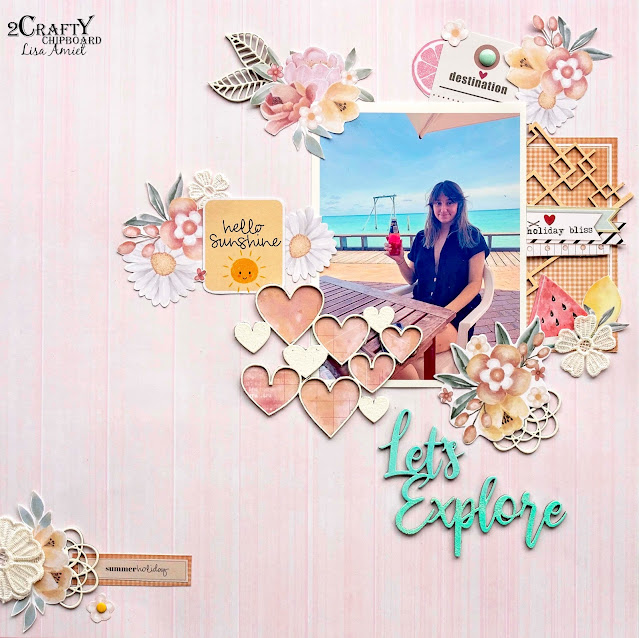
'Let's Explore' with Lisa Amiet


Hello 2Crafty lovers!
It's Lisa here today to share some
summer-loving inspiration with you.

2Crafty Products used:
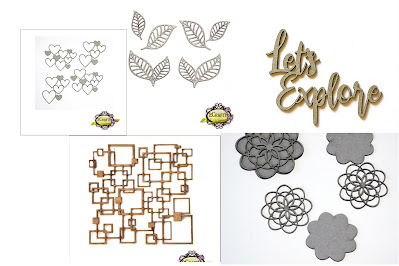


For this layout, I have used a piece of the 'Square Collage Panel'
which I have cut to size and painted in a pale peach to match my papers.
I have then layered this next to my photo.
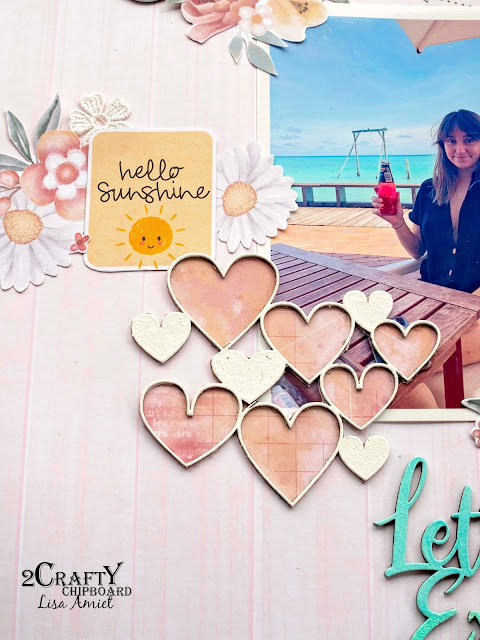

On the other side of my photo, I have used one of the 'Heart Clumps',
which I have embossed in white, and backed with patterned paper.
This was a bit trickier than I thought lol, so it's not perfect.
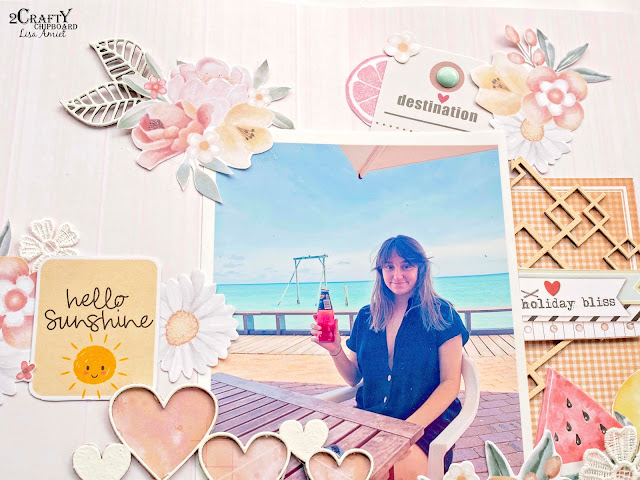

I have also used a couple of the 'Lattice Leaves',
also embossed in white. 


I have also used some of the 'Pretty Flowers', one I have used in my corner cluster,
both have been embossed in white. 
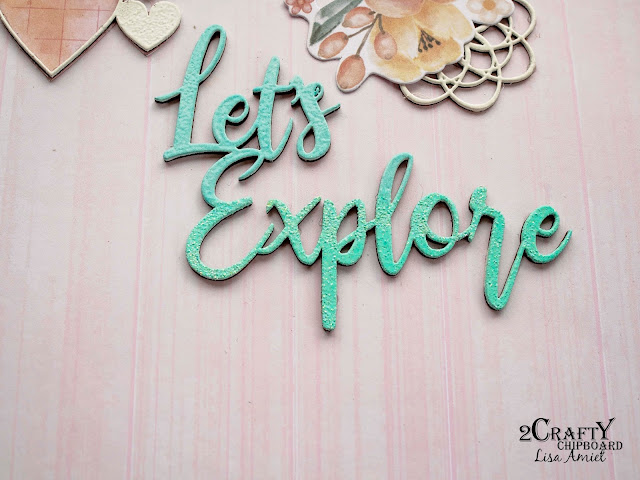

For my title, I have used the 'Let's Explore', in that gorgeous font.
I have given it a bit of an ombre effect, 
with the bottom half being embossed in a sparkly aqua embossing powder. 
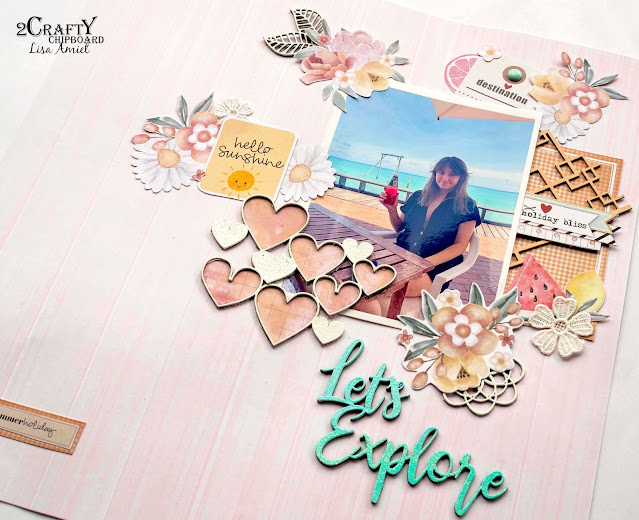

I love the bright summery feel to this layout,
I hope this brings you a little sunshine today!

Until next time!

Lisa x

Sunday, August 8, 2021

I am extraordinary by Emma Zappone

Hello, Emma with you today.
Today's share is bold and bright, with a little sass thrown in.


These are the chipboard pieces used.....

Square Collage Panel
Lattice Leaf set
Border 6" Floral Cluster


My page is an A4 set as landscape, something a little different in size and design.
As the background is quite bold and bright, I wanted to make sure the chipboard elements stood out.


For the square panel I painted these with black Gesso and then with my finger just lightly brushed over some white Gesso. Once these were dry I then clear embossed them to make them shine and stand out from the colourful background.


With the gorgeous floral border I decided to cut the flowers apart and make them individual pops of colour on the squares. To colour these, I painted with an assortment of acrylic paints that I had used on the background paper. Again painting and blending with my fingers.
Once dry, I again clear embossed them.


And then finally the stunning lattice leaves! I used the similar acrylic paint techniques as the other chippy on the leaves and clear embossed. I really love the way all the chipboard shines above the coloured background and really owns the page!


I hope you found a little inspo from this page and I will see you all again at the end of the month.
Stay safe, stay crafty.

Em xx


Saturday, February 8, 2020

'Adore You' layout
by Rachael Funnell

Hello and Welcome!
Rach with you today sharing
 more 2 Crafty Inspiration...

'Adore You'

This layout featuring a lovely photo
of a proud father with our 2 gorgeous kids..
Along with some GREAT 2 Crafty chipboard pieces!


Mini title stick set 2
Fancy Set 1 borders
Adore YOU (title)
Square Collage 6x6 panel
Funky Arrows


Starting with the title 'Adore YOU' I kept it 
quite simple & inked it with black.....

For the Mini title stick (Fatherly love) 
I added a light coat of gesso... 


Also! adding gesso to this Funky Arrow,
given this awesome arrow 2 coats of gesso...


I wanted to break up the black a little so 
I went with inking the Square Collage 6x6 panel 
dark brown then cutting it into 
smaller pieces before adhering to the base page...


And lastly this beautiful delicate Fancy border, 
I heat embossed it with black..


Thanks for stopping by!
I hope you leave feeling inpsired in some way 😀


Wednesday, November 7, 2018

"Overthinking"
- Layout and Video with Emma.

Hi friends, Emma here with you all today.
Today's layout that I'm sharing is one that I tried to express the frustration
 I have with overthinking my creative time.
Comparing myself to other creatives and doubting my own style is the
 kind of overthinking that can stumble the creating process.
So I found this awesome artwork on Pinterest and it spoke perfectly with me,
 and I instantly knew what direction I wanted to take with the page.
Could I interpret what was In my head to page?
I feel I did get pretty close.....what do you think?

I have created a Video for you all to see this vision come to life,
check it out at the end of this blog :)

"Over Thinking"


With this layout I also wanted to use up a few pieces of chippy that have
 been left over from cutting a panel up or the last piece to pop out of a sheet, 
or that had just been found after looking through my tub of chippy.

I also wanted pieces to compliment my image and the organized chaos
 and creative venture that my page depicts ;)


For the Square panel piece I inked with just a black archival ink,
 keeping it very simple, but to still stand out from the background colours.

For the Doily frame that I tucked up in my layers, I inked also but this was
 with one of the complimentary Distress oxides I used on the background,
this way it brought the colour up through the layers.


For the leafy round and the branch I applied the same inks as the
 square panel and frame, except the branch is a different colour this time.

If you look closely at the Leafy round you can see its inked imperfectly and I
really liked that I didn't get an even coverage as it kind of represents the imperfection
 of overthinking, that's it's OK to not always be perfect, things work out anyway.


I chose embellishments that complimented the colour scheme and kept them
 simple, flicking ink over the whole page to tie it all together.


I must say that I am proud of this layout, it may not be to every
 ones liking but it felt good to let loose, trust in myself and play!

I hope you enjoy my video too, and that it inspires you in some way.

CLICK HERE TO VIEW VIDEO


Thanks for all of you for your support and encouragement and I look
 forward to seeing you all again later in the month.

Till then, Scrap on, Em xx


Monday, August 20, 2018

Mixed media cards with Kripa Koushik

Hello friends,

This month, for my second project, I have 2 cards to share.
 They are non-standard cards approx. 6"x6" requested in this size in order to write a letter inside instead of a message. 


I started by cutting out some circles from Cocoa Vanilla pattern paper and coated them with white gesso. While that was drying, I coated all the 2crafty chipboard pieces with white gesso as well - a few gears from Steampunk Small & Medium, a small panel cut off from the Square Collage Panel and one piece from the Vintage Hot Air Balloon Set. I did NOT apply any gesso on the tile 2crafty chipboard piece 'You make me Happy'


To get an even coat of colour on the chipboard pieces, Ive directly applied stamp pads on the chipboard pieces.

 Here is the second card. The colour palette was directly based on the pattern paper.


Can you see how the Hot Air Balloon has a bright orange whereas the 'You make me happy' chipboard in the previous card looks darker and more vintage looking. That's because I didn't apply any gesso on the 'You make me happy' chipboard piece. Gesso makes colour look brighter on chipboard.


Thank you for visiting us today.
Wishing you all a very happy & creative week ahead.
Hugs,
Kripa
www.thecolourpress.blogspot.com


2crafty chipboard used:
- Square Collage Panel
- Steampunk Gears Small
- Steampunk gears Medium
- Vintage Hot Air Balloons
- You make me Happy Title


Wednesday, July 25, 2018

"Adventure Rebel"
By Emma Zappone

Hi everyone, 
Emma here today on the 2Crafty blog. 
Today’s layout was inspired by this Pop Art image I found on Pinterest
of Carrie Fisher mixed with a little  David Bowie...


I chose the red background to match the stripe on Carrie's face. 
Then to get the space vibe I chose the square collage panel and cut it up to
 sit behind my image, I inked this with a Distress Oxide ink and then with
 my finger applied a Prima wax over the top. 


To mimic the pattern on her face I used part of the squiggle border which I painted
with  Dina Wakley paint and again went over it with the Wax. I think this is my
 new fave product. Plus it smells so good 😉 


The ‘adventure’ word I inked with black archival ink and left it as it was. 


Here are the 2Crafty products I used......


I really had fun with this layout, taking my time, creating layers and just enjoying the process. 

I look forward to seeing you all next month. 
Until then, Em xx


Wednesday, July 18, 2018

July inspiration 'Capture' by Hetty Hall


Hi there 2Crafty fans and welcome to my second share for July. 


 2Crafty Chipboard products used:


 I layered the 'Cassie's Flourishes' and the 'Decorative Rods' behind my photo to create texture and embossed it with Nuvo shimmering pearl embossing powder. I also ended up cutting out the middle bit of the decorative rod as it was covered by the photo and I don't like 'wasting' my beautiful chipboard. So now as you can see it is in a more prominent place.


The 'Square Collage Panel' was cut into several pieces and layered amongst the flowers for visual effect and embossed with Nuvo Glacier White embossing powder.


I used the negative from the '6" Circle Revolution set' which was left over from another project and layered it behind my photo to serve as a frame. It was again embossed with the Nuvo Glacier White embossing powder.


Last but not least I added some Zing Cranberry Metallic finish embossing powder to my chipboard sentiment from 'Mini Word Set 1'.


Flowers and paper are from 49 and Market and the little finishing touches are the Nuvo crystal drops.

Hope you enjoyed my layout and I was able to inspire you to get some beautiful 2Crafty Chipboard and get your craft on.

Until next time......
Hugs
Hetty