Showing posts with label Heart Charms. Show all posts

Monday, July 23, 2018

"Love is a Four legged Word' Layout
2nd July inspiration By Rachael Funnell

'Love is a four legged word'

Hello everyone! Rach today sharing my 2nd layout as part of my July inspiration....  
Inspired by the colour scheme in this adorable photo of my daughter with our
 furry family member 'Princess' to create this layout...

Including these 2 Crafty Chipboard pieces...
Heart Charm
Moroccan bits
Circle heart frame
'Love is a four legged word' 

Starting with the 'Love is a four legged word' title which I thought was just perfect
 for this photo.. I have added gone and added a peachy ink colour to it....


Wanting to draw attention to my photo without over powering it, So I first adding a couple
of coats of white acrylic paint before adhering the Circle heart frame onto the photo...


With the 'Moroccan bits' I have placed without my page... I firstly inked them a
 navy blue ink before adhering them!!


Lastly! With the 'Heart Charm' I have inked with a sliver ink, before
 attaching it underneath the photo, to finishing it off nicely....

Hopefully I have inspired you in someway to scrapbook those photos you
 may have of your furry family member....
Until next time!

Thursday, April 27, 2017

April Inspiration by Kavitha

Hello 2crafty fans, 

 Kavitha here today to share my March projects.


"Precious" - Canvas

2crafty chipboard used:
Sammi's swirl
Frame Lucys flourish
Heat charms
Fine word set 2


For my first project I created a canvas.
I have used Frame Lucy's flourish to frame the picture 
and I used Sammi's swirls behind my photo.


I tucked in the heart charm among the floral cluster.
I love how it connects the layout.


All the chipboard pieces are heat embossed with
teal and pink embossing powder.


"A Love Story"

 2crafty chipboards used:
6" circle revolution frames
Heidi's vines
A love story


 For my second project I created a soft feminine layout.
I love this picture I got from Pinterest,loved the ethereal look,
so to match that I kept my layout very soft and shabby.


I created a floral arrangement on one side of my picture with Heidi's vine
 as base, I used circle revolution frame behind my picture
and finished it off with the title piece.


All the chipboard pieces are heat with embossed with pink and 
white embossing powder.


"Lovely"

2 crafty chipboard used:
Elise's border
Frame Lucys flourish


I have an extra layout to share today.
I have used Frames lucy's flourish and Elise's border behind the photo.
I first gave a coat of gesso, colored it with
color bloom spray and gave
a coat of crackle paste on top for weathered look.


Thank you for stopping by.


Wednesday, April 19, 2017

Karine's April Shares and a Video Tutorial

Hi crafty friends, It's my turn today to share my April inspirations here on the 2Crafty blog. I don't know why,
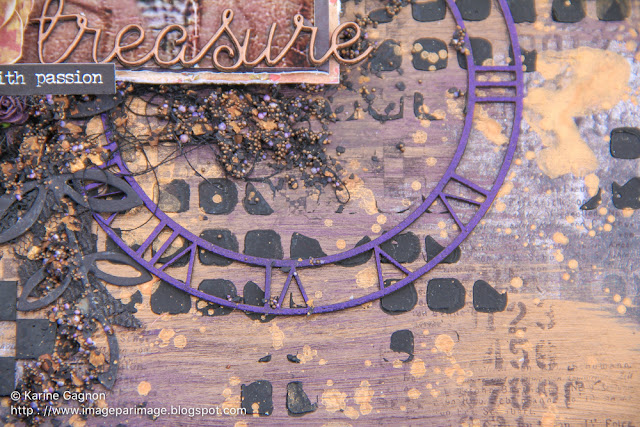
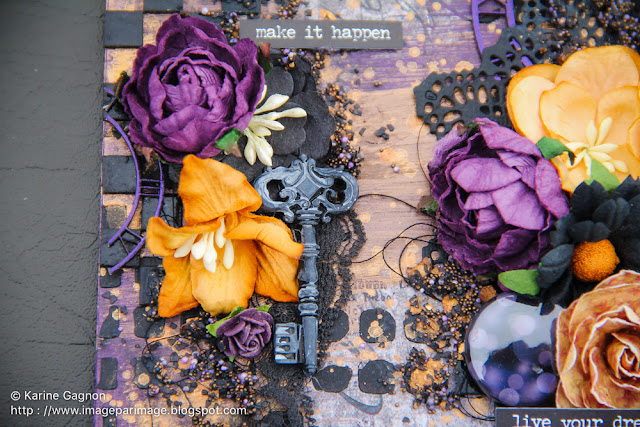
 I seem to gravitate towards purple this month. My first layout is called «Treasure» and
it showcases an old picture of my father when he was about 16 years old.

"Treasure"

I used clear gesso to cover the whole background paper. Then, I used two shades of metallic
acrylic paint. When everything was dry, I used black archival ink to stamp some numbers
and some checkered patterns. I finally used black modeling paste through a square stencil.


To anchor my composition, I used some of the 6'' Clock Face Frames,
 which I embossed with purple embossing powder.


Here and there, under my clusters, I scattered some of the  
Checkerboard Clumps pieces, that were embossed in black.


At the end, I used some micro beads on my my background, and some embellishments.


My title piece, the word «Treasure», is from the Mini Word Set 1. I embossed it in copper.

2Crafty products used:
Checkerboard Clumps
6'' Clock Face Frames
Mini Word Set 1


"This Girl"
My second layout features my daughter. I can't believe how fast
she grew up: she's already reading!


On my background, I used some clear gesso all over.
(I forgot to show this step in the video tutorial, sorry!)
I then spread some white gesso to create the area where I'll spread some color.


Some modeling paste, shimmering paints, sprays, stamps
and ink were used to create the background.


My main composition is built around the beautiful Ava's Frames piece.
 I painted it with purple metallic acrylic paint.


I used flowers, die-cuts leaves and flair badges to embellish my layout.


I thought it looked good, but I wanted to add another piece of chipboard, painted in
 blue metallic acrylic paint, this time, so I went for one Heart Charms piece.


I placed it towards the bottom of my picture. All around the main cluster, I used some
micro beads, some glass glitter and other mica flakes to add texture.


My title piece is the This Girl chipboard, which I painted with the same
 purple metallic acrylic paint that I used before.

I made a video tutorial to share my creative process with you.
 I hope you enjoy it.
TO VIEW VIDEO CLICK HERE


2Crafty products used:
Heart Charms
Ava's Frames
This Girl

Thanks so much for stopping by today.