Showing posts with label Avery Vines. Show all posts

Saturday, December 31, 2016

"Treasure"
Last Project by Priscilla Lim

Hello everyone, 
It's 31st December and I hope that 2016 has been a good year for everyone.
Otherwise I wish for the not so lucky ones a very peaceful and joyful 2017.

Today, I am writing this post with mixed feelings.
I am happy to sign off for a wonderful year but at the same time, sad that this will be
 my very last post for 2Crafty as I will be leaving the team. Sob sob....

So for my last project, I have created a layout using my favourite color combo. 
Mint, Pink and Gold. The best color combination in my opinion :)


These are the 2Crafty supplies I have used in the above layout:

 Here are some close up photos for a good glimpse on the chipboards and
 how I layered them between the embellishments.

I wish to highlight that I have only dabbled on either Gold or White paint
on all the 2Crafty chipboards used on page. 
This is a very simple step to alter the chipboards but already so appealing. 


Above you can see where I've tucked the Swirly Star Border.


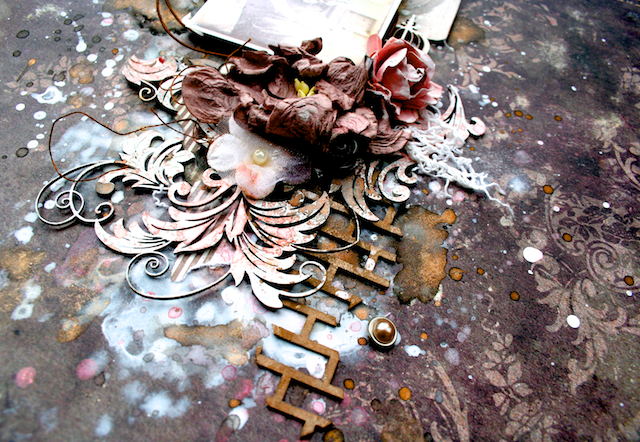
Close up of the Avery Vine above and the lovely title below, both have been painted in gold and then had swipes of white paint dabbed on, giving a weathered effect.


Alrighty, that's all I have to share today. 
It has been great fun working with 2Crafty Chipboards and I think you have
 all been inspired by the wonderful works of our talented team. 
Keep visiting this blog and continue to be wowed by the amazing works in 2017.

Once a crafter, always a crafter.....
so I am sure that I will bump into you all on the other social pages. 

Lots of love and Take Care!


Wednesday, December 21, 2016

December Layouts by Sandra Bernard

''Christmas Time''

Which emblem makes you feel more like Christmas than the fir tree itself?


2 Crafty Chipboards I used:
-Christmas Time-title
-Corner sweet Holly
-Avery vines
-Fleur Arrows
-Mini flourish bits


I chose to place Avery vines, Mini flourish bits and Corner sweet holly to create
 a fir tree. I embossed under heat these chipboards in certain places to create of the texture.


I also put of the black distress on the sides of these chipboards


I embossed black Fleur arrows to create a focal point at the top of the fir tree, 
as a replacement of traditional star.


I also embossed in black ''Christmas time'' and I then wiped some ink 
in silver on the edges of the title.


''Merry Christmas''

Christmas also means wishes, cards. & 2crafty Chipboards offer an
abundance  of chipboards to make this happen.


2crafty chipboards used:
-holly leaves
-Merry Christmas script card pack
-Retro Xmas trees
-stellar snowflakes
-Winter twig branches


On the first card, I embossed the small balls on the end of branches in red and I stuck 
on some, red dots. I left the holly natural and I painted the sentiment in white.


For the second card, I put some greenery under the winter twig branch and
 I embossed a stellar snowflake to put on the top of the ''tree''.

To decorate, I put badges and Birds in cork.


I really wish you Merry Christmas time!!!


Wednesday, April 27, 2016

April Inspiration From Marianne Johansson, Norway

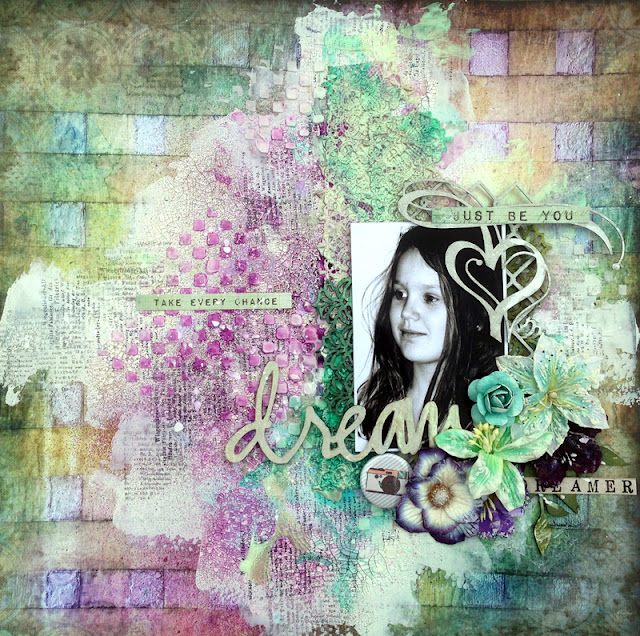
"Dream"


Hi all 2Crafty fans!
Today I have two rather different layouts to show you.

The first one is with an old photo of our youngest daughter. I just 
love this "dreamy" look she has here.


My background is filled with different mediums such as gesso, 
crackle paint, molding past,  mist, paint, stencils and stamps


I have used Gesso on all the chippies and also white watercolor. 
(love when it's really really white)


Some "Mini branches"  colored with an ink pad together with the flowers.


Here you see how white the title "Dream" is with the watercolor on top of the Gesso


The "Fencing wire panel" and "French lace Border" under the photo are both
 colored with Gesso, ink pad and mist.

2Crafty products used..


"The Queen and I!"

Well, I'm visisting royalties in London LOL
Here is a layout with a photo of me and Queen Victoria I, from Madame Tussauds in London.


I wanted to get the velvet feeling (from the curtain in the photo) and only had some black ink on the natural chippies this time. And some Inka Gold, also to get the luxury feeling.


Loved the title on this one, guess I could have used it many times on several layouts.


I cut out the "Dottet baubles" and used the circles as embellishments below, as a "flower". The "strings" I used on top of the photo, as "hanging-strings".


I cut the "Avery vines" in several pieces and used them in combination with the flowers, as leaves.


Aren't we cute together? The Queen and I? LOL


My background is rather simple, with only some stamps, stencils, tape and a few drops of paint.


  2Crafty Chipboard used:

Dottet Baubles
Avery vines
Mini Branches
What you see is what you get - title


Photobucket

Tuesday, February 23, 2016

Two Vintage Layouts By Lisa Griffith

Hello crafty friends!! I have prepared two layouts 
this month, both in my favourite vintage style.
 
But before we start..
Please remember to become a blog follower & leave a comment to
be eligible to go in our monthly draw for a great chippie prize pack.
The more comments you leave, the more chances to win.
'Spread Your Wings'

I love finding vintage photographs on Pinterest and this one caught my eye for the 
lovely girls and the beautiful patterns in their clothes. 

I used the following 2 Crafty Chipboard pieces:
'Mini Branches'
'Doily Frames'
'Birds Set'
'Leafy Shrub Set 1'
 

I painted the 'Birds Set' with black acrylic paint and then lightly brushed 
on some metallic silver paint to give the wings some motion.


For the 'Doily Frame' and the 'Leafy Shrub Set' I embossed them both
 with sparkly black embossing powder to add some shine.


And the last chipboard piece I used, the 'Mini Branches'. I firstly coated them with white gesso,
then I painted them with bright green watercolor paint and then stamped them in black ink.


'Miss Potter'

This is a photograph I found on Pinterest of Beatrix Potter with her pet mouse. 
Who remembers falling in love with all of her sweet little animal characters?

2 Crafty Chipboard pieces used:
'Corner Thick Vine'
'Brick Panel'


For the 'Brick Panel' I kept it simple with some brown ink, and for the 'Corner Thick Vines' 
I painted them white, and then splashed them with some pink mist to give it a weathered look.


I hope you have found a little inspiration today :)


Photobucket