Showing posts with label Sabine's frame set. Show all posts

Thursday, July 13, 2023

"Amazing Day" by Amy Voorthuis

 Good morning amazing 2Crafty friends, 

Today I would like to show you all a very colorful layout and this time I used the amazing NEW "Postcards from Paradise" collection by Prima {swoon} and some beautiful NEW & older 2Crafty Chipboard pieces. The picture I have used here is from Jeroen & Abbey in Greece last year. We have had rough couple of months and we have some ahead that's why you haven't seen much of my work lately. Hopefully I will make that okay with you all.

Amazing Day

 2Crafty Chipboard used: 
Sabina's Frame Set 
Fern Leaf Set 
Foliage Corners 
Amazing Day
Squiggle Arrow Set 
Mini Branches 


On the beautiful "Sabine's Frame Set" I added some matt golden eyelets in the already prepared circles after that I added some sheer lace but before all that I used some pretty matte pink acrylic paint to color it. For the phrase I used the same color pink and after I attached it to the upper right corner of my layout and used my sewing machine to stitch over it. 


 On the rest of the chipboard pieces I used some white gesso and some different green matte, metallique acrylic paints on some I have added some waxes. On the Foilage Corners I used two different shades of green and some cute green pearls. Inthe end I added some leaves, pearls and word strips. 

Thank you so much for your visit today and if you would like to see more of my work please visit here:

Much love and happy crafting...
Tuesday, February 21, 2023

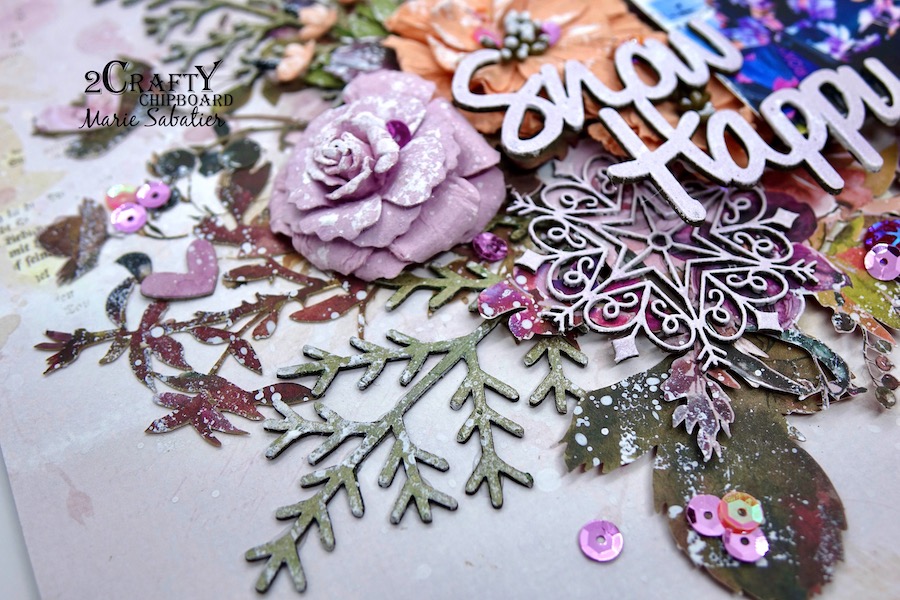
"Snow Happy"
Layout by Marie Sabatier


Hello everyone,


I am always happy to meet you to present my new inspiration. 

In France, we are on winter school holidays. 
My granddaughter has just spent a week on holiday in the snow 
and this new photo inspired me to create a layout with my favorite chipboards.


"Snow Happy"


The 2Crafty chipboard used:

- Word "Snow Happy"
- Sabine Frame
- Winter Twig Branches
- Foliage Set 10
- Starbright Snowflakes
- Circle Tags Set 2


I was inspired by the colors of the ski jacket to make my layout.

I prepare each panel by applying a layer of white gesso.

I then embellished the title, frame and chipboard "Strabright Snowflakes" with Lindy’s Gang’s
 "Pop Rock Purple" coloured embossing powder.


I set up my frame, my photo, and then I formed two clusters. 

I added on the "Winter Twig Branches" chipboards a "Lucky Emerald" wax 
which I then inserted into my cluster. 
By highlighting them.


I did the same for the chipboard "Foliage Set 10".

The snowflake being well openwork it is possible to distinguish the colors behind and mixes 
well in the middle of the flowers

And, for more details I added this tag in circle that found its place!


I hope I brought you some freshness and the need to scrape. 


Thank you for your visit and see you soon!


Monday, August 13, 2018

August Inspiration by Elisa Ablett - Good For the Soul

'Good for the Soul' 

Hi Everyone,

I am up on the blog today with another mixed media layout, combining some gorgeous pieces of chipboard along with handpainted stamped images.

I wanted a fun layout and stuck to the colours that were in the photo, blues and browns. 

The 7 dots Studio paper with a painted background and the Aall and Create stamps combined with the awesome chipboard make for a unique and fun layout. 


2Crafty Chipboard products used:

1. Sabine Circle Frames
2. Hummingbird
3. Ada's Flourish - border pieces


Let's take a look at the finer details!


Firstly, the hummingbird piece, I inked carefully in black ink and then using my finger 
I smoothed Finnabair Art Alchemy Metallique Wax in Blue over the chipboard 
and then a top coat of Vintage Gold.


For the second piece of chipboard and the set of Sabine's frames, I inked them all in black,
then added layers of Aged Brass and Vintage Copper Metallique 
Wax over the pieces to give them a rusted look.


To create an interesting feature on the left side of my page, I cut one of the smaller Sabine Frames in half and tucked the cut edges underneath my fussy cut stamped images.


The larger frame I left a bit darker with just a small amount of Metallique wax smoothed over the top. I wanted to use the frame to draw attention to my fun photo.


I used the flourish border piece to create flow across my page, it has a rusted appearance to blend in with the colours of the background photo. Creating flow across your page draws the eye to your photo and main cluster of embellishments. 

To finish off the layout, I hand painted with a small paintbrush and watercolours to match the colours from the background and photo, plus I love Mandala's and any sort of Bohemian look and I think the colours and chipboard make the layout unique, different and interesting. 

Let me know what you think !

That's it from me today, thanks for stopping by the blog :-) 

Hugs 

Elisa xx


Thursday, May 17, 2018

May Layout by Lisa Amiet


Hello again!
It's Lisa here today to share some more 2Crafty goodness with you, as promised :)

My layout today features one of my wedding photos from may years ago....


For this layout I have used some of the gorgeous 'Pointed Doily Frames' that I have embossed in white weathered wood embossing powder. 
I have used these to frame some of the elements I have cut from my papers.


I have also used two of the flourishes from the 'Flourish Adornment Set 4',
that I have embossed in silver. 


 I have also used one of the 'Flower Medallions', finished in white.


Lastly I have also used some of the 'Sabine's Frame Set',
also embossed in white, tucked into my layers.


I really love the soft and delicate feel to this layout. I hope you like it too!

2Crafty Products Used:


Thanks for stopping by

Lisa


Tuesday, February 13, 2018

February Inspirations + Video Tutorial
by Lilibleu


Hello 2Crafty fans!

This is Lilibleu here today, giving you my February projects. I chose to create 
two pages very different one from one another about their colors and I also 
made a video for my second project!


"Enjoy The Journey"

For this first project, I wanted to make a sweet and feminine page with the
colors of Spring. I found a lovely picture of this appetizing cupcake on Pinterest.


I chose to use the "Sabine's Frame Set" chipboards for their round shape 
reminding the shape of the cup cake. I embossed them with mint green powder.


I really like the large size of my title which perfectly dresses my project.
 I painted it using a turquoise paint with silver glitters so that it fits perfectly
 with the colors of my page, while being clearly visible.  


I painted the large "Roxy's Flourish Vine" arabesque in metallic pink so that it
 stands out perfectly on my page background. I embossed the "Mini-Branches" 
 foliage with turquoise powder.


Just like the big arabesque, I painted my second "Mini-Branches" foliage in
 metallic pink. I gathered the flowers in a bouquet by mixing pink and turquoise.


2Crafty Chipboards used :
- Sabine's Frame Set
- Mini-Branches
- Mini cameras 
- Enjoy the journey title
- Roxy's Flourish Vine


"#Handsome"

For this second project, I also realized a page. I rarely scrap babies but I love this photo found on Pinterest (I had it for a long time), all the sweetness that emerges from the picture.

You will find the video of this project a little further down :)


I used a hot color scheme to complete this project. The beautiful 
"Flourish adornment set 3" foliage is embossed with gold powder and 
the "Foliage Set 1" is painted with copper paint.


The big heart that frames my picture is embossed with gold powder. I love
 the finesse of this chipboard, truly wonderful. The title is embossed with a
 powder that gives a weather-worn look.


And here is the video process : 

TO VIEW VIDEO CLICK HERE


2Crafty Chipboards used :
- Hashtag word set 1
- Flourish adornment set 3
- Frame Handrawn Hearts
- Foliage Set 1


See you next month !!
Lilibleu xx