Showing posts with label Mini Fob Watches. Show all posts

Monday, February 21, 2022

'Create' layout
by Rachael Funnell


Hello everyone!
Rach with you today sharing some more 2 Crafty inspiration...
where I have created this fun, little girly, little grungy, mixed media page.
And have included some great 2 Crafty Chipboard pieces.


2 Crafty Chipboard:
NEW Mini Scissors set
ATC - words 1
Aztec feathers
Mini Fob watches
Indian feathers


Starting with the super cute Mini Fob watch,
where I have ever so lightly added a coat of gesso...
Make sure not to take away any detail to the watch.


Next up is the Aztec feather, that I have partly sitting 
underneath my photo. Again using some gesso,
 I have given this feather 2 coats.

Also given 2 coats of gesso to the Indian feathers, 
and finished them off by blending a little bit of teal ink 


Lastly! For my title 'Create' & the New Mini Scissor I have sitting next right next to it.
Going with the same process by adding 2 coats of gesso, then inking the 'Create' 
with brown & the Mini Scissor, inking it lightly with an apricot.

Thanks for stopping by, 
I hope you have a FABULOUS week


Saturday, April 4, 2020

Be Your Own Kind of Beautiful
Layout by Elena Martynova

Hello crafty friends!

Hoping you are all keeping well in these difficult days and staying positive!

We are forced to stay at home, which gives more time for creativity. 
Finally, I can implement all my ideas that have accumulated in my notebook.

I made this layout using a beautiful paper collection  
and also the best chipboards from 2Crafty.

It has one main photo with a beautiful girl that I found on Pinterest.
But there are also some old framed photos that create part of the background 
and add atmosphere to the layout.

"Be Your Own Kind of Beautiful"

 
I created a layout with this absolutely gorgeous Flourish Adornment Set
I spent a lot of time decorating it. Several layers of paint, clear glossy, and more strokes of gold paint.
 It was interesting to add and add new layers.


The inscription was painted black and added volume and 
shine with black embossing powder.

 
My page is about generations of people which are forever linked.
 We keep portraits and photos of our ancestors and remember them in our hearts. 
I added a Mini Fob Watches as a symbol of the transience of time.


The Artdeco Heart added lightness to the layout and
emphasized the elegance and refinement of the girl in the photo.

Some close up photos:


I used the following 2Crafty Chipboard:


Have a wonderful day and be inspired.
Cheers, Elena.

Friday, January 13, 2017

January Inspiration By Lilibleu


"Timeless Moments To Remember"

Hello 2 Crafty Fans !!
Today, let me show you my two projects for January. I chose to make two pages
 in a romantic style with a lot of gentleness.

For my first page, I wanted to work with brown, gold, pink and white colors 
which to me goes just fine with a vintage photo.


2 Crafty Product Used:
Circle Lace Panel
Mini Fob Watches
Timeless, Moments to Remember 
Heidi's Vines


The title "Timeless Moments To Remember" is painted gold to highlight 
it from the background of my page which is very dark.


The "Heidi's Vines" are painted white and I simply put some dark pink ink
 on the fruits to make them stand out.


I also painted gold the "Mini Fob Watches" and the "Circle Lace Panel
that I first broke into pieces to make them match my page.


"Escape"

For my second page I used very different colors - green, turquoise and blue - and I 
wanted to make a very romantic page with this very lovely photo I found on Pinterest.


2 Crafty Product Used:
Bubble Clumps 
Mini Word Set 1
- Thistle Shrub
Giant Gears
Leafy Shrub Set 2  


I painted metallic blue the "Bubble Clumps" to make them match with my background.
 The "Leafy Shrub Set 2foliage is first painted white before I painted green the leaves.


I embossed in white the two big gears.


I also embossed in white the "Thistle Shrubfoliage.


And that's all for today!
See you back here soon with some more 2Crafty inspirations.

To visit my blog, that's HERE 


Monday, September 8, 2014

My September Shares by Marg Mifsud

Hi everyone and welcome to the 2Crafty Blog!
  Hope you are all having a fabulous day!!
I'm back to share my September projects created with some awesome 2Crafty Chipboard pieces.
This time around I have a card, a canvas and a masculine tag to show you.
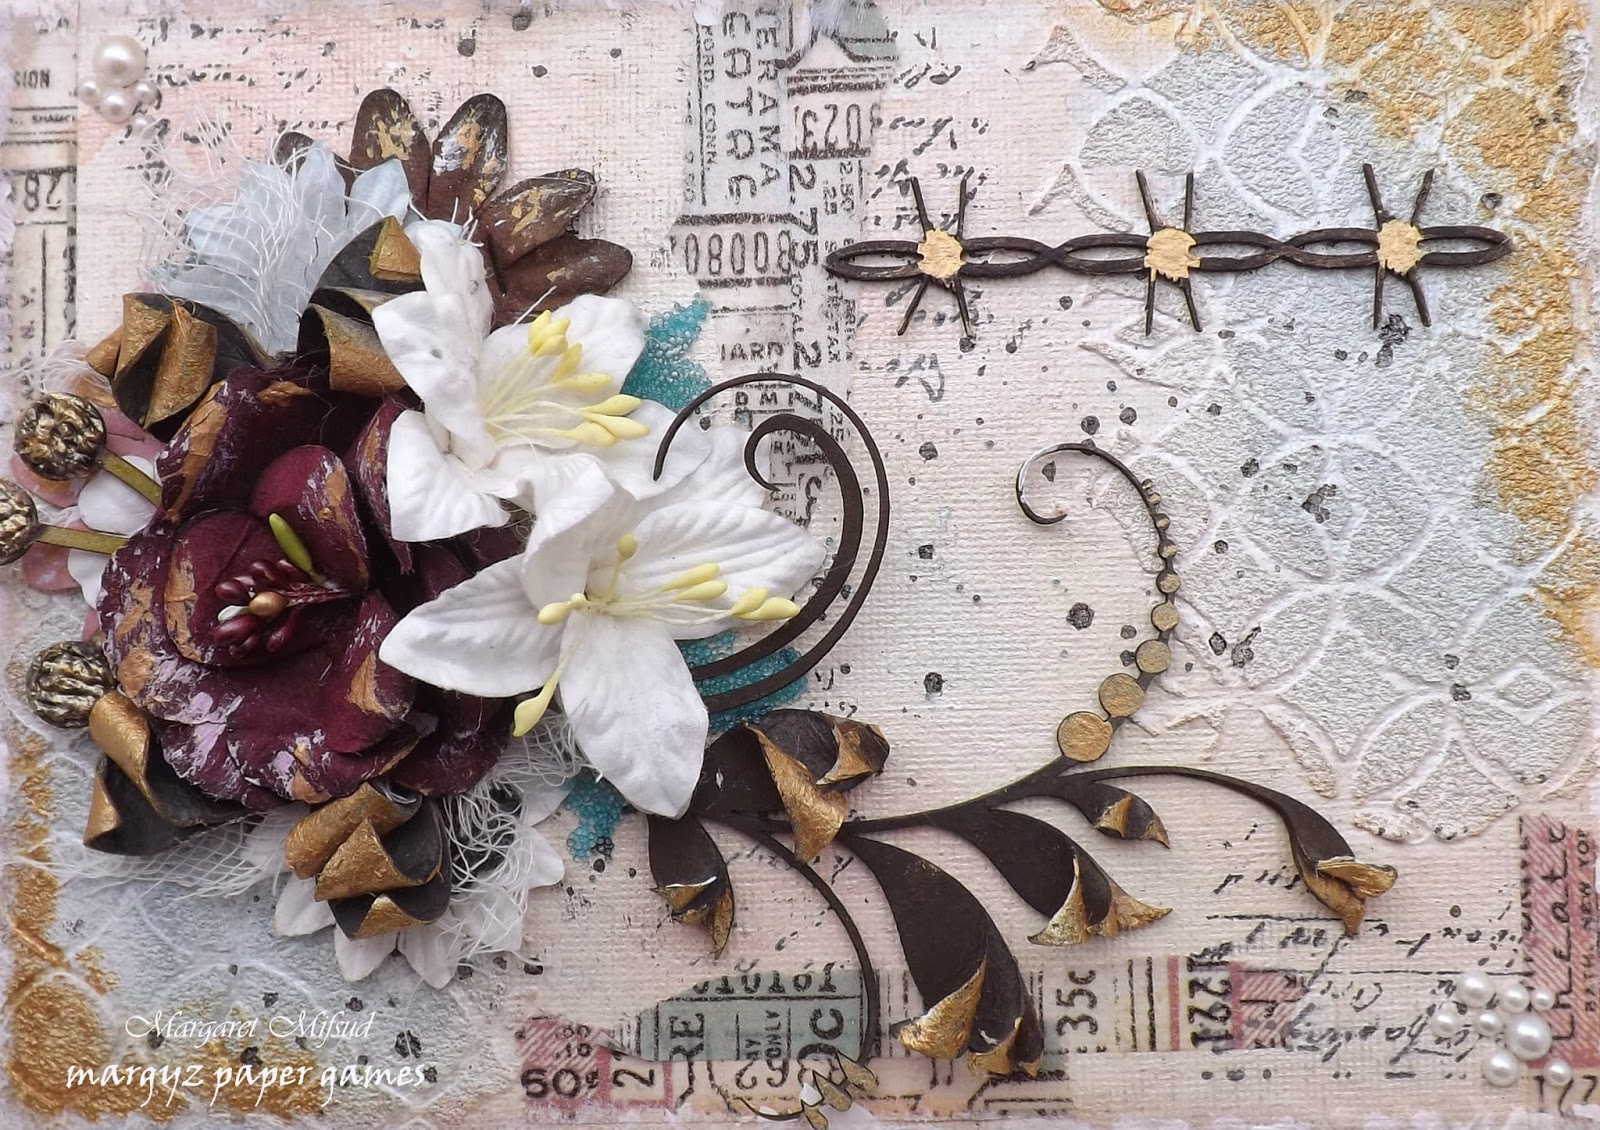
So, first of all, here is the card.
 
2Crafty products used
Mini Chicken 
Wire Barbed
Heidi's Vines


I lightly sprayed the back of the Heidi Vine with some water so it could be slightly shaped.
 It was then coloured with Distress Inks and brushed with gesso.  I also added some
 texture paste to the 'bulbs' on the ends and coloured them with Distress Ink and then
 swiped over the top with gold Versa Color.


The Chicken Wire Barbed comes in a 6" x 6" panel.  I simply cut off some small pieces
 and painted them with white acrylic paint.  While they were still wet, I sprinkled them
 with clear glitter and, when dry, tucked them in between the paper layers.  I love the
 look of torn paper and making some small tears over the chippies helps to show them off.


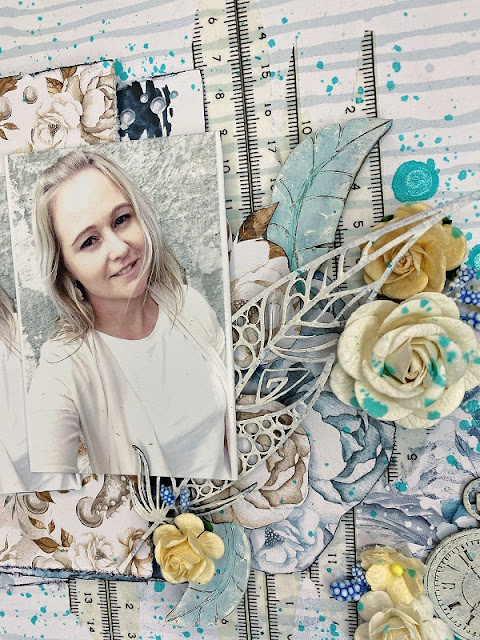
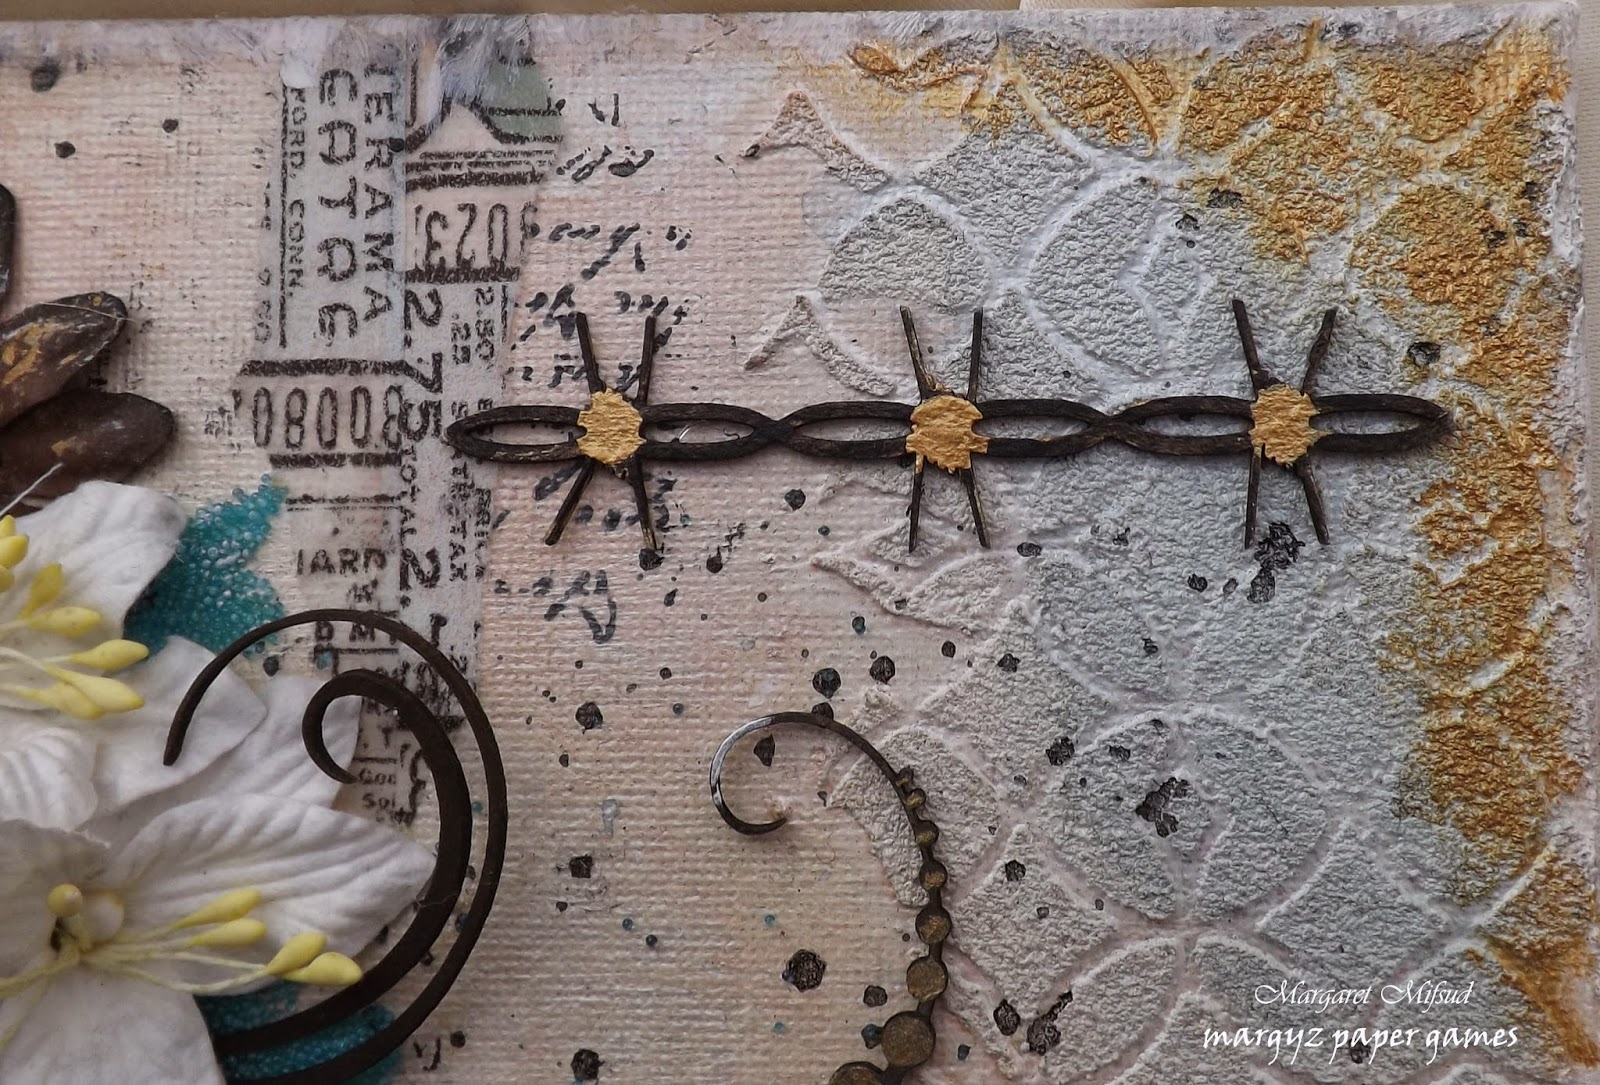
 Next, I have a small canvas.  It measures 5" x 7".
2Crafty products used
Heidi Vines
Leafy Shrub Set 1
Barbed Wire Border
 
I took a leaf out of Di Garling's book here in that I coloured these chippies black. 
 I love the dramatic effect of the black against the pale background and it really
 does make them stand out beautifully.  Thank you for the inspiration Di!
 

I had some left over pieces of the Heidi Vine from a previous post HERE and decided
to use them in the flower cluster.   As I did for the card, I again added a little
texture paste to the 'bulbs' and coloured them with Distress Ink but then used
gold acrylic paint for the accent.  The leaves were sprayed with water and then
 I gently separated some of the layers.  Shaped and curled the layers while they
 were still wet and coloured them with Black Soot Distress Ink.  Once they were
 dry I used the gold acrylic paint to colour the ends of the leaves.  


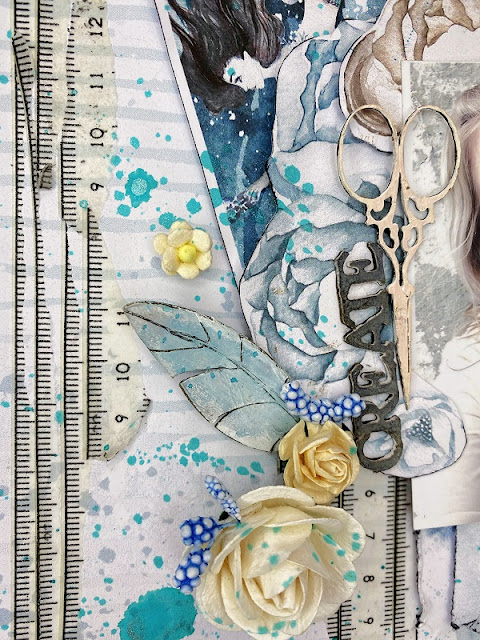
The leaves on the Leafy Shrub Set were shaped and coloured in the same way as the
 Heidi Vine leaves.  I really love how they turned out.  This is a fairly delicate piece
but it was still robust enough that it took the shaping very well.  I really love these
 chippies & they are so easy to work with and they look stunning!!


The Barbed Wire Border comes in a pack of two and they are about 12" long.
 I had intended to put a quote in the corner but decided instead to use a small piece
of the Barbed Wire Border as an accent.   This was also coloured with Distress Ink
 and gold acrylic paint.  


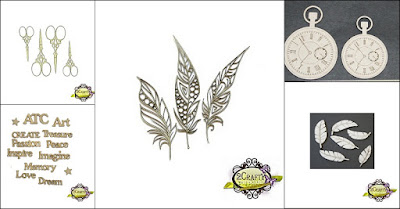
 My last piece is a Masculine Tag.

2Crafty products used..
Barbed Wire Border
Compass
Mini Fob Watch
Mini Rulers
Gears

A blank from the Tiny Edwin Corners


The small piece of the Mini Rulers was brushed with some watered down with
 gesso and, when it was dry, I swiped it with Tea Stain Distress Ink.  I coloured the
Compass with Distress Inks as well and then covered it with Clear Rock
Candy Crackle Paint.  Except for the ring around the edge which was left raw,
the Fob Watch was coloured with gold Versa Color and then covered in
 Glossy Accents.  I love that the details of the watch still stand out really well
 even after colouring it.  Awesome!!  


I randomly swiped the gears with Midnight Black Versa Magic and then with
Lapislazuli Versa Color.  I also used some Kaisercraft Red Gum and then Silver
Versa Color so that they appear old and rustic.  The Barbed Wire Border was also
 coloured with the Midnight Black Versa Magic and then randomly swiped
with a little silver and gold.


Originally I was just going to tie the word band at the bottom of the Tag but, it looked a
 little bare and needed something underneath to fill the space.  As I was looking through
 my chipboard pieces I discovered the blank from the Tiny Henry Frames
which I had used on a previous project.  I simply cut away one of the centers and
inked the edges.  Trimmed a piece of scrap paper to fit and then just tied the word
 band over the top.  It fills the space up nicely!!


Once everything was assembled and dry, I randomly swiped around the
 finished Tag with some watered down gesso.


That's all from me for this month.  Thank you so much for visiting and taking a look
 at my projects. I hope I have inspired you to get some fabulous 2Crafty Chipboard
 for yourself.  There are so many different shapes to choose from and, no matter
 what size your project, you are sure to find something that will add that special touch
 you are looking for.


And remember, to find a 2Crafty stockist near you, drop an email to...
salesat2crafty@optusnet.com.au

Take care and God Bless.
oxox Marg


Photobucket

Thursday, October 25, 2012

An Angel Story by Elena Olinevich


    Hello 2Crafty fans. Today I would like to share some  layouts I made for my baby son. He had his Christening ceremony this summer and I have found so many extraordinary photos that I decided to make an album for him.
   This time all my projects are inspired by a story I read recently in a Russian book. The idea is that you have to live your life in a good way, & that while you are being good, your angels can rest, because they can rely on you, that you won't do something bad, and thus they can help someone else who needs their assistance more, at this moment.  Beautiful story, isn't it?
So let's start and keep in my mind, that babies are like angels.
  My first layout  is called

 "While the Angels  Rest"

 I decided to use just very simple techniques this time,  to keep the
 delicate  mood of the layouts..
  So I have used Chandalier 1 


 I covered it with primer, then I added modelling paste, embossed it
 with a heat gun using Starburst embossing powder.
After that I inked the edges with brown chalk ink.
 

For the Clock Face Frames I used just the primer and embossing powder,
crackle paint and random dots of modelling paste.
 For the second part. The same technique was applied on Corner Rosie's


My second layout  is called
 "The Main Thing"

  Nothing special again, I just misted the
 Esther Name Plate
with Starburst mists.

Next I have just used the same techniques as I did
 with the  Helena's Corner.


Here I have  just added  some touches of gesso.
For the Iron Fence I covered it with Gesso, then Crackle paint
and embossed with Ruby Black embossing powder.


Here  I have  embossed the chandelier from Vintage elements 1.


  Here I have used a  Mini Fob Watch, which was just inked with Distress ink.


My last layout  was made for Manor House Creations,
& since the photo was taken on this same special day,
I have decided to include it also.
This layout is called
   Cherished Moments

 I have used the same techniques that I have already shared above.
 Here are some close ups on title Cherished Moments:


 Frames Tiny Henri's
(Great for a spot of journaling which I will do later)


Thanks for calling by today.
For more inspiration and projects using 2Crafty
you can visit  my blog.
http://eleele-handmade.blogspot.com/

Also we would love you to visit
2 Crafty on Facebook too.

Elena Olinevich