Showing posts with label Hello Beautiful. Show all posts

Tuesday, June 17, 2025

HELLO Beautiful by Tania Ridgwell

Hi there!
Tania joining you today to share the last of my DT projects for June. 
  I have created another layout for my second share. 


2 Crafty Chipboard Used:

*Ginny's Flourish Set
*Hello Beautiful
*Foliage Set 14
*6" Messy Square Frame"


I have used the stunning Uniquely Creative 'Serenity' Collection to create the base for my layout.  


I first painted all the chippie pieces with gesso.  Once dry I randomly dabbed on Kaisercraft Lavender and Heidi Swapp Amethyst Color Shine Sprays to all the pieces.  I then randomly dabbed on some more gesso over top of all the pieces.


I added paper layers under my photo and then added it to my background page.  I added the Messy Square Frame chippie over my photo and then embellished around the Frame using lots of fussy cut elements and paper blooms.  I tucked the Ginny's Flourishes & Foliage chippies in amongst all the fussy cut elements and paper blooms.  I finished off my page by adding the HELLO Beautiful chippie to the top left of my layout.

Thats' all from me today, I hope I have inspired you all with my Layout. 
 Until next time thanks so much for stopping by.
Tania xx

Monday, June 2, 2025

"HELLO beautiful"
Layout by Marie Sabatier

Hello everyone,

Here's my first source of inspiration for June: 
a layout featuring vibrant colors, contrasted by touches of black. 
In a flower market-themed style, I opted for the refined use of "Frame Tiny Henri's" in slate style.

"HELLO beautiful"


To add relief to my background, I use the "Geo Circle Panel" chipboard, which I cut into two parts. I simply tint it with "Distress Oxide" ink in "black soot."
To create an embellishment cluster, I use "Frame Tiny Henri's" chipboards. 
I apply a layer of white gesso to the frame and the black paper background.
Finally, I add some splashes of gesso to make them shine.


The title is covered with two layers of white gesso. 
It perfectly expresses the unconditional love I have for my granddaughter.


A close-up that only serves to captivate the eyes.


Easy creation of a layout with superb chipboards and a touch of subtlety thanks to the
 "Frames Tiny Henri’s".


Thank you very much for watching.


Wednesday, May 18, 2022

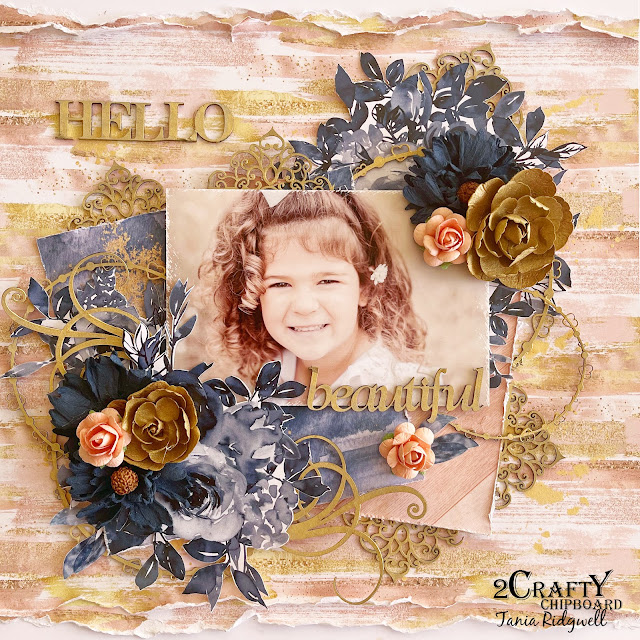
Hello Beautiful Layout by Tania Ridgwell

Hello there! 

Tania with you today to share the second of my DT projects for May.
  I have created another layout.
  I just love the colours in this layout - especially the Gold!!!


2 Crafty Chipboard Used:

*Circle Heart Frames
*Flourish Adornment Set 4
*Hello Beautiful
*Delicate Lace Border


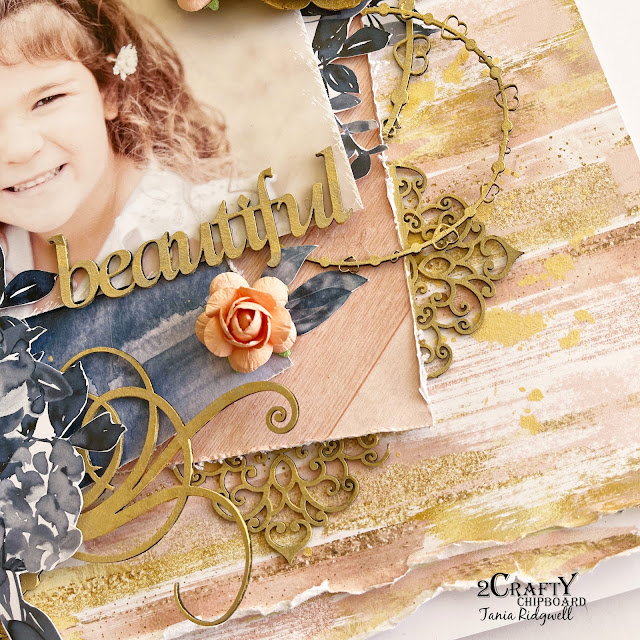
I just love this paper range and couldn't wait to use it and add lots of extra pops of gold to it.  Once I had created my background,  I chose my chipboard pieces and coloured them all with Inca Gold Paint.


I added my photo and tucked in the Circle Heart Frames between the paper layers and under my photo.  I then embellished around the photo using fussy cut elements and flowers.
I cut up the Delicate Lace Border and tucked pieces in between the paper layers and under the flowers.


I added a Flourish Adornment to each side of the flower embellishments at the bottom left of the photo.  To finish the page I added the Hello Beautiful Chipboard Title.


Thats' all from me today, I hope I have inspired you all a little with my Hello Beautiful Layout.  
Until next time thanks so much for stopping by.

Tania xx

Wednesday, October 21, 2020

Hello beautiful
By Marie Claude Rodier


Hi everyone,

For my latest October post, I played with CSI case 334, details can be found below my layout.

Hello beautiful


I am not a big fan of Halloween, so instead of using traditional costume picture and theme, 
I used one of my favorite black and white photo of my eldest son. And I chose to go 
with a fall inspiration using most of the color scheme and a few clues. 


Hello beautiful was first painted with brown acrylic and embossed with Tim Holtz’s
 Rusty Hinge Ditress Embossing Blaze. It created such a beautiful shiny rusty look!!!


Hessian Patch Panels were painted with teal acrylic and tucked under the central paper cluster.


Frame Jenna was primed with white gesso and embossed with the same Tim Holtz embossing glaze.
The white background gives it a completely different look, It’s lighter and more vibrant. 


2Crafty Product used...
Frame Jenna
Hello beautiful
Hessian Patch Panels


Until next time, be happy and be creative!

Marie Claude
xx


Saturday, April 6, 2019

'Hello beautiful' by Tammy Klingner

Hi there chippy fans,

Tam here today, I've popped in to share my latest layout titled:

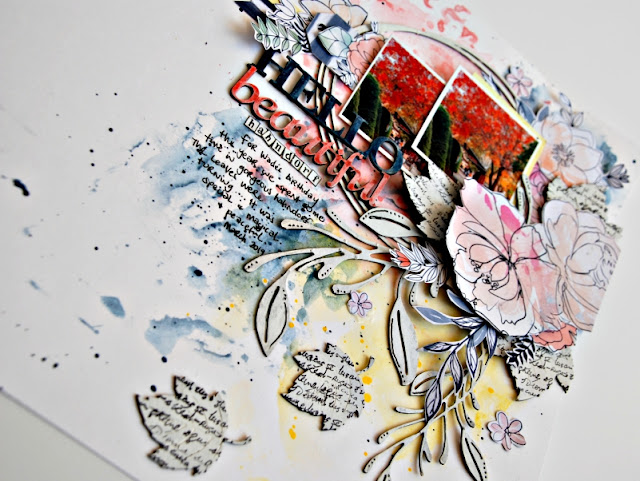
"Hello beautiful Hahndorf"


For those who follow my work, you know I am all about COLOUR, and usually the brighter the better!  Today I wanted to challenge myself and add some softer tones.


I spent a recent weekend in the Adelaide Hills in a gorgeous town called Hahndorf.  It's quaint and authentic and we were lucky enough to visit as the leaves had begun to turn.


I used the following 2Crafty Chipboard:

'Hello beautiful title'
'Autumn leaves'
'6" revolution frame'
'Amelia flower stems large'
'Amelia flower stems small'


I painted the 'Amelia flower stems large' and the 'Amelia flower stems small' with white gesso and then added white acrylic paint.

I wanted them to be really fresh and white.


I then added them in underneath the cluster of flowers.

To finish them off, I added a touch of doodling to them using a black gel pen.


I repeated this process for the '6" revolution frame' to get it a vivid white.

I didn't add any doodling to this, I just used it as a frame around the photos.


I also completed the above process on the 'Autumn Leaves', however to finish them off, I stamped with a script stamp over the top.


I absolutely love how this looks!
Soft and yet textured and interesting.


I added these leaves to the flower cluster and also placed them on the layout so they looked like they were falling.

I did this to emphasise the Autumn feel.


As this page is soft and contains pastel tones, I wanted my title to be soft and yet still be a focal point of the layout.

I coated it in white gesso and then added some watercolours to the words.


I love how the watercolours have dried with an ombre effect.

I also love that the different fonts are in different colours.

I love that about 2Crafty chippy titles.


There you have it.


I'll pop back again a bit later in the month with more inspiration.

Until then you can see my on my blog.

Lots of creative love
xxx


Wednesday, February 21, 2018

February Inspiration with Sabrina Turpin

Hello 2Crafty fans,

It is my turn to share my February layouts. Playing with the 2crafty chipboards is 
always a pleasure.
 I hope you'll like my layouts as much as I had fun to making them!
.
"Hello Beautiful"
Hello Beautiful is a layout made with the school photo of my daughter.


In the "Hello Beautiful" layout, I embossed the "Feather" chipboard
 with a copper embossing enamel.


 The "Pointed Doily Frame", the "Decorative Disc Set #1" and the "Winter Twig Branches"
are inked and embossed with different colors of embossing ink. 


For the title, I used  aged white embossing enamel.

2Crafty Chipboards Used...
Hello Beautiful
Decorative Disc Set 1

Feather
Pointed Doily Frame
Winter Twit Branches


"Perfection"

For my "Perfection" layout, I decided to use a black background 
that I found gave it gave a boyish look.


For this layout, I used the "Diamond Chunks Bits" as a background, which I 
embossed with silver powder and then used black embossing ink on top of it.


I diluted some charcoal paint and applied it to the "Swirly Star Border". 
This gives a nice effect where the chipboard looks very roughly painted.

For the "Steampunk Gears", I also used paint, but a metallic navy blue one which I diluted less.


For the large "Wire Star" in the background, I used regular undiluted grey paint.


Finally, for the title, I used white embossing powder on the word: Perfection.


2Crafty Chipboard Used:
Perfection
Diamond Chunk Bits

Steampunk gears Medium
Swirly Star Border
Wire Stars

I also have an extra layout to present, because I'm a guest designer the CSI blog.
 I created this layout for the #248 CSI: Colors, Story, inspiration.

For this month, 2Crafty Chipboard is sponsoring their challenges. 


I used "Hearts Clumps" for the background. I applied a white gesso on it and
 I applied some waterpaint powder to the background. 


I left the "Mini Branches" chipboard at their natural color. For the little 
"Messy Square Frame", I used a glittering embossing powder.


Finally, for the title, I used the word "Love" from the "Fine Words Set #1"
 and applied embossing ink.

2Crafty Chipboards Used..
Mini Branches
Hearts Clumbs

Fine words Set 1
Messy Square Frames

I hope that my layouts inspired you!