Showing posts with label Be yourself title. Show all posts

Friday, August 16, 2024

Be Yourself by Tania Ridgwell

 Hi there!
Tania joining you today to share the last of my DT projects for August. 
I have created another layout. 

"Be Yourself"


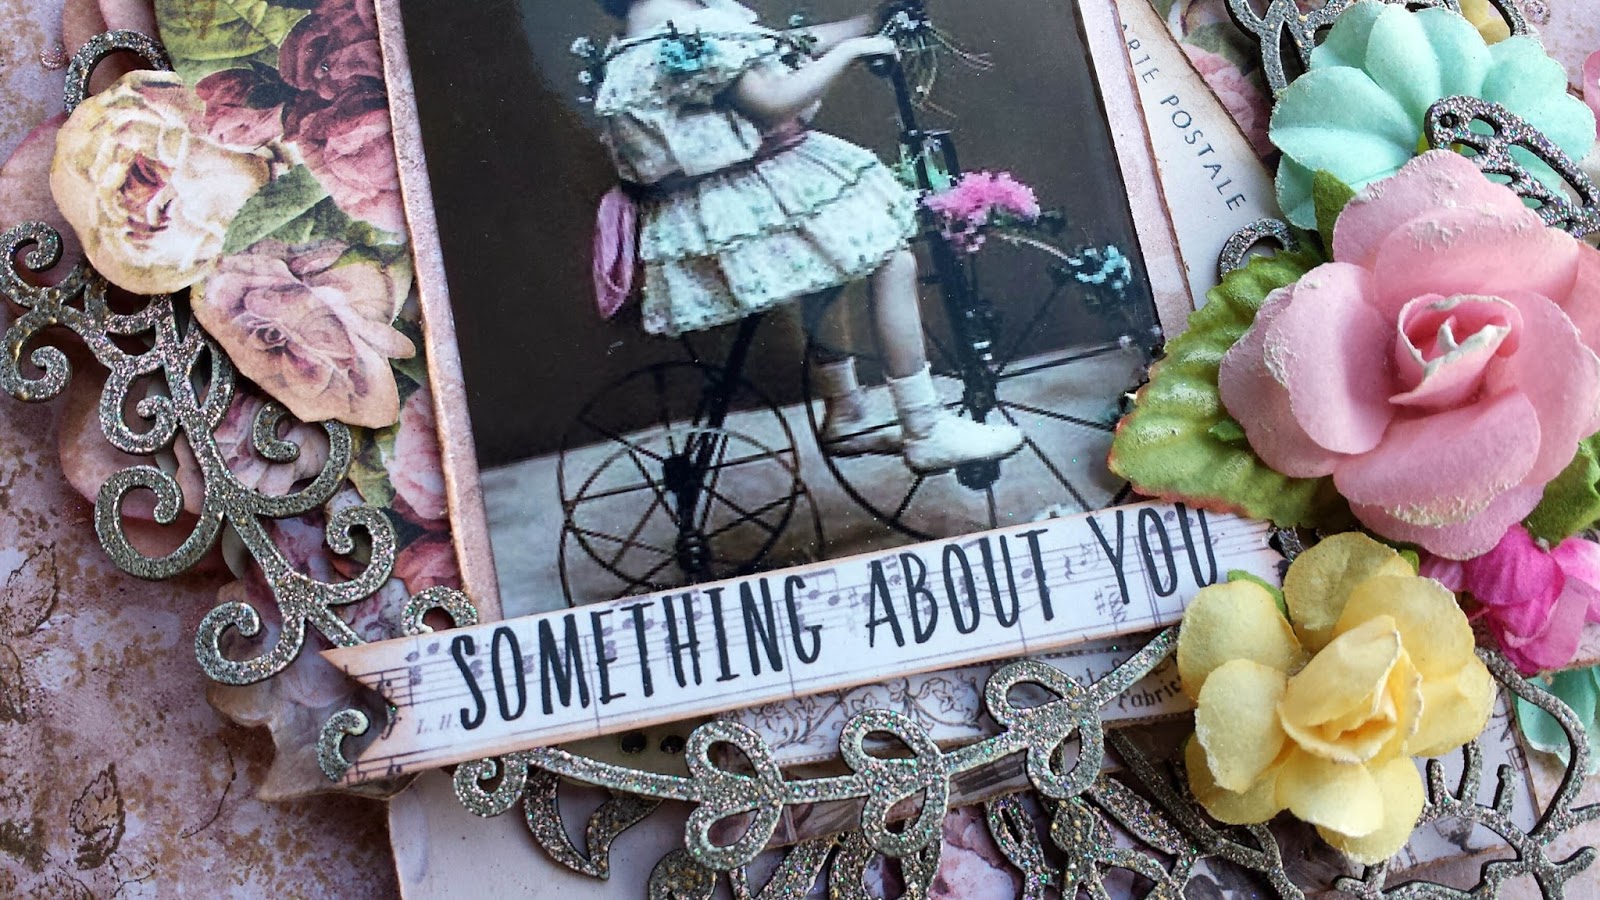
2 Crafty Chipboard Used:

*Frame Olivia
*Be Yourself
*Textured Tile Bits
* Mini Swirl 1


I have used the beautiful 49 & Market 'Kraft Garden' Collection to create the base for my layout.  


I coloured the Textured Tile Bits chippies using White Gold Wax.  I also used the White Gold Wax on my "Be Yourself" chippie title and once this was dry I randomly dabbed on some Kaisercraft Turquoise Mist.  The Olivia Frame and Swirl chippies were sprayed with Kaisercraft Turquoise Mist and once dry I randomly added some Frost White Shimmer Paint to them to tone down the colour slightly. 
 I added lots of paper layers under my photo and added it to the centre of my page.


Lots of paper blooms added to the top and bottom of my photo.  I cut the Olivia Frame chippie in half and tucked one half along the left of my photo and the other half along right of my photo.
I cut the Textured Tile Bits chippies into pieces and tucked them and the Swirl chippies in amongst the flowers.  I finished off my page by adding the Be Yourself title.


Thats' all from me today, I hope I have inspired you all with my Layout. 
 Until next time thanks so much for stopping by.
Tania xx


Friday, November 23, 2018

'Be Yourself'
Layout by Rachael Funnell

Hello 2 Crafty Fans!
Rach with you sharing another bit of November inspration
using some fabulous 2Crafty Chipboard...
This layout features my teenage son...

'Be Yourself'

2 Crafty pieces used: 

Deer head
Stars from ATC - Tiny heart & Stars
 6" Checkerboard piece
Be Yourself (title)
Geometric arrow
Always fine word from set 1

Since I decided to work with a darker background/base page & still wanted the chipboard 
to stand out, I thought white would be the way to go using gesso on the 6" Checkerboard piece 

A little TIP: using my photo as a template & getting more out this 6" Checkerboard piece,
  I've cut away some of the checker and replace it using some negative chipboard... 😀
 Then I cut that piece into some smaller pieces & placing randomly onto my page....


The ATC tiny stars have a coat of gesso, then inked with Tim Holtz - Peacock feather....


The Geometric arrow I've given a couple of coats of gesso, then cut it into 3 pieces ...


Both the Always fine word and Deer head have been inked with black....


Finally the Be Yourself title, I started with giving it a coat of gesso, then inking
 with the Tim Holtz Peacock feather & black inks.....


That's it from me today! Thanks for stopping by...
Until next time x


Thursday, September 21, 2017

September Inspiration & A Picture Tutorial
By Debbie Burns

Hi everyone!
  Debbie here with you today to share my September layouts featuring lots of 
2Crafty Chipboard.

"Enjoy Today"


2Crafty Chipboard Used:
Ariel's Spray
Leafy Shrub Set 2
Butterfly Frames
Corine's Swirl
Enjoy Today
Sammi's Swirls


Along the left side of the photo I placed the Ariel's Spray embossed white along with
 Sammi's Swirl embossed peach, and a piece from Corine's Swirl embossed peach.
Tucked in the flowers I used a piece from Leafy Shrub Set 2.


To the right of the photo I used pieces from the Corine's Swirl embossed green. 


The Butterfly Frame was painted blue and then sprinkled with blue glitter.


Enjoy Today title was embossed peach.


"Be Your Self"


2Crafty Chipboard used:
Edgar's Swirls
Sharon's Butterflies
Be Yourself
Frankie's Frames
Element Set 1
Trudi's Vine


 I embossed the large piece from Frankie's Frames,  along with Edgar's Swirls and
Trudi's Vines with a mixture of antique taupe and pink embossing powders.


Sharon's Butterflies embossed with light pink and the title with antique taupe.

I've created a PICTURE TUTORIAL for you to view my creative process:...


Step 1:  Add some light stamping along with some masking using a light gel medium
and then embossing with light pink embossing powder.


Step 2:  Begin your layering process.


Step 3:  Continue to build up your layers.


Step 4:  Add your photo.


Step 5:  Add chipboard:  Frankie's Frame, Edgar's Swirls and Trudi's Vine along with flowers.
Apply some additional stamping along the edges of your paper background.


Step 6:  Add additional flowers to the right of the photo and build up some paper layers.
Add your title and Element Set 1.

I hope I have inspired you.
See you next month!
. . . Debbie


Saturday, March 21, 2015

Be yourself by Melenia

Hello, 2 Crafty Chipboard fans!
Melenia Agapides with you today!

I would like to share with you my page 
from the Scrap Around The World March Challenge,
in which, the 2Crafty DT members get to play along, as 2Crafty is sponsoring.
I had the honour to contribute as a guest Designer!

The lovely moodboard,is a totally modern, graphic-design oriented beauty!
So I tried to stick close to its style and produced a modern page,
pretty outside of my comfort zone.  As you will notice, 
there is not a single flower in my layout!


The page is absolutely based on the following amazing 2 Crafty Chippies:


Apart from some string under the photo,
there are no other 3D embellishments on my page, other than the chipboard.
Nothing else was actually needed!


Ok what I did was to paint the Mini Cameras,
the Film Strip and my title with acrylic paint.
I painted the Film Strip with Silver Metallic paint,
in order to be able to merge it with the rest of my elements more efficiently.


For the rest of the chipboard,
since I wanted to create much contrast to the white background,
I chose really intense colours, like bright yellow and black.


As you probably know, I'm a glitter girl.
I couldn't leave my page without Silver Hologram Glitter.

That's all from me for now!
I hope you liked my page!


And remember, to find a 2Crafty stockist near you, drop an email to...
salesat2crafty@optusnet.com.au


Photobucket