Showing posts with label Ariel's Spray. Show all posts

Monday, August 31, 2026

Memories - Laura Gilhuly

 Hi everyone!
I am back to share another layout I created for my husbands childhood album!


2Crafty Products used:


Fine Word Set 3
Mini Lattice Bits
Ariels Spray
Decorative Circle Accents


I love this flourish - it is so beautiful!  I prepped all the chipboard with gesso then used an orange and green gelato.  I spritzed with water then rubbed with my finger.


I tucked the decorative circle under the photo and embossed the title in white so it would stand out a bit.


I added the mini lattice bits with the flower clusters adding texture to the cluster.

Tthanks for stopping by


Saturday, June 4, 2022

Beautiful Memories Layout by Tania Ridgwell

  Hi there!  

Tania joining you today to share the first of my DT projects for June a Layout.

"Beautiful Memories"


2 Crafty Chipboard Used:

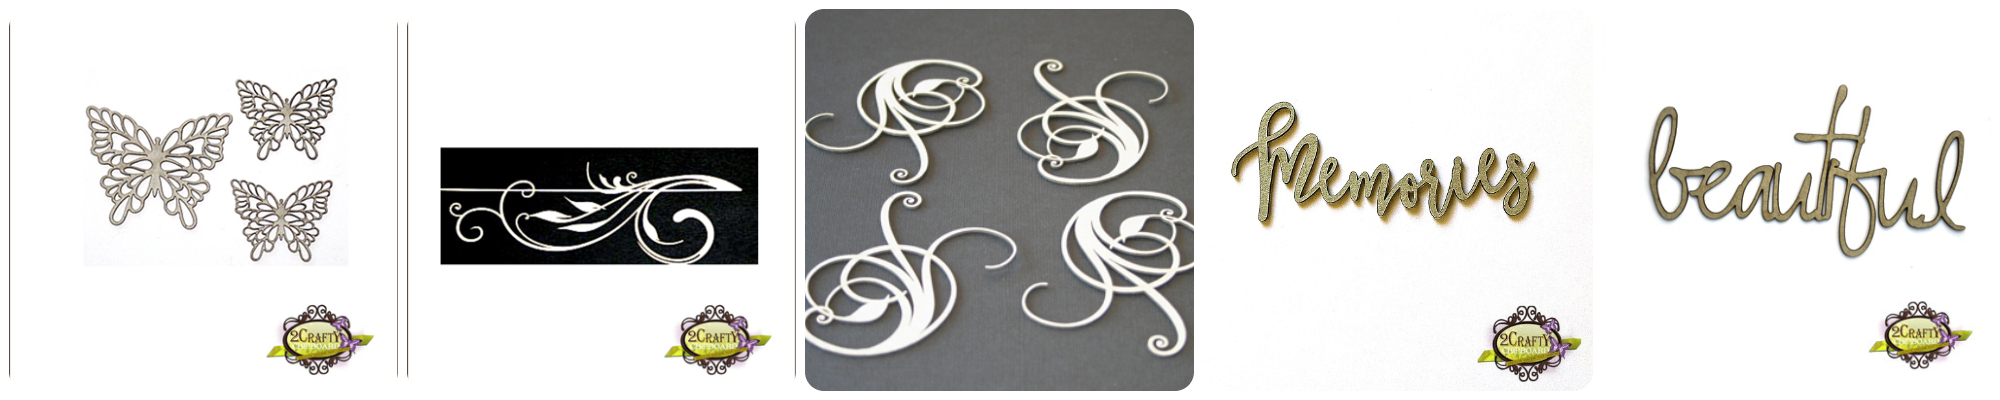
*Freda's Butterflies
*Ariel's Spray
*Flourish Adornment Set 4
*Memories
*Beautiful Loopy Font


Once I had chosen my papers and created my background I set about painting my Chipboard in coordinating colours.   The Ariel's Spray & Flourish Adornments Chipboard are painted with Art Alchemy Opal Magic Green-Gold Acrylic Paint and the Freda's Butterflies, Memories & Beautiful Loopy Font Chipboard are painted with Art Alchemy Opal Magic Aqua-Rose Acrylic Paint.


I added my photo to the page, then added the Ariel's Spray along the bottom of the photo and arranged the fussy cut elements around the photo.  I tucked the Flourishes and Butterflies in and around the fussy cut elements and embellished my page using a variety of flowers to compliment the chipboard pieces I have used.


To finish my page I added the Beautiful & Memories Chipboard for the title.


That's all from me today, I hope I have inspired you all a little with my Beautiful Memories Layout.  

Until next time,
Thanks so much for stopping by.

Tania xx

Tuesday, January 19, 2021

Live it up
by Sabrina Turpin

Hello 2Crafty fans!

I hope the new year is treating you well so far!
 Today, I'd like to share a layout showcasing my favorite moment of 2020: our camping trip
 where we visited a bunch of amazing places around Quebec.
 This was during a "break" in the pandemic where the number cases was much lower and going
 out and around felt amazing after several months of staying at home.

"Live it up"


On the "Ariel's Spray", I applied metallic pewter paint and then dabbed some raspberry embossing ink.


On the "Lattice Leaves", I applied burgundy embossing powder and then dabbed a bit of silver embossing ink on top.


For the title, "Live it up", I applied two coats of black embossing powder. Then, I sprayed a few drops of metallic paint.

I used the following 2Crafty chipboards in this layout:

Ariel's Spray [db0002]
Lattice Leaves [m00589]
Live it up [w00222]


That's all for me today!
 I hope you enjoyed this layout and that it gave you some inspiration for your own creations!
 I'll be back soon with more ideas to share with you. 
Until then, happy crafting!


Sunday, January 3, 2021

“So Beautiful”
By Chris Tingey


“So Beautiful”


Hi everyone, I hope you have all had a wonderful Christmas, 
I am so excited to show you my very first project for 2Crafty. 
I have created this layout and used one of my favourite photo's of my daughter. 

2Crafty Chipboard Used...
Flourish Adornment Set 6
Sharon Butterflies
Leafy Shrub Set 2
Thistle Shrub
Stitched Lace Border
Ariel Spray


To start with I gave all the gorgeous Chipboards a couple of coats of white paint, it doesn't 
need to be perfect, I quite like it to look a bit textured, so dabbing it on adds to that. 


I stitched along the edge of the Stitched Lace Border Chippie with some lavender coloured thread....


I love the fact that the chippie's are quite flexible, so I layered up the butterflies 
and shaped their wings to give some height....


I also shaped some of the beautiful flourish stems and tucked these 
in and around my fussy cut flowers....


I added the beautiful Ariel Spray Chippie to the left of my photo to frame it -
 with some more of the layered butterflies....


I love the Thistle Shrub.....I divided it up and tucked little bits of it to the right and left of
my photo and also added one of the chippie's from the Leafy Shrub set....


I hope you like my layout and I hope I have inspired you to layer up, 
shape and maybe even stitch on your chipboards. 


Tuesday, February 4, 2020

Layout "Space Cat" by Elena Martynova

Hello and welcome to the 2Crafty blog!
For today's project, I have created a layout featuring a photo of Space-cat.

 I applied a texture paste through a stencil 
at the junction of the
two papers. When it was dry, I painted it with sprays.


 I did some random stamping 
and permanent black ink.

The chipboard is covered with Lindys "Twilight Bronze Slate"
 embossing powder. To show its texture, 
I slightly tinted some places with white Gold wax.


Lots of flowers added to the composition on the page. 


In this photo, you can find the small letter "f " from the Alpha Set 1.
 And if you are very careful you will also find a "t" next to the photo of the cat :)))

I like to add such small details. They complicate the work and make it more interesting.

Wonderful curls of Ariel's Spray set the direction of the entire
 composition on the page. I loved using it as a decoration
 that I will definitely order it a few more times!


 I used the following 2Crafty Chipboard:


That's all for today.
We thank you so much for coming by and for supporting us here at 2Crafty.

I'll see you next time!

Cheers, Elena.

Friday, March 23, 2018

March Inspiration By Bec

Hi all, today I'm here to share two layouts that I have made this month.

This Boy

I also made a video tutorial for this layout so please enjoy.


First up is my take on a masculine layout with flowers.

2Crafty Chipboard  used:
Star Circular Frames
Star Bubble Set
ATC Tiny Hearts & Stars Pack
This Boy title

TO VIEW VIDEO CLICK HERE:


I love the all the different star chipboard pieces in the 2Crafty range, so on this layout
 I used 3 different star chipboards.


Close up of the gorgeous Circular Star Frames and the cute Star Bubble Set.


This layout was made using 49&Market  papers and flowers.


Love

Next up is a layout featuring both my kids.


 2Crafty Chipboard  used:
Elsa Frame
Word Circle Set 1
Ariel's Spray
Chloe's Vines


I coloured the Elsa Frame with an embossing powder in Aged Ivroy, 
I then cut the frame in half and placed it under my photo.


I used embossing powder to colour all my chipboard pieces on this layout. On the 
Ariel's Spray I used a light purple embossing powder. Then a shabby white powder
 on the Love title from the Word Circle Set 1.

On the Chloe's Vines I used 3 different embossing powders. To get the multi colour effect I first used Versamark embossing ink on the chipboard, next I sprinkled the embossing powder in patches until I had all 3 colours on before I heat set the powder. The colours I used were, gold, beige and teal.


This layout was made using 49andMarket papers and flowers.

Thanks for visiting

Bec 💗


Tuesday, December 5, 2017

December Projects by Sandra Bernard

'' Christmas Day ''


Love that time!! Just before Christmas, the lights on, the decorations all around, just love it...

2craftychipboards used:

Corner Sweet Holly

Christmas Day Title

Ariel's Spray


I tried to create a layout with a magic side. I put a lot of layers to get dimension. 


I treated the Corner Sweet Holly and Arial's spray in the same way,
in just leaving it raw & adding gesso in just in some areas.


For the title Christmas day, I also put gesso on it in creating some textures.
 I added gold paint in randomly to get more highlights. 


''Merry Christmas Cards''

I love making cards thiis time of the year. 

 2craftychipboard used...:

Holly Leaves

Merry Christmas Script Card Pack

Pointed Ornament Set

Swirly Star Christmas Tree

Majestic Reindeer Set 


I really enjoy making these cards. I just played with embossing powders to color all of them.


I used an embossing glue pen to get some different colors areas on the swirly star Christmas tree.
 I used green for the tree, red for the small stars on it and gold for the star on the top.

The title Merry Christmas is embossed with red powder on this card and the
 Majestic Reindeer Set in gold.


For the other card, the title was embossed with gold and red powders to make an ombre effect. 

Love to play with pointed ornement set.
 I embossed in red the bases and make the shapes in gold to create deeper effect. 

I also embossed Holly leaves in green with some gold on the edges.


Hope you like my projects and that I have given you some new ideas to create...

That was my last post for 2crafty chipboards, I would like to thanks Vanessa and Di
 for all their support... I loved creating for you, and the 2Crafty fans... see you around soon...
San xx