Showing posts with label Old Fence. Show all posts

Monday, October 28, 2024

'Paradise Found'
with Lisa Amiet


Hello 2Crafty fans!
It's Lisa here with some more scrappy inspiration for you.

'Paradise Found'

 
2Crafty products used:


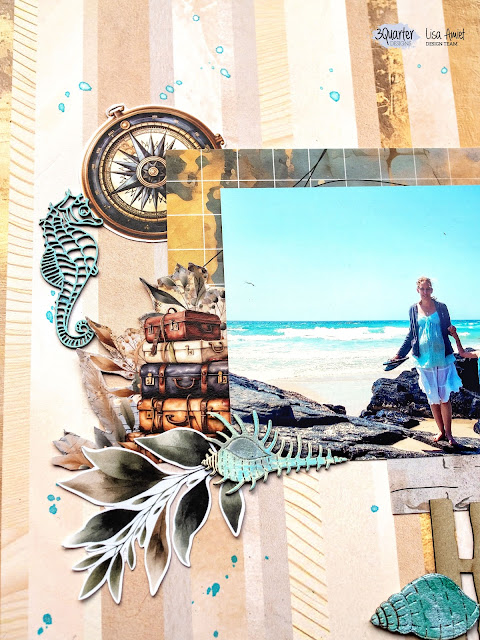
For this layout, I have used one of the 'Seaweed Set 1',
that I have finished in a watercoloured blues,
and tucked into my elements.

 
I also used a few of the 'Seashells Set 2',
also finished in multiple shades of blues.  
 
I then used one of the 'Intricate Seahorses',
also finished in aqua blues.
 
 
For my title, I used the 'Paradise Found' title,
again finished in the multiple blue shades.
I have layered this over one of the 'Old Fence' pieces, 
which I have left raw and layered
with some of the 'Seashells Set 2'.

 
I really like the blue shades
over the natural raw finish of the chipboard.

 
I just love the fun beach colours and vibes to this layout.
I hope that you like it too!
 
Until next time,
 
Lisa
 

Wednesday, October 9, 2024

Fun In The Sun
Laura Gilhuly

 Hi!
Laura here today to share my next layout!


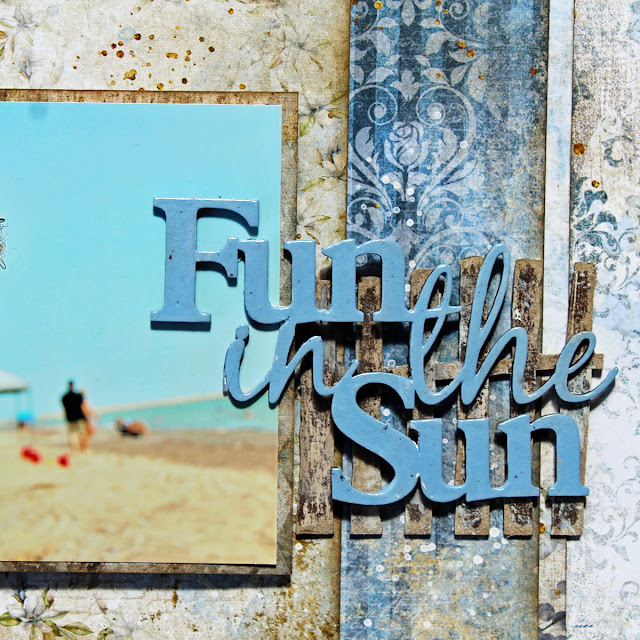
Fun in the Sun


We like to spend a lot of time at the beach and I like to take a lot of photos while we are there.

2Crafty products used:


I painted then heat embossed the title.  While the embossing powder was still wet I drop a
small amount of white and brown paint on the title


All the pieces were covered in gesso, then painted in either brown or white.  After the paint dried I sanded to create a more shabby washed out look.  For the fence I also dry brushed a bit of white paint over it after I had finished sanding to add a more aged look


I cut one of teh revolution frames and placed one on top and one under the photo.  I used a whole one under the photo.  I also added some altered grid bits into the clusters.

Thanks so much for stopping by


Wednesday, July 1, 2020

"happy life"
Layout by Marie Sabatier


Here I am with a new page for this month of July, already 6 months of the
 year have passed. Everything is going so fast!

I chose to make a summer page. 
I played with these two photos to make my layout.

"happy life"


2Crafty Chipboards used :

- ATC Title Sticks Set 3
- Circle-Revolution Frames
- Old Fence
- Winter Twig Branches
- Lighthouse


To start I applied a layer of white gesso on the chipboards.

On the "Lighthouse" chipboard I applied white cracking paste then a little wax.


For the "Circle-Revolution Frames" and "Old Fence" chipboards 
I applied brown embossing powder, once dry I rubbed with a file to give 
an aged appearance.


For the "Winter Twig Branches" I left natural just with a little white gesso.


For the title I just applied a little shiny wax to the white gesso.


Here it is finished.
 I hope this page has given you some inspiration especially with these wonderful chipboards. 

Thank you for always being here with us.


Sunday, November 25, 2012

Elena's November Mood

November is a very hard month for me to bear. It is too dull, too dark, too rainy, too cold in my part of the world. So I am struggling with this awful mood and here is my bright projects but still under November's influence for you.
The first one is called
Mother & Daughter
 
Yes, you are right , I love to use our photos in my projects
 
I decided to maintain the color palette used in Prima's papers and flowers, so I have a delightful pleasure to be warmed with this turquoise blue and peach shadows. But I wanted to add some shabby colors too, so I kept  the white accents on the chipboard.
I used the title Mother & Daughter
 

 I covered it with white Crackle Paint, then dabbed with acrylic paint in blue, turquoise and guava. I used a sponge to make some random spots.  Then I mounted some flowers on it, just wrapping them over the alphas.


The same technique I used on a 
Bunch of roses
 
I just added flowers to it, to add  more texture to create a bouquet.
 
Also I tried to keep a more visible crackle effect on 
ATC Georgian Frame
and just added the ink on the edges.
 
 
I used it as a padding for the resin embellishment
I kept the blue colors on the Birdcage 1 too.
 
 
I primed it with Gesso, then misted with Lindy's Staburst mist for some shimmering and then sprayed with Dyllusions ink. and you can see this 2-tone result on the chipboard cage.
  
 
  For my second layout I used autumn colors. 
 
  I have started randomly gessoing the chipboard. Then I added some acrylic paint with a sponge and a metallic acrylic paint with my brush
 
Birds on a Wire,
 
 I cut them and the other part I have already used on the other project
 
Penny Farthing
 I placed a big flower on it, which was gessoed too 
 
 
I wanted to add some rusty look on Old Fence, so I painted it roughly with a dry brush and
 the edges on the Miniature tree were inked with the chalk ink
 
I used the same techniques on
Grass Clumps
 
 
Finally my last Layout. I was thinking which one to share with you, 
and decided to finish with some winter colors. Next time I think I will have something  Christmas, so please stay tuned to see my Christmas projects.
but this time I want to show one of my favorite that I made for Manor House Creations.
 
It is a photo of me with my son. I love the tenderness of baby's skin. 
All of you who are mothers know this adorable feeling  of care and the smell of nativity.
That is why I choose the title 
Timeless Moments to Remember
 
I primed this piece with gesso, then applied texture paste and dabbed in blue acrylic paint .
 Next I took some Shimmerz and with a thin brush painted some stripes.
 
The technique used on the Summer Leaf Stem is very simple.
 I primed it with Gesso too and dabbed it with a sponge in light blue acrylic paint.
 
I hope you have enjoyed my projects and if you want to find more inspiration
 using 2Crafty chipboard you are welcome to visit  my blog.
 
TFW
Elena
 
 
Photobucket