Showing posts with label Christmas Decorative Ornament Border. Show all posts

Sunday, October 20, 2019

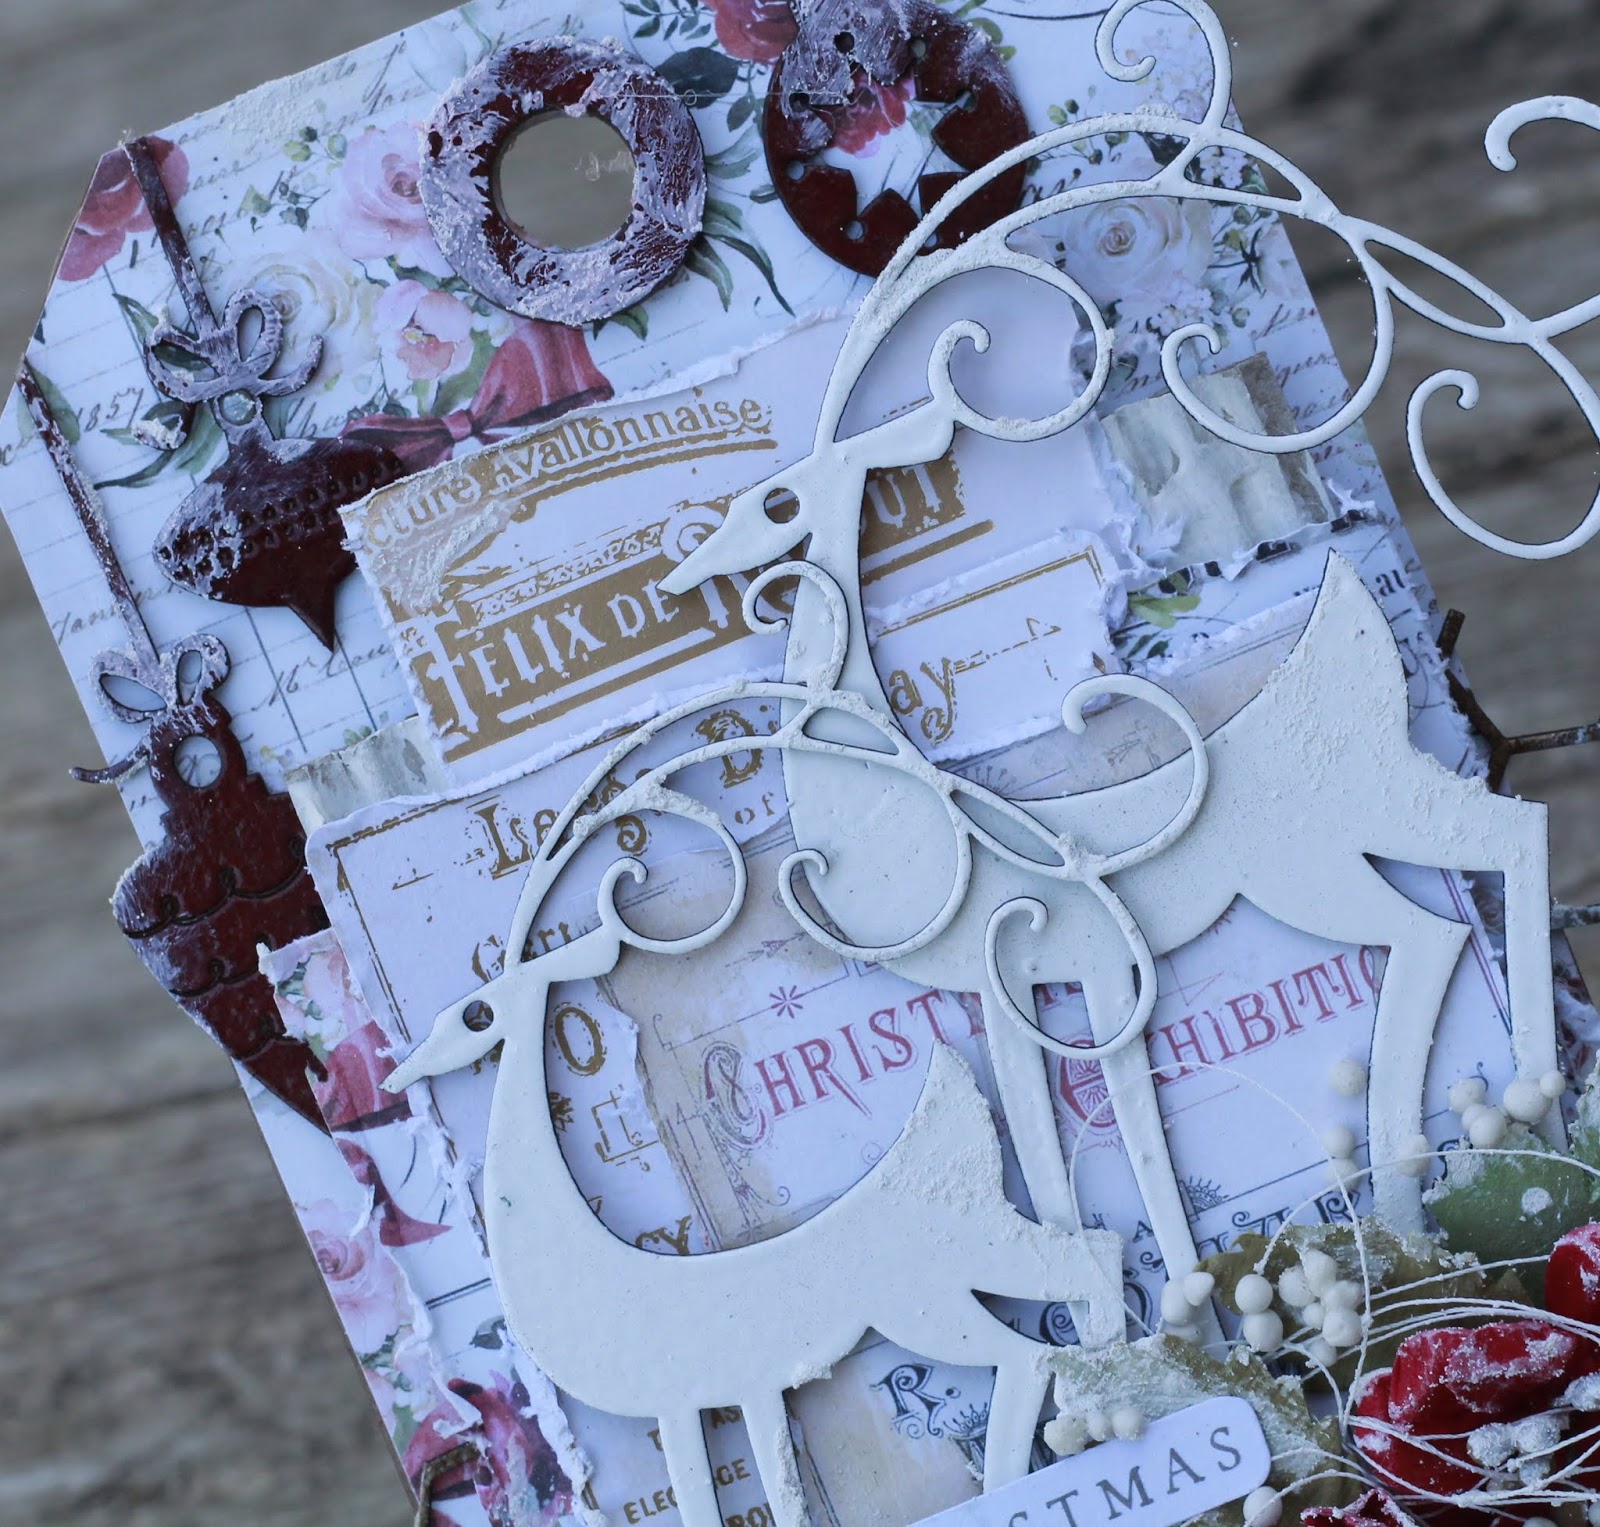
Christmas Tag By Karan Gerber

Hi Friends and welcome to the 2 Crafty Blog today.

Its Karan  Gerber here to share some Christmas Decor with you using some
of the Christmas selections of chipboard that 2 Crafty has to offer. 

With Christmas on my mind I thought it would be nice to create some Home Decor as
 this beauty would be perfect sitting on a plate stand with fairy lights around the bottom. 


The base is designed from the Tim Holtz etc tags and these are a very
 thick chipboard designed for mixed media. 


I heat embossed the Reindeer in white; the ornaments were cut apart from the
 border and used individually and heat embossed with Crimson embossing powder.


The Chicken Wire was embossed with Ancient Amber embossing powder and I
 cut it in half and it sits on either side of the paper layers. 


I love how this tag turned out and I hope I have inspired you to 
think about your Christmas Home Decor!


2 Crafty Chipboard Used:
Chicken wire
 Ornament Border
Blitzen 


Until Next Time:
 Happy Scrapping


Saturday, October 5, 2019

A Christmas Tradition Tag
With Karan Gerber

Hi friends and welcome to the 2 Crafty Blog today.

 Its Karan Gerber here with you once again to host the blog and I have another Christmas Tag
to share with you using some of the Christmas Chipboard pieces that 2 Crafty has to offer.


With Christmas on my mind I thought it would be nice to create some Home Decor as this beautiful tag would be perfect sitting on a plate stand with fairy lights around the bottom. 

The base is designed on a Tim Holtz etc tags and these are a very
 thick chipboard designed for mixed media. 

2 Crafty Chipboard Used:
Chicken wire
 Ornament Border
 A Christmas Tradition Title


I heat embossed the title in white, the ornaments were cut apart from the border and
used individually and heat embossed with Crimson embossing powder.


The Chicken wire was embossed with Ancient Amber embossing powder and I cut it in half.


I love how this tag turned out and I hope I have inspired you to think about your
 Christmas Home Decor!


Until Next Time: Happy Scrapping


Sunday, December 25, 2016

December Inspiration Projects
by Jaya Raghuvanshi

Hello 2Crafty Fans!

Wishing all, you wonderful people a very Merry Christmas!
 Today I have a few projects to share with you all using the gorgeous 2Crafty chippies.
 I hope you will like them and be inspired to create something yourself.

My first project is this really Christmassy layout I created.

" Smile"

Some close ups-


The title chippie has been covered with white gesso.
When dry I added some  black art sugar and caramel alcohol ink.
 The Christmas ornament border chippies have been colored using alcohol inks


I heat embossed the snowflakes in white embossing powder and
 the deer set has been covered in gold foils  

2Crafty Chipboards used-

Christmas decorative ornament border
Smile loopy font
Linear snowflake
Deer set
Ornate snowflake


Next up is this mixed media canvas I created. 

"Create"

Some close ups-


The chippie pieces here have been coated with gesso and painted. Once the paint was
dry I outlined the chippies with white pen to make them pop out.


2Crafty chipboards used-

6" Clock face frame
Square collage panel
Steampunk gears medium
Steampunk gears small


Hope you like my projects for the month.

Thanks for stopping by today!
Have a great day!


Tuesday, November 29, 2016

November Inspiration Projects with Jaya Raghuvanshi

Hello 2Crafty Fans!
Today I have a few projects to share with you all. I hope you like them.

"The Eyes Are The Window To The Soul"

Some close ups-

I cut my The Eyes title chippie into a few pieces and arranged them like so.
 All the chippies have been coated with gesso and then I used watercolors to add color to them.
I also added some mini art stones to the Whispy dandelion chippies to add some texture.


2Crafty Chipboards used-
The Eyes Title
Tiny Feathers
Beaded Hanging hearts
Whispy Dandelions


"Dream Big"

My next project is this layout with the title Dream Big.

Some close ups-


I covered the Dream Big title chippie in gesso and then used
chalk edgers to give the ombre effect to it.


The Flower doilies chippies are just awesome to add depth and texture in your layers.
 I love using them behind my photos.
 I framed the cluster using the 6"Circle revolution frame chippie.


2Crafty Chipboards used-
Dream Big
Circle revolution frame
Flower doilies
Shrub set 3


One more project I made the last month.

"Christmas Home decor"

Some close ups-


I applied some adhesive on the chippies here and once it was
 semi dry I covered it with Foils and ran through my bigshot.


2Crafty chippies used- Deer set
Christmas decorative border set
Stellar snowflakes


Thank you for stopping by!


Wednesday, December 3, 2014

Christmas Cards By Jennifer Snyder

Hello. 
 Jennifer Snyder here to help get a start on the holiday preparations.
  Let's get some Christmas cards checked off that giant "to do" list as soon
 as possible so we can move on to baking and shopping ( and eating). 

Don't get bogged down with complicated cards that you know you'll never finish in
 time to send out.  Keep it simple and let 2Crafty help take the stress from this task.  

One more BONUS?  They are FLAT and easily go through the postal system without 
adding postal expense and frustration of fitting in an envelope.  Now THAT is important.  
No dimensional embellishments needed.  

Here's my suggestion for the the season...Keep it simple! Work smarter, not harder.  

2Crafty has an incredible line of Christmas and Holiday chipboard designs that will help achieve this.   The beauty of these pieces is that most can be used to embellish your cards and leave you with little else to do but simply pop the chipboard on the card and sign your name.  How easy is that!


OK so your card needs  a sentiment.  Yep - keep it simple.  I chose the 2Crafty
 "Christmas Mini Word Set #2" as my main sentiment.  It comes with 6 perfectly sized sentiments in the package, thus making 6 cards!  BAM - easy.  


I used the mini words on all my cards and kept it really convenient by merely inking them a rich vintage brown or green.  Nothing fancy.  No time for that when you're pushing out a bunch of cards within a deadline. 


"Christmas Mini Word Set 2" 


Card 1
"Dotted Baubles"
Now on to card completion.   This is card #1.  Not fancy and yet so elegant. 
  That's because I let the chipboard do all the work for me.  This card just has
 a border strip of paper and ribbon/trim and the chipboard.   yep- simple.


I used the "Dotted Baubles" chipboard piece and I painted the little dots on the piece with gold, red and green paint, then coated them with Ranger Crackle Accent to make them pop.  

"Dotted Baubles"


Card 2
"Retro Xmas Tree"
This card is equally simple and quick to complete.   Ink the edges of your cardstock .  I used pre-folded cards and matching envelopes that came in a set because they are inexpensive and perfect , though folding your own cardstock is great too.  Just be careful that your card fits into a standard  envelope that you have handy.   Can't even tell you how many times I made cards without paying mind to envelope size.   Then I am totally out of luck.  


My chipboard was inked and painted with acrylic paint in red, green and gold.  I also topped some dots with glitter and Range Crackle Accents.  


"Retro Xmas Tree" chipboard  

Card 3
"Christmas Decorative Ornament Border"
"Fine Snowflakes"

This card looks fancier that it really is.   It has a few chipboard pieces layered  atop each other but that's it to the complexity.  The gorgeous focal piece I used on this card is the "Christmas Decorative Ornament Border" which is shown further down the page. 

This border piece is amazing, delicate and can easily be cut into several pieces to make multiple cards.  What value for your money!   Ink it brown, add red and green paint , some gold glitter on the star, plus a little Ranger Crackle Accents on the berries and this  chipboard piece is done.  

My gorgeous snowflake chipboard piece has a simple and subtle finish.  I painted 
it white and gently inked the tips brown so they didn't totally blend into the card. 


"Christmas Decorative Ornament Border"

"Fine Snowflakes"


Don't have paints and crackle products?  No worries. Just ink the whole piece a solid color and glue to the card that way.  Or leave the chipboard natural straight from the package.
  It's beautiful  "as is".  


Ho Ho Ho, keep it simple this year so that you can focus on the reason for the 
season and not let the little things in life bog you down.  


May your entire holiday season and your new year be filled with joy, peace 
and glorious simplicity.  


Visit the 2Crafty Facebook page for additional inspiration. 


Here is a recap of the supplies I used:

Card 1
"Christmas Mini Word Set 2" 
"Dotted Baubles"

Card 2
"Christmas Mini Word Set 2" 
"Retro Xmas Tree"

Card 3
"Christmas Mini Word Set 2" 
"Christmas Decorative Ornament Border"
"Fine Snowflakes" 


And remember, to find a 2Crafty stockist near you, drop an email to...
salesat2crafty@optusnet.com.au
Photobucket