Showing posts with label Chain Length. Show all posts

Friday, December 20, 2019

Journey-Take the Scenic Route - with Karan Gerber

Hi Friends and welcome to the  2 Crafty Chipboard Blog today.

Its Karan Gerber here to host the blog for you one last time. 
 It has been a wonderful year and I cannot believe how quickly it has passed us by.  
I want to take the opportunity and thank Vanessa and Di for allowing me to join the team this past year, I hope i have served you well, and wish you continued success! 

So onto my Last Project!


I have altered a box. In my scrap room clean up, i came upon some mists collections from Canvas Corp, this one is called Naturally Aged Kit - Aged Mahogany. It is a four part step mist/paint process, some requiring drying time in between, some while the previous layer is still wet. 

I started by prepping my box with gesso and heat setting; and following directions on the package adding layers of color. 

I chose some chipboard pieces to accent this box, I love the light bulbs and chains, and thought the brick detail will be a nice touch


I cut up the brick chipboard and placed some on the top edge of the box and brought some down onto the bottom part of the box


I love gears, they represent moving pieces of my favorite item to alter ( clocks) 

I put a piece of flat chipboard behind the light bulb word for added strength. And below are some further images. 


I love how this turned out, its not normally my go to color combo, but trying to get out of my comfort zone with that and when i came upon this color kit, i thought it would be a great way to do that. 


Here are the pieces of chipboard i used.
Brick Panel; Chain Link; Light Bulb Word Set

Happy Scrapping !!


Monday, February 25, 2019

Bro - layout inspo by Emma.


Hey there 2Crafty friends!!
Emma with you all today, sharing a boyish layout.
This was a fun one to create especially with this fun photo I found on Pinterest.


Here are the chipboard pieces I used...


Assorted Chain lengths
Bro
Checkerboard Clumps


Firstly I want to talk about this awesome title and the finish I used on it.
Firstly I inked it with a black ink and then once dry rubbed over the top with my finger some wax to give it this cool sheen.


The Checkerboard clumps I sprayed with a ink mist which coated the chippy perfectly with out any primer used first. And stand out from the grid paper I had chosen to use but totally suited it as well.


And then finally I chose two lengths of the assorted chains and layered them behind my image after I had used a Distress Oxide over the top to give it a matte finish.


Soft and subtle yet totally making their presence known.

I hope you enjoyed my share today and I look forward to seeing you all again real soon.

Till then, Em xx


Saturday, February 23, 2019

'6 teen' by Rachael Funnell


Hello 2Crafty fans! 
Rach with you sharing today with this vivid, masculine, grungy layout featuring my boy.....
Using a few fabulous 2Crafty chipboard pieces!!!


2Crafty Chipboard Used...
Today (from fine word set 3)
Assorted Arrows
Steampunk Collage
6 from Large number set)
Scrabble tiles
2018
Chain length


I wanted the Chain length to been seen & not get lost....  What better way than
 inking the chain with black, I then cut into 3 smaller lengths and placed on my page.....


I have few Assorted Arrows which have been treated with a couple of coats with gesso...
 I thought it would be a nice contrast against the black....

Also! inking with black is the fine word Today (from fine word set 3) looking 
great sitting to the left side of my photo...


The Steampunk Collage. Firstly I gave it couple of coats of gesso, & once dried
adhering it to the right side of the photo, a little just sitting underneath my photo...

I then inked the number 6 with black and adhering it onto the Steampunk Collage
 using some foam tape for the added dimension...


To finish off my layout and inspired by the colours that I added to my background I
 throught it would bring my layout together nicely.... I treated both the scrabble tiles 
& the 2018 with a coat of gesso, then adding some colour to the these pieces.... 


Thankyou for stopping by!!
 I hope I have motivated  YOU in some way when creating your next masculine layout
 and 2 Crafty having such a GREAT range of chipboard pieces to do just that!!

Sunday, June 11, 2017

Tammy's June Shares


Hi 2 Crafties!!

Tammy here to share my June creations with you.

First up is a layout titled

"Live out Loud"


A bright fun layout celebrating friendships.
I am a big fan of colour!! and as this layout celebrates a fun occasion vibrant colour is perfect.

I used the following 2Crafty Chipboard:
'Flower Doilies'
'Grid Bits'
'Lattice Leaves'
'Live out Loud Title'


                                                                                          I began by adding paint to the background.
Onto this I applied a stencil with transparent gloss gel.
This just gives a bit of texture to the background without detracting from the photos.

I added some stamping with black ink to help blend the paint into the cardstock.

I then applied gesso to the 'Grid Bits'.

and also to the 'Flower Doilies'.


I painted the 'Live out Loud' title in black paint


I also painted the 'Lattice Leaves' with the black paint too.

I love how the black pops against the colour and also the white background.


I finished off the layout by layering up behind the photos and adding a cluster of flowers.

Finally to finish I added a few flicks and splashes of black paint, 
and some quotes to help tell the story.


My next creation is totally different.

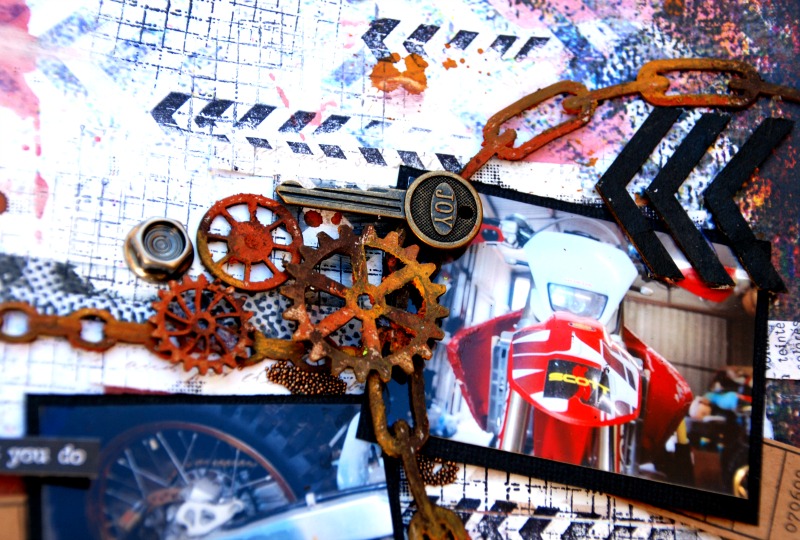
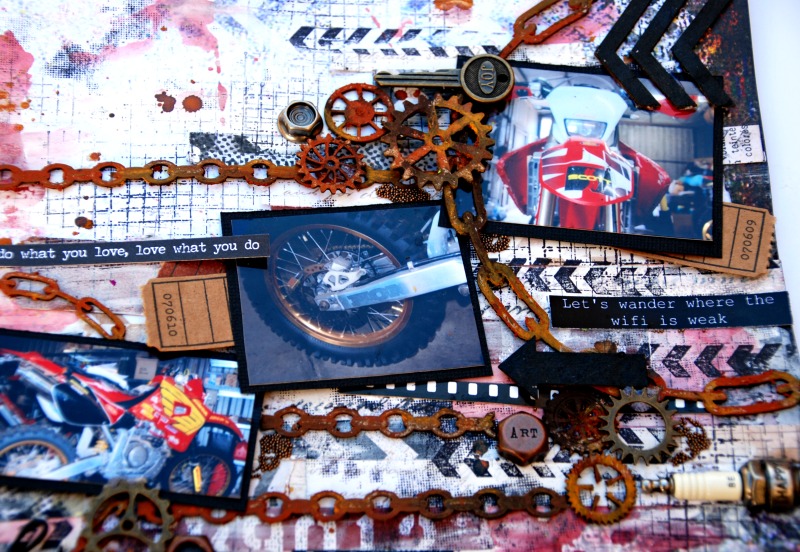
I've gone grungy and rustic.

It's titled:

"Adventure awaits"


I used the following 2Crafty Chipboard:

"Chevron Bits"
"Steampunk Medium Gears"
"Steampunk Small Gears"
"Chain lengths"
"Adventure loopy title"
"Chained Circle Frames"
"Assorted Arrows"


I grunged up the background paper by adding some stamping in black ink, 
and also some flicks and blobs of spritz.

I also added some random strips of paper, to which I applied gesso.


As I wanted some of the chipboard to look like rusty metal, I applied Finnabair's Rust Effect Paste.

I was thrilled with how it came out.  So simple.

The rust comes in 3 colours - Red Rust, Brown Rust and Gold Rust.

I just rubbed it over the chipboard quite randomly.


I did this for the 'Steampunk Small Gears' and 'Steampunk Medium Gears'

 
and also for the 'Chained Circle Frames' and the 'Chain Lengths'.


I painted a few 'Assorted Arrows' and 'Chevron Bits' in black, and also added 
black paint to my title 'Adventure loopy font'.


I then added some extra embellishments - quotes, metal bits and flicks of paint.


I really enjoyed doing a grungy layout.
 It's been a long time as I get so distracted by COLOUR!

This layout really reminded me to step out of my comfort zone and try something a little different.

I hope you do too!!

I thought I'd share one more layout that I recently created  for Scrap the Girls.

Of course I used 2Crafty Chipboard on it....

I use 2Crafty Chipboard on every layout!!!


It's titled

"Work in Progress"


I used the following 2Crafty Chipboard:

'Polaroid Assorted Frames'
'Fine Heart Border'


I painted the 'Fine Heart Borders'


I painted the 'Polaroid Assorted Frames' and then stamped randomly on top of this.

Well that's it from me!

You can see more on my BLOG.

Happy creating!!