Showing posts with label Assort chain borders. Show all posts

Thursday, July 31, 2025

"You"
Layout
with Amy Voorthuis

Hello and good morning lovely 2Crafty friend.
How wonderful of you all to stop by the 2Crafty blog, this is my second layout for the month of July. This time it's a layout of my husband who started his own company this may. After two of his former employments went bankrupt he had enough. His last job was fixing electric bikes for the company STELLA. Now he does the same but for himself his company's name is JEBT, Vanessa the boss lady was kind enough to make his bike logo in chipboard which I used on this layout.
 Enjoy this post....


YOU:
Beautiful 2Crafty Chipboard pieces used:
Logo Bikes JEBT


All the chipboard pieces are treated with white gesso, some with rust paste or my wonderful markers and waxes. Don't you just love those bikes?? I only left the words and year 2025 white with acrylic paint. 


I coloured the amazing bikes with my green aqua markers and matted the bikes with some of the papers I used in my layout. Then I added two different matte waxes brown & white. I couldn't not add flowers it's so hard not too lol 

Hope you all enjoyed my post thank you so much for stopping by, I will be back with another project soon hope to see you back then.... 
Meanwhile if you would like to see more of my work you could visit here: 
Amy's Pretty Papers

Thursday, April 20, 2023

EXPLORE dream DISCOVER
Layout by Marie Sabatier


Hello everyone,

I am delighted to be back with you and to present my second layout 
for this month of April.

I was inspired by this picture my grandson.
We were on the tram platform and he explained to me by taking the pose the difference
between the ground with circles and the ground with pavements.
I was dying to laugh!


" EXPLORE dream DISCOVER"


The 2Crafty chipboard used:


- Explore Dream Discover Title"
- Circle Stack
- Frame Zig Zag Borders
- Asst Chain Lengths
- Diamond Chunk Bits


I wanted to create a rural atmosphere and I found that these chipboards 
fit well with my theme.

I chose papers with flashy colors.

I started by applying a layer of white gesso to each chipboard. 
On the chipboard "Circle Stack" and "Asst Chain Lengths" I applied color embossing powder
 "Twilight Blue Silver".
Looking for my layout, I found it fun to organize the two chipboards one on the other with two different colors to dissociate them.


I played with of Washi tape to place the chipboard "Asst Chain Lengths".

I also used embossing powder on chipboards "Frame Zig Zag Borders" and "Diamond Chunk Bits".


To give some relief to the title, I sprinkled powder to be embossed with the same shade.


I hope this layout will inspire you in your future creations.
With these beautiful chipboards.

Thank you very much, see you soon!


Monday, June 20, 2022

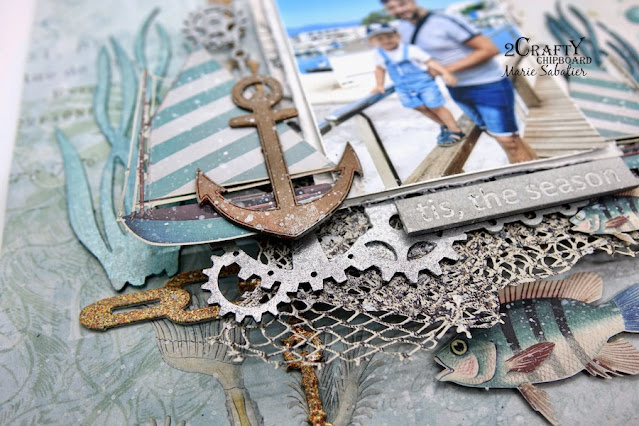
"tis, the season"
Layout By Marie Sabatier

Hello everyone,

Here I am again to present my second inspiration of this month of June. 

In France, we are approaching the summer holidays, 
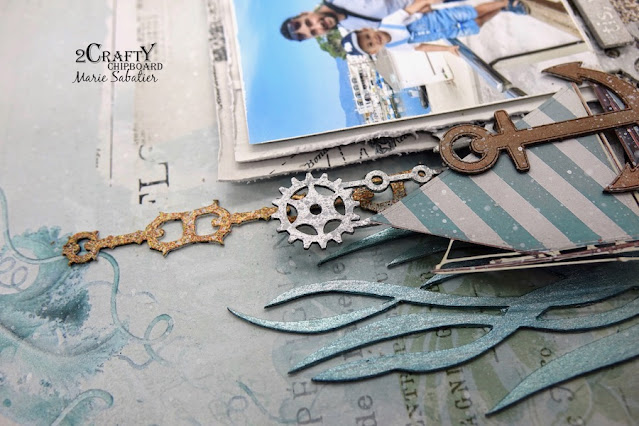
It made me want to do a layout on the theme of the sea.

This is a picture of my son and grandson taken last year in a marina.


"tis, the season"


The 2Crafty Chipboard used:


- Mini Title Stick Christmas Set 1
- Assort Chain Borders
-  Anchors & Buoys Set
- Corner Steampunk Set 5
- Seaweed Set 


First I cover the chipboard with a layer of white gesso.

To create perfect harmony, I used the shades of my paper to embellish the chipboard.

For the "Asst chain Borders" chipboard I used "Tin Roof Rusted" powder from Lindy’s Gang. 
I placed them to create a dividing line for my layout.

To bring even more detail I added this chipboard "Corner Steampunk" which 
I embellished with a gray metallic paint.


For the "Anchors & Buoys" chipboard I just applied a thin layer of "Bronze Age" 
coloured wax to reveal the details of the chipboard.

The "Seaweed" chipboard I like have been coated with "Mermaid Sparkle" acrylic paint.


I love creating clusters by superimposing chipboard and ornaments.


Thank you for your visit, I wish you a good scrap with 2Crafty.


Sunday, January 31, 2021

To Dreamland by Emma Zappone PLUS VIDEO

Hello friends!

Emma here with you today with another share.
Todays project is a keepsake made for my scrap room wall using wooden planks. 

Here are the awesome chipboard items used:

Assorted Chain Borders
4" Mandala 2
Steampunk Cog Strips


These rectangles only measure 13x15cms. So I knew it was going to be tricky to fit everything
on them that I wanted. But somehow I managed to achieve the look I hoped for.

The chipboard I painted in black Gesso ready for a finish.

I chose to cover them with waxes as this looks really great over black Gesso.
I used a combination of colours to add light and dark shade.

Because of the size of the projects, I had to trim each piece to either share on both or to fit
and suit the size, without taking away the awesomeness of the chippy.

I'm really happy with the finished result and can't wait to hang them.


Here is the video of it all coming together.....Please enjoy.


Happy scrapping everyone and will see you all again soon.

Em xx


Monday, July 8, 2019

My Gorgeous Nephew
layout by Rachael Funnell

Hello 2 Crafty Chipboard fans!
 Rach with you to share this layout I created 
inspired by the 2 Crafty Chipboard title My Gorgeous Nephew


I am pretty lucky I have 7 gorgeous nephews, 
featuring is just one of those nephews.... 

I just love how this photo captures those beautiful blue eyes he has...

 2 Crafty Chipboard: 


2018 
My Gorgeous Nephew
Assort chain borders
Small film strip
ATC - Tiny Stars  


Once I had created my mixed media background, 
I then used the leftover/negative pieces from Adian's arrow, 
painted this with gesso & attaching this just to give another level of contrast....

Aidan's Arrows (units of 3)


Using only 1 strip from the Assort chain borders cutting into 
 2 small strips inking with black & adhering them against the white...

Also! Inked with black the title My Gorgeous Nephew


I cut into 2 lengths a Small film strip colouring both 
pieces with Tim Holtz - Distress Crayons
 to coordinate nicely with the two toned background paper....


Painted a couple of coats of gesso to the 2018 


Did the same treatment as the I did to the film strip
 to the ATC - Tiny Stars, adding teal colour to some & green to others...


That's it from me today!
Thanks for stopping by...