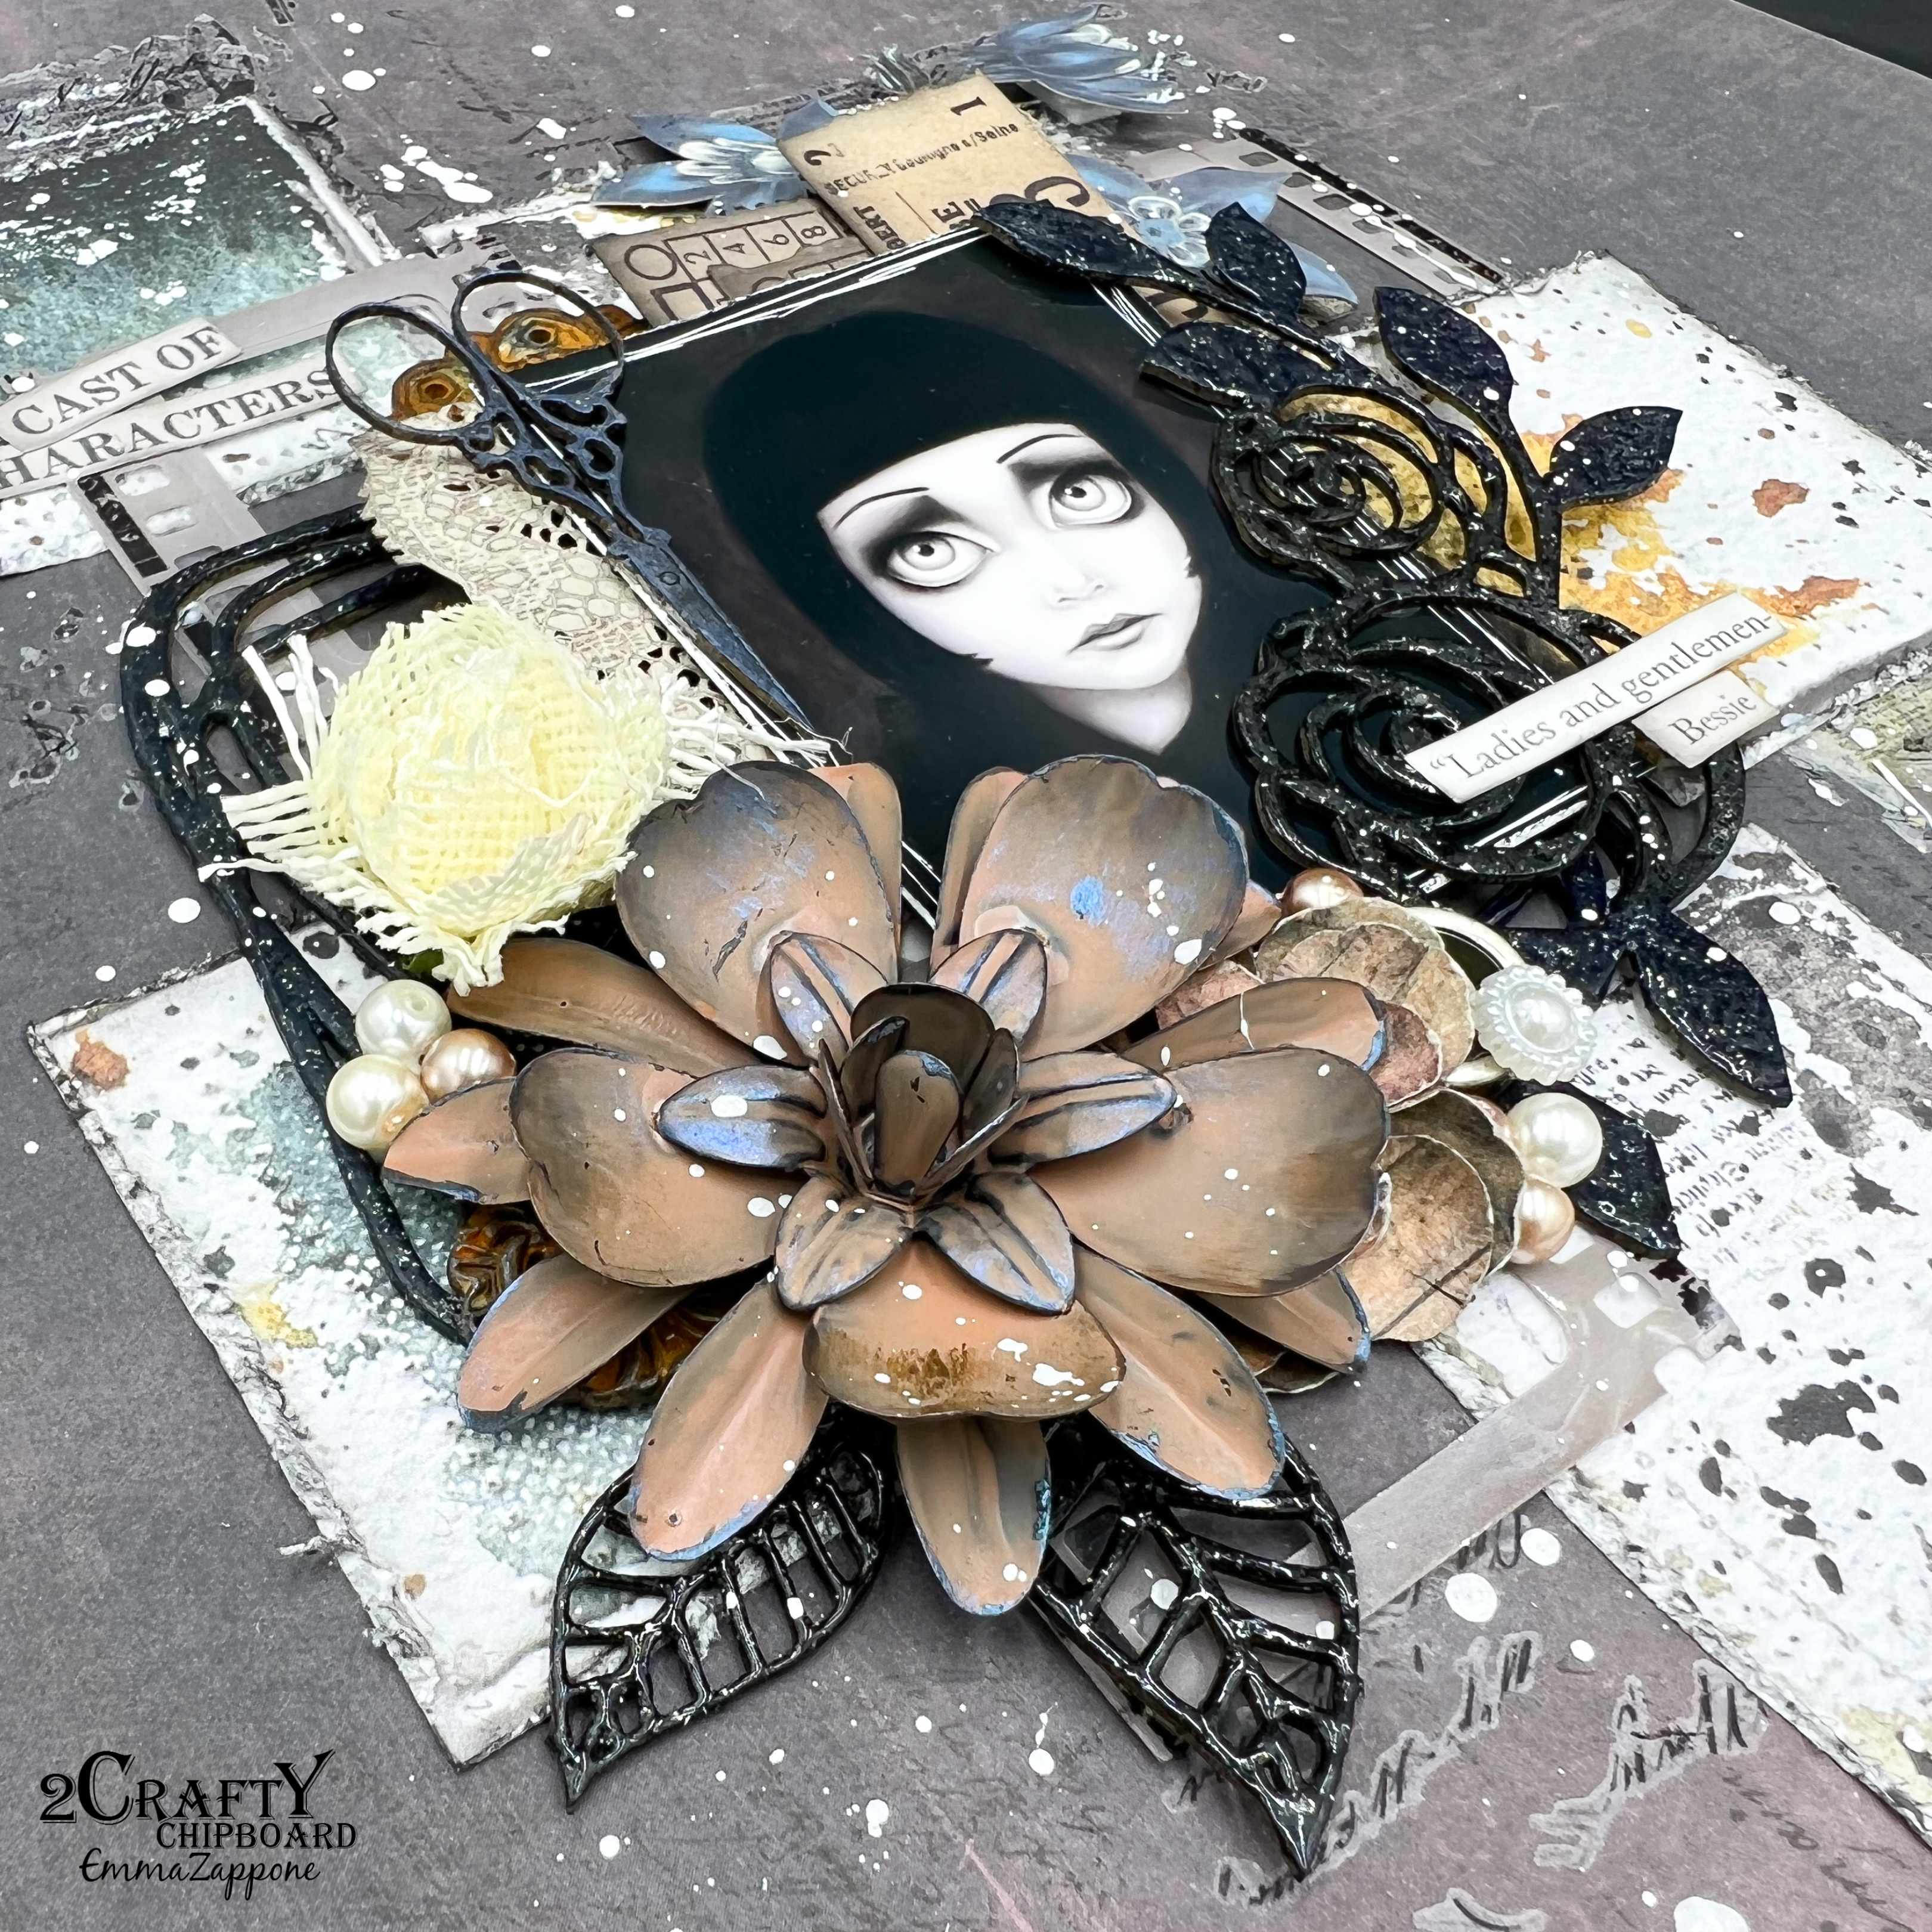
Hello 2Crafty friends! Today I would like you to meet 'Bessie', a stunning 1920's French Cabaret performer. Life hasn't been easy for Bessie, the stage has come at a cost. But with all she may have lost, her passion and love of performing out ways the sadness she has felt. Please put your hands together for 'Bessie'.....
Let's also focus on a few other star performers featured on this page....
ATC - Mini Scissors Rose Set 1 Lattice Leaf Set Messy Squares
For this page I wanted to go dark, a little smoky and create a vibe that reflected the image. So I painted all the chipboard with black Gesso.
The Messy Square also had a light paint of Prussian Blue to set it off from the black. The lighting in the photo doesn't quite pick it up. Once dry I added a clear emboss powder to add a little more drama to the chippy. And the little pair of scissors were painted black with a blue wax to finish them off.
The lattice leaves are also in black with a Clear emboss. I just love how these black elements set apart the layers.
The stunning Rose chippy was treated the same way as the Square, with that slight hint of blue shining through the embossing.
Bessie and I would like to thank you for stopping by and for all your continued support. We hope we have inspired you a little.
Hi everyone, it's Bec here and today is my day to share my first layout for October.
I have a soft and floral layout to show you, I love the light pink and purple tones
with just a hint of blue.
2Crafty Chipboard Used:
Anna's Flourish
Handdrawn Flowers
6" Messy Square Frames
Mini Travel Word Set 2
I love these Handdrawn flowers!!
They are so delicate and pretty. To colour them I first coated them with white gesso before adding a pale pink and purple watercolours to the flowers and a very light green watercolour to the leaves.
I placed the Anna's Flourish along the left side of my photo. I treated this piece the same as the Handdrawn flowers and coloured it with a pale pink watercolour.
I used the smallest Messy Square frame on this layout, I coloured it a darker purple and cut it in half to place on the right side and bottom of my photo.
I used the word 'Escape' from the Mini Travel Word set 2 and just left this white from the gesso.
Hi everyone. Today I have my second 2Crafty layout for June to share with you.
Now that I have a boy to scrap I'm trying to do more masculine layouts, although I still add a lot of flowers lol. So here is my take on a "boy" page.
The 2Crafty Chipboard I used was:
Handsome Little Man Title
Messy Squares
Steampunk Gears Small
Steampunk Gears Medium
Sequin Negative Bits
I started my background by using Silver and White pastes through a couple of different stencils, then adding some black stamping
I used the 2 largest sized Messy Squares, the larger one I coloured with Prima Acrylic Sparks Paint in Mermaid Sparkle and the medium size in Prima Acrylic Metallic Paint Sliver Spoon. I placed these under my photo
I used 2 pieces from the Sequin Negative Bits and coloured them with Prima Acrylic Sparks paint in Unicorn's Hair. I also used the Prima paints in Sliver Spoon and Steampunk Copper to colour the Small and Medium Steampunk Gears.
On the Handsome Little Man title I used white embossing powder.
I finshed of my layout by embellishing with flowers and leaves.
It is now the moment to reveal my second May inspiration.
At the end of this blog post, you'll find a video tutorial that shows how
I did my layout. I really like the mischievous look my son sometimes make and
I was able to capture it on photo for the first time.
Thus came the inspiration for my "Capture" layout.
This shot is a highlight of the left cluster of chipboard that includes "Triangle Clusters",
"Parisian Border" and, in dark brown, the chipboard support that was holding the
"Messy square frame" chipboard (let's not waste perfectly good material!).
For the "Messy square frame" chipboard support, I used
brown embossing ink and then applied black ink on top.
For the "Triangle Clusters", I used red-gold embossing powder
and then inked it with a black ink.
For the "Mini #Word Set 2", I used midnight-brown embossing powder.
For the "Parisian Border", I inked them with a brown ink and then I applied black ink.
For this layout, I used the following awesome
2Crafty chipboard:
Mini #word set 2
MB018
Parisian Border
DB0039
Corner Lorena
CR0056
Triangle Cluster
M00720
Messy Square Frames
FR0085
Here's the video showing how I built that layout:
TO VIEW VIDEO CLICK HERE
Thanks for joining me for this layout, I hope this gave you new ideas!
My first project this month has a You Tube process VIDEO and it's titled...
"Capture the Sillies"
A fun layout that captures every day life at my place!
I used the following 2 Crafty Chipboard:
"Hessian Patch Panels"
"Punctuation"
"Chevron Bits"
"Mini Fast Forward Arrows"
"Mini Word Set 1"
I painted the "Hessian Patch Panels" black
I also did this to the "Chevron Bits" and the bracket from the "Punctuation" Set.
I love how black really pops against white and bright colours.
I used some of my favourite colours in this layout. I adore teal and lime together.
I also painted the word 'capture' from the "Mini Word Set 1" pack in a black, and then I
swiped some of Finnabair's Art Alchemy Opal Magic Acrylic Paint in Aqua/Rose over the top.
On white it has a pink colour, but when applied to a black background it turns this amazing teal!
I also applied this technique to the "Mini Fast Forward Arrows"
You'll see it on the video I've posted below......pink in the jar, but changes once applied to the black! Super cool!
Fantastic on chipboard as there's no heat gun required!!
You can watch me create this layout, as I've created a You Tube video:
My second layout is titled:
"Forever"
A layout about love and laying on the grass watching the clouds go by......
I wish everyday could be like this.
I used the following 2 Crafty Chipboard:
"Fine Word Set 1"
"Grid Bits"
"Mini Branches"
"Messy Squares"
I applied white gesso to the "Messy Squares" and the "Mini Branches".
I also applied white gesso to the "Grid Bits", and then added some watercolours in a peach colour.
I really like the variegated colour that watercolour brings,
rather than the usual bold style I tend to gravitate to.
I painted the 'forever' from the "Fine Words Set 1" in black paint.
I love how this contrasts with the softer corals and also highlights the background.
This photo has been in my 'to scrap' pile for a while now......so nice to finally scrap it!!
I created a layout recently for a challenge over at Kraft plus, which was to use roses in 3 ways.
Of course my entry had 2 Crafty Chipboard on it, so thought I'd share it here as well.
I used the following 2Crafty Chipboard:
Rose Vine Border
Lattice Leaf Set
I painted the lattice leaves black - I do this so often as I love the way it 'pops' on the page.
I painted the rose vine border black too and then added some
Finnabair Opal Magic Paint in Aqua Rose.
I love this product, on white it's a soft pink, and on black you get this fabulous metallic teal.
Just wipe it on with your fingers.
Too easy!
So that's it from me!!
Hope I've inspired you this month.
If you'd like to see more you can visit my blog HERE