Showing posts with label Fine Leafy Bush. Show all posts

Monday, November 20, 2023

Cherish this Moment by Tania Ridgwell

Hello there!
Tania popping in today to share the last of my DT projects for November.  I have created a layout.

"Cherish This Moment"


2 Crafty Chipboard Used:

*Fine Leafy Bush
*Dana's Ornate Rectangle Frame
*12x12 Fine Floral Love Frame
*Mini Title Stick Set 5
*Mollie's Butterfly Set


I used the gorgeous Mintay City of Love Collection to create the base for my Layout.


I gave the 12x12 Fine Floral Love Frame a coat of gesso and once dry I then painted it with Pearl Mont Marte Shimmer Paint.  I then added it to my background page. I kept the Dana's Ornate Rectangle Frame raw as I think it suited the colours in the papers.  I added my photo and then it to my page.


 I embellished my page with lots of pretty blooms.  I gave the Fine Leafy Bush a coat of gesso and once dry I cut it up into sections and tucked in in amongst the blooms.  I painted the Mollie's Butterfly Solid chippies with some green acrylic paint and tucked them into the blooms too.  To finish off my my I added a couple of raw chippie titles from the Mini Title Stick Set 5.

Thats' all from me today, I hope I have inspired you all with my Layout. 

 Until next time thanks so much for stopping by.

Saturday, May 23, 2020

' #BEAUTY ' layout
By Rachael Funnell

Hello everyone!
Rach with you today sharing 
another 2 Crafty Chipboard inpsiration...

'#BEAUTY'

2 Crafty Chipboard used: 


Turkish Lantern
Fine leaf bush
#BEAUTY from Hashtag word set 1
12" Baroque Lace border
ATC - Tiny Butterflies


Sticking with the paper colour scheme 
I have inked the #BEAUTY  word
 using the Tim Holtz Distress Oxide 
- Dusty Concord (purple) 


The Beautiful Turkish Lantern
firstly removed the chain link
putting it aside for another project..

Inking the Lantern with a metalic silver,
then ever so lightly, parts with a royal blue ink...


The 12" Baroque Lace border & 
the ATC - Tiny Butterflies have all
couple of coats of gesso...

 then cutting the 
12" Baroque Lace border in half 
and adhering with glue...


Attaching the SUPER CUTE butterflies
with foam tape..


And lastly the Fine leaf bush 
First inking this with Tim Holtz 
Distress Oxide - Lucky clover (green)
then cutting it up into smaller pieces & 
placing them thoughout my flower clusters...


Thanks for stopping by
hopefully I have got your 
creative juices flowing in some way...

Until next time
HAPPY crafting!!

Wednesday, January 8, 2020

'Love You Long Time'
Layout By Rachael Funnell

'Love You Long Time'

Hello Everyone!
Rachael with you today sharing my first 2 Crafty layout for January 2020....
This layout featuring a photo of my teenage son & myself....

2 Crafty Chipboard pieces used: 


Fine leaf bush
Messy Square
6x4 phrase sticks Set 4
Ornate Chuncky Heart
Foilage set 1


First up this Ornate Chucky heart 
I have heat embossed this gorgeous heart with a teal...


This frame I have sitting on my photo and another chipboard piece I
 heat embossed is the Messy Square with a nice mid blue!


Using two types of foilage for this layout
The Foilage set 1 & Fine leaf bush
Where I've inked a few of  Foilage set 1 with green ink!

And for a diferent contrast I have given a Fine leaf bush
a thick coat of gesso before cutting into smaller
pieces & placing them thoughout my flower clusters.....


AND lastly but certainly not least, is one of the strips from 
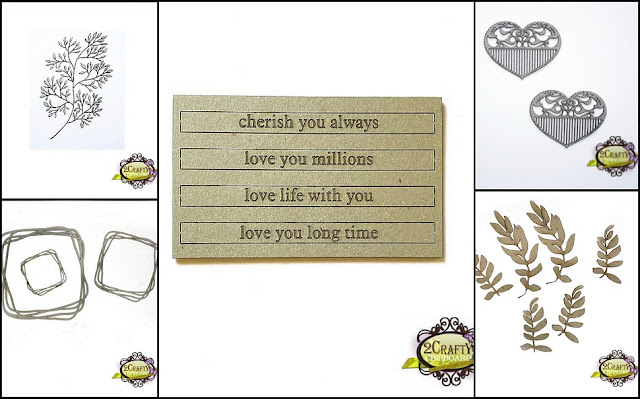
the  6x4 phrase sticks Set 4 - Love you long time, 
where I have lightly painted on some gesso..


TIP: If you do end up getting any gesso in any of the letters,
which I did with a couple...
 I just grab my craft knife and traced over each letter 
& it seem to removed most of that gesso!  

That's it from me today!
Until next time...

Friday, November 1, 2019

"Too Cute to Scare"
Layout and VIDEO by Marie Sabatier


Already November 1st, time goes by so fast!


My layout today with a step by step video,
I was inspired by the Halloween party with a photo of my little girl
from last year that I printed with a vintage effect.


TO VIEW VIDEO CLICK HERE


2Crafty Chipboards used:

- Word Too Cute To Scare
- Halloween Frame
- Fine Leafy Bush
- Seaweed Set


I love this "Halloween Frame" that you can see here in these photos,
  not very scared it is adorable.


I wanted to enrich my page with foliage.


And the title "Too Cute To Scare" that looks like the photo ....

I also had a chipboard "Seeweed"
that I turned into a flame.


Still very happy to have shared this creative moment with you
and these wonderful 2Craftychipboard.


Monday, March 18, 2019

Fantasy Layout Inspiration by Elena Martynova

 Hello scrappy friends!
 My new layout is about spring, waking up nature, new discoveries and impressions!
I let my fantasy spread its wings and sent her flying free :)))
No rule, restrictions, patterns and norms!
The composition was formed easily and naturally, and bright details revived the layout.

In the background is a sheet of paper from ABStudio.
I also added pages from the old dictionary and paper from Prima from the Forever Green collection.

 I made the leaves of the oak from the  Foliage Set 2
bright green as the first spring leaves.


To support the mushroom cap on the card at the top of the page, 
I painted the Turkish Lanterns  in  flashlight bright red. 
I really like how it attracts the eye!

 Added such a remarkable phrase

  I used the following 2Crafty Chipboard:


 But that's not all for today!

From scraps of paper and small chippys I made these ATCs.


  I used the following 2Crafty Chipboard:

I hope you enjoyed my works, 
 and you also wanted to try to do something unusual and interesting!

Thank you for visiting, have a lovely crafty day!

 Don't forget to check out my BLOG.