Showing posts with label "Live Everyday With Intention". Show all posts

Friday, June 4, 2021

'Live Everday With Intention'
Layout by Rachael Funnell


Hello Everyone & welcome back to the blog...
Rach with you today sharing another layout
I created with some great 2 Crafty Chipbaord pieces....

2 Crafty Chipboard used:

Triangle set
Medium Steampunk gears 
Large gears 
Live evertday with intention


Starting off with the Triangle Set where I have inked
 some with black & have left a few raw....


Then I had the left over bit from the Triangle Set
I thought! why not use this and add an extra 
texture element to this page, also leaving it raw
& placing it between my page layers....


Next up! The Medium Steampunk gears 
Large gears where I have sponged on
a coat of gesso....


And lastly! My Title 'Live Everyday With Intention'
 inking everyday with Intention with black 
& leaving the Live as is...


That's it from me for now...
I hopefully inspired you in some way, 
maybe to use up that left over piece/pieces 
and add them into your next project....

Thanks for stopping by  
Until next time xx


Thursday, January 17, 2019

January Layout + Video
by Lisa Amiet
'Live every day with Intention'


Hello all!
It's Lisa here today to share another creation with you.

This time I have a bright and bold layout featuring my daughter.
I love this picture even though you can't see her face. :)


This orange trumpet vine is divine! 
Every year there are lines of people waiting to take their photo in front of the flowers.

You can watch the VIDEO for the creation of this layout
 by clicking on the picture below


For this layout I have started with a few swipes of colourful paints to match my papers.
I have added some stamping around where I want the Mandala to sit.


I have then used the gorgeous '6" Mandala No 1" as a frame for my photo stack. 
I have finished it with black gesso, giving it a great matte finish. 


I have then used a couple of the foliage swirls from 'Foliage Set 4',
that I have again finished with black gesso.


I love how the black pops against the colours!


Lastly I have used the "Live every day with Intention" title, 
which I have also chosen the black gesso finish for.


2Crafty Products Used:
                                      6" Mandala No 1                                   Foliage Set 4


Live every day with Intention 

I hope you like what I have created this time.
I will be back soon with some more to share with you.

Lisa


Sunday, October 21, 2018

"Live Everyday with Intention" - Layout
PLUS A Video Tutorial
By Bec Genet

Hi everyone,  Bec here with you today.
 I'm sharing my second 2Crafty Project for the month and I have a
soft and delicate layout to share with you that also comes with a video tutorial.

 I hope you enjoy it.
"Live Everyday With Intention"


2Crafty Chipboard Used:
Circle Stack
Live Everyday with Intention Title
Film Strip Tiny
Leafy Shrub Set 2


Some close ups


Chipboard looks great in a cluster, easy to layer too.


Always love using the Shrub pieces, great contrast with fabric/paper flowers.


Thanks for visiting

Sunday, June 10, 2018

June Inspiration by Sabrina Turpin

Hello Everyone!

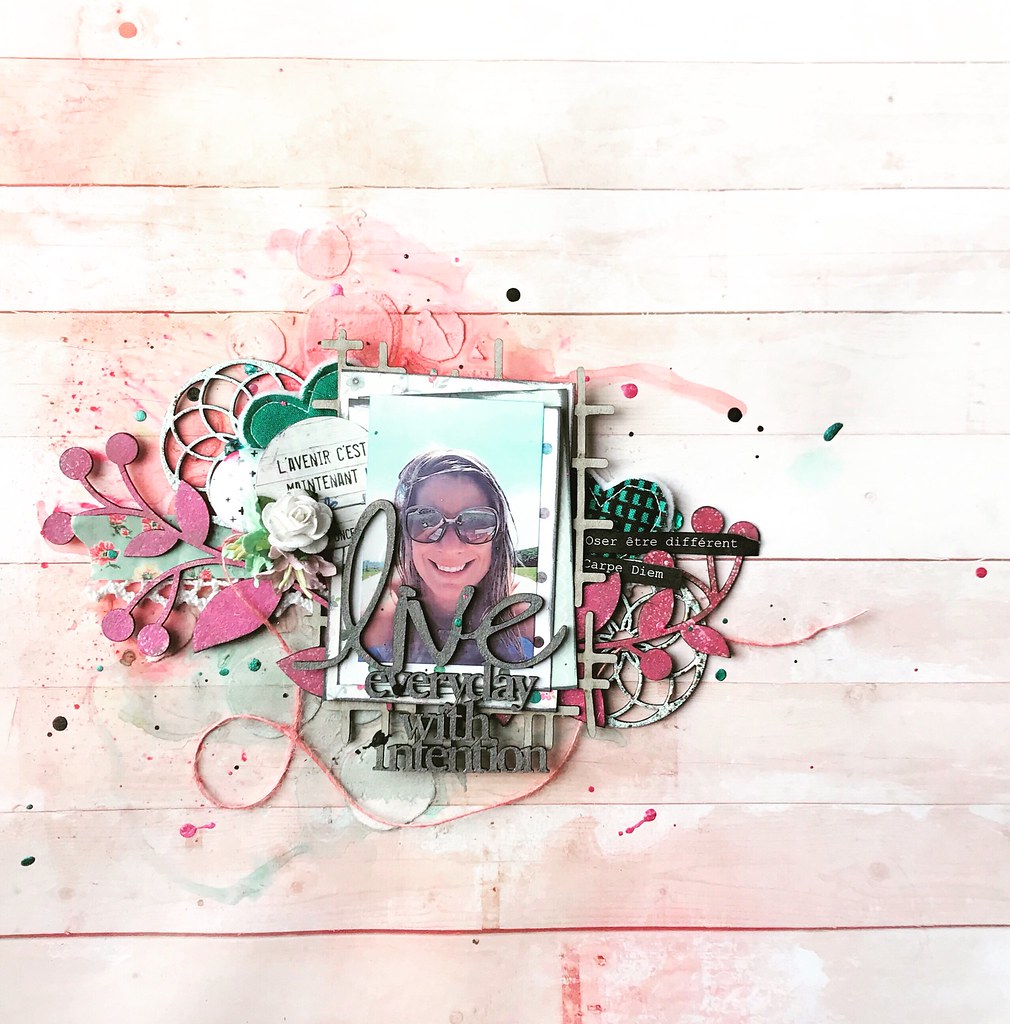
Weather is warming up as summer is finally approaching here in Canada after a cold, cold winter! I had the chance to do some nice spring sunbathing last week, taking a fun selfie which inspired me for a layout with the awesome 2Crafty chipboard products! Without further ado, I'm revealing my "live everyday with intention" layout:


I've inked the "Foliage Set 3" with pink embossing ink and then stamped a white embossing ink on top to give it a nice texture. Finally, I traced the contour with black ink to give more shadow and make it pop out more.

For the "Flower Medallions", I applied a shabby blue enamel powder. I left the "Interlocking Grid Panel" untouched because I loved the look and different texture it brought to the page.

Finally, I painted the "live everyday with intention" title with diluted metallic gray paint so it blends better while still standing out.

For this layout, I used these following products:
Live everyday with intention: W00226
Foliage Set 3 : M00569
Flower Medallions: M00422
Interlocking Grid Panel: 660033


That's all for today! I hope this layout brought you some ideas for your next creations! See you soon for another reveal.


Tuesday, January 9, 2018

January Journal with Kripa Koushik

Hello friends,

I hope you all had a relaxing holiday with friends & family. 
My January projects are both art journal pages that incorporate my chosen words/intent for this year.

 'Embrace possibilities'

My year started with a box full of goodies from 2crafty chipboard. My first project is inspired by the delicate and beautiful pieces that you see in the close up below: Ella's border and Scroll 3. I layered them vertically between pieces of lace, ribbon and net alongwith a keyhole chipboard.
 

For the opposite side of the page, behind the sentiment, I tucked in a single flower from Ella's border and a key. All chipboard pieces first got a layer of texture paste applied with a palette knife followed by Colourarte acrylic silks & twinkling H2Os. For a distressed grungy look, all the paint was also applied with a palette knife.

2crafty chipboard used:
  • Scroll 3
  • Ella's border
  • Keyholes & Locks 

'Live with intention'


Here is a step by step of how this page came together.

Start by gluing down squares of pattern paper using matt multi medium.

 Apply a layer of gesso on the page and then some texture paste mixed with gesso 
through a gears stencil.


Once dry, apply twinkling H2Os in shades of brown, rust & teal.

While that dries, apply white gesso on a selection of chipboard from Steampunk gears medium, Giant gears, cogs and gears, clock faces and light bulb. On a few dab Vivid Ultra Metallics with a make up sponge. The light blue colour is by using Twinkling H2Os on the gessoed gears.

For the title, Ive used gold metallic paint and dabbed some white gesso after the blue paint dried for a distressed effect. Below is a close up from the completed art journal page.


I've layered the gears and cogs on top of a sheet of chipboard left after removing the small steampunk gears. It gave me a flat base to layer the gears and cogs.


2crafty supplies Used:
  • Gears
  • Cute Cogs
  • Light Bulbs
  • Giant Gears
  • Clock Face frames
  • Vintage Clock Hands
  • Steampunk gears medium
  • Live Everyday with Intention Title
  

I hope you enjoyed today's post. 
Wishing all of you a 'Very Happy 2018'
Kripa


Sunday, October 1, 2017

October Inspiration By Sandra

''Live everyday with intention''

I love making white and black layouts with one touch of color... Always make me satisfied.
That is what I created for my first layout this month.

2Crafty chipboard list

Corner Thick Vine

Frame Georgian

Live everyday with Intention


I began my background by sticking the Corner Thick Vine chipboard to a watercolor paper. 

I also add the bigger Frame Georgian in the middle. You can't see it a lot, but there is. 


I added a mixture of balls synthetic material with the medium gel to add more textures. 

Then, I put some white gesso to color my chipboards. 


I put some black ink with some water to make an ombre finish on my 
background around the chipboards and the textures.


I cut the small Frame Georgian and I embossed it with black powder.
 I made the same treatment to the title.


At the end, I just put some other white gesso on my textures, some drops white
 and black and added some flowers and a badge. 


''This is Me''

I love altered paper for my background to fit with my layout's finished idea. 

2Crafty chipboards list

Ivy's Squares

6" Clock Face Frames

This is Me


I made a lot of things on my background...I started by adding some acrylic paint with
 water to add more colors. I used a stencil with black gesso to make some contrasts,
and I added stamps and also some embossing powder on some medium gel. 

For the all the Ivy's squares, I used 4 colors of embossing powder,
 blue, green, light turquoise and black. 


To add more textures, I put some balls acrylic with yellow ink and medium gel, before
they were dry, I added some turquoise embossing powder in it and I used my embossing iron. 


I used one piece of clock from 6''clock face frames and 2 parts which serve has to hold the clock together. I embossed them with yellow embossing powder.


To add more contrast, I put some black flowers and two turquoise. 

I painted the title This is me-title with black acrylic paint. 


you can see all chipboards on the website.


Thanks and see you next month...
San xx