Showing posts with label Triangle set. Show all posts

Monday, November 8, 2021

Natural Beauty - with Emma Zappone BONUS Video

 Hello everyone.
Emma with you on the blog today and I also have a little video for you all to see this page come to life.

First though lets see the page...


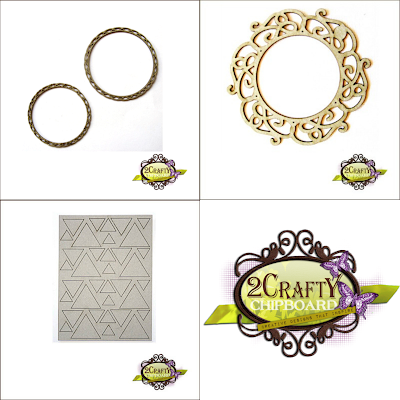
And here is the awesome chipboard used....

Doily Frames
Mini Frame
Mini Triangle set


As the saying goes 'Everything old is new again' so is this page I created.
I used ideas and techniques used many years ago when I first started scrapbooking. The only thing different is I'm using 'new' products that are now on the market, and hopefully the techniques are a little more mastered..hehehe.
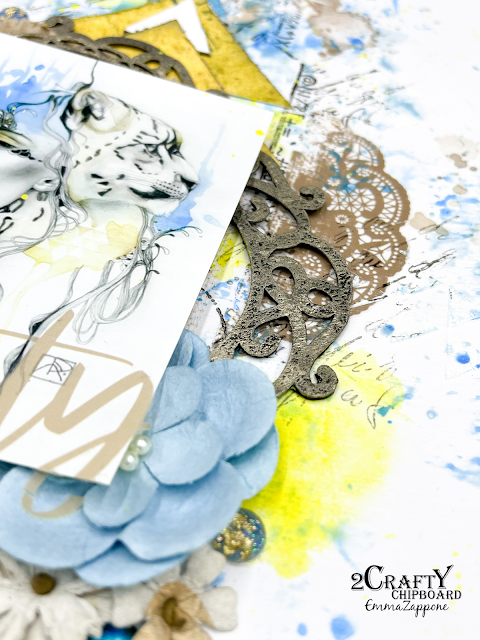


I used rub-ons on the base of my page and then matching some chipboard to compliment each other.
The finishes are simple, the Mina frame was primed with black gesso and then once dry I added a lovely white gold wax to the top. This lended itself to match the browner tones on the page.


I applied the same finish to the mini frame also.
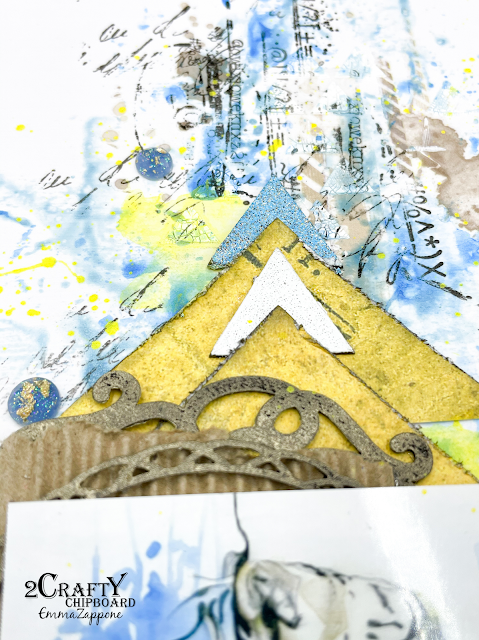


The triangles were primed with white gesso and then embossed with a blue and a white powder to compliment the colour choices in the photo image.
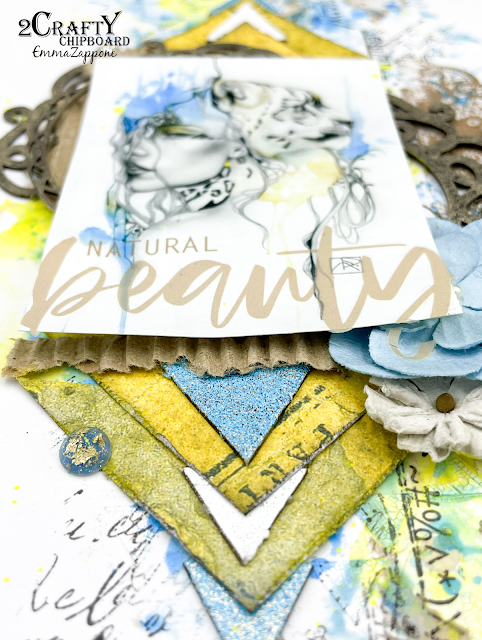


The flow from the colours and shapes really suited this image and I love that I revisited a style I have not played with for a little while. Hopefully modernising it a little.

Check out my video to see all the elements come together, I hope you enjoy the process.


I will see you all soon.
Happy crafting.

Em xx


Friday, June 4, 2021

'Live Everday With Intention'
Layout by Rachael Funnell


Hello Everyone & welcome back to the blog...
Rach with you today sharing another layout
I created with some great 2 Crafty Chipbaord pieces....

2 Crafty Chipboard used:

Triangle set
Medium Steampunk gears 
Large gears 
Live evertday with intention


Starting off with the Triangle Set where I have inked
 some with black & have left a few raw....


Then I had the left over bit from the Triangle Set
I thought! why not use this and add an extra 
texture element to this page, also leaving it raw
& placing it between my page layers....


Next up! The Medium Steampunk gears 
Large gears where I have sponged on
a coat of gesso....


And lastly! My Title 'Live Everyday With Intention'
 inking everyday with Intention with black 
& leaving the Live as is...


That's it from me for now...
I hopefully inspired you in some way, 
maybe to use up that left over piece/pieces 
and add them into your next project....

Thanks for stopping by  
Until next time xx


Sunday, September 23, 2018

2 Crafty Chipboard 'Dream BIG' Layout
PLUS a Video Tutorial
By Rachael Funnell

Hello Everyone!
It's Rach here today sharing my second layout for this month using
some great pieces of 2 Crafty Chipboard......

'Dream BIG'

2 Crafty Chipboard used: 
2018
Dream BIG title
Remember banner from ATC- banner word set 2
Triangle set
6" Butterfly clock frame


All the 2 Crafty Chipboard pieces have been either coated with gesso
 and left as i,s or inked over the gesso, or just inked... 

The BONUS part  for you all is....    I have created a video tutorial on the process...


SO! please hit that play button & ENJOY.... 


That's it for me today... I hope you watch my tutorial & get a little inspired...

Thanks for popping by.

Till next time!


Saturday, March 31, 2018

A Bonus Share from Tammy

Hi everyone
I've popped onto the blog today to share a layout I recently created.
This one's titled:

"Gorgeous"


A layout celebrating my gorgeous 16 year old girl and her girlfriends.
Of course I got this photo from her phone, and really wanted to scrap it.
As we know, friends change over the years, and often the ones we have at 16
really bring us joy and happiness when we look back years later.
I wanted my daughter to have this memory.

I used the following 2Crafty Chipboard:
"Triangle Set"
"Doily Frames"
"Fine Word Set 2"


I painted all of the pieces with Black Gesso.

This really made them pop against the soft white and pink.
Such a bold contrast.


Sometimes simplicity really is best.
I especially love that 'gorgeous' title from the "Find Word Set 2".
As it's so fine, it's easily added on top of photos, without covering up the detail and focal point.
That's it from me today.
I'll be back in April to share some more 2Crafty Chipboard Creations with you all.
Love Tam
xx

Saturday, March 3, 2018

March Layouts + Process Video
With Lisa Amiet


Hello 2Crafty people!!

It's Lisa here today to share some inspiration with you all.

My first layout is featuring a photo of my son conquering some rocks at the beach.

"Explore"

For this layout I have used a bit of mixed media and stamping on
my white cardstock base. Lots of splatters :)


I have cut up pieces of the 'Fencing Wire Panel'
which I have embossed in black 
and then slightly in some areas with gold embossing powder.


I have used them amongst my layers.


I have also used some of the 
'Triangles Set', 
which I have lightly sponged with gesso.
I have then used watercolours to slightly colour them,
 in colours that coordinate with my papers


I have also used the word explore from the 
'Mini Travel Word Set 1',
as my title.


Some close ups...


I have layered my chipboard triangles with triangles that I have cut from my papers.


2Crafty Products Used


For my next layout I have gone all out girly lol

This layout features my gorgeous (now adult) daughter, on a recent day out.

"Love"

There are a lot of details in this layout....


For this layout I have used the stunning, and my favourite piece EVER... 
pieces of the 'Parisian Border',
 that I have cut up and used around my photo.


I have used metallic rose gold wax to colour my chipboard.


I have also used a few of the 
'Lattice Leaves', 
also coloured in rose gold wax.


More of the leaves and border :)


I have also used one of the locks from the 'Keyholes and Locks' set.


Lastly I have used one of the
  'Frames Tiny Kathleen's' 
that I have cut in half and used on either side of my photo.


I'm never quite sure where a layout is going to end up when I start,
 there is usually no plan in mind. But I'm quite happy with the end result.

Now, there is a process video for this layout,
but I will warn you that it is on the long side. 

You can watch it below...


2Crafty Products Used:


I really hope you like what I have come up with this month.

The other girls have some gorgeous projects to share with you over 
the next few weeks and I will see you again soon!

Take Care

Lisa