Showing posts with label Twiggy Branch. Show all posts

Monday, December 20, 2021

#snapchat
by Sabrina Turpin

Hello 2Crafty friends!

I hope you're doing great in these festive times! Today is a bit of a bittersweet one for me: it is going to be my last post for 2Crafty, as I'll be going on a scrapbooking hiatus for the foreseeable future. But nevertheless, I will for sure keep an eye on what team 2Crafty is brewing while I'm away!

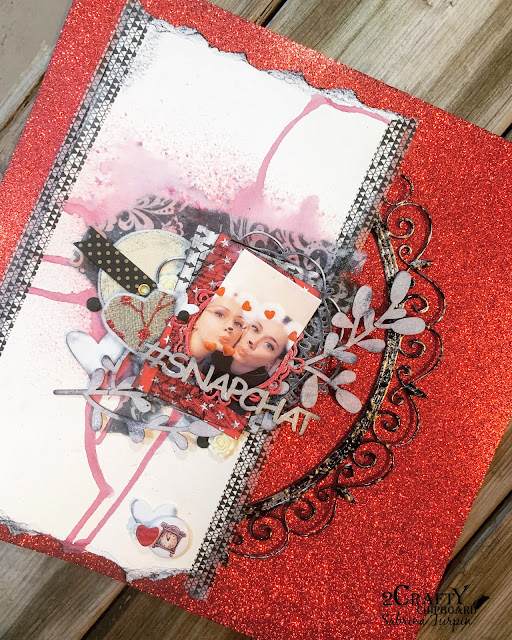
"#snapchat"


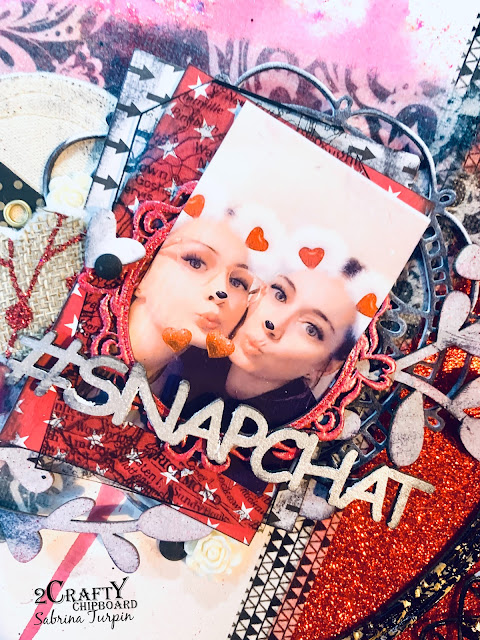
On the '11" Round Flourish Frame', I used silver-black embossing enamel. For the "Twiggy Branch", I applied 1 coat of white embossing ink then dabbed a bit of red embossing ink on top and finally inked  the borders in black.


For the "Mini Decorative frame set 6", I used two coats of red shimering embossing powder and applied a pearly white wax on top. On the title, "#snapchat", part of the "Mini #Word set 2", I applied two coats of pearly white wax with my fingers and inked the borders in black.

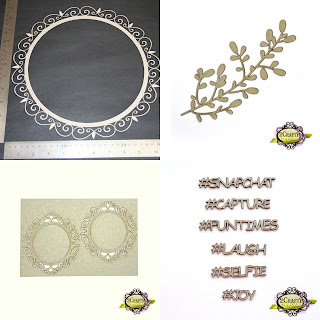
I used the following 2Crafty chipboards in this layout:

11" Round Flourish Frame [120063]
Twiggy branch [m00359]
Mini decorative frame set 6 [fr0149]
Mini #word set 2 [mb018]


That's all for me today! 
I hope you enjoyed my festive creation! 
I wish you the best for the holidays and the new year!


Sunday, January 21, 2018

January Inspiration By Sabrina Turpin

"Life Documented"


Hello everyone!
I hope that 2018 is treating you well so far. It has been fantastic for me as I am 
absolutely thrilled to be joining the amazing 2Crafty team!

Let me introduce myself. I’m Sabrina Turpin, from Quebec, Canada, mom of two
 fantastic kids. I work in a daycare by day and I am a chipboard ninja by night!

For my first post, I’ll be sharing two new layouts. The first one, “Life Documented”, 
features my daughter having fun in a playground.


I inked and then used a transparent embossing powder on the
"Frame Madelines Flourish".


For the title I simply painted and inked it & the 
"Pointed Doiley Frames" I did the same.


Again on the "Tiny Leaf Stems" I did the same, just painting & inking as it looks so good.
These I used an embossing ink on the "Sharon's Butterflies".

For this page, I used the following 2Crafty Chipboards:

"Life Documented - title
Sharon's Butterflies
Frame Madeline's Flourish
Pointed Doiley Frames
"Tiny Leaf Stems"

"Friends"


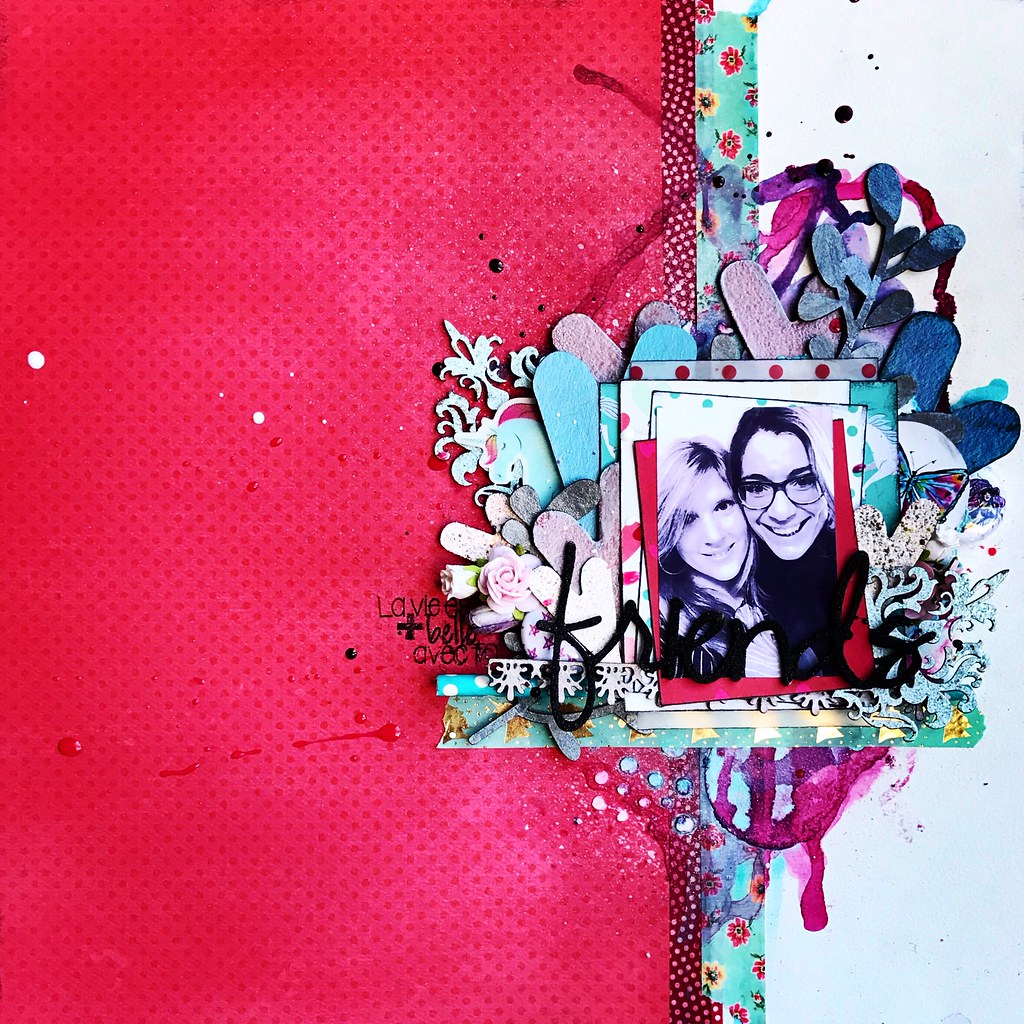
My second page, "Friends", puts into the spotlight one of my closest friend.

For the "Funky Hearts" I embossed them with embossing powder.


The larger hearts were painted and inked & the smaller ones were
 embossed with embossing powder.


The "Twiggy Branch" was painted painted with acrylic metallic paints.


The border is from the "Lacey Border Set #1"& both that & the "Damask"
 were painted in acrylic paints.
The "Friends" title was embossed with embossing powders.

2Crafty Chipboard Products Used....

Funky Hearts
Damask
Lacey Border Set #1
Twiggy Branch
Friends - title-loopy font


Saturday, January 11, 2014

First Share from Debbi

Hi, I'm Debbi Tehrani and I'm so excited to be a "Resident Guest Designer"
 for 2Crafty this year! I scrap 8 x 8, and I love how well the 2Crafty pieces
 work for me on my small pages.

For my first page, I scrapped this lovely photo of my mom and her wonderful
 husband, Ed, who we just lost this Christmas. I decided to go monochromatic
 to show off the beautiful chipboard.

Because of the waterfall, I wanted to make the chipboard look as if they'd been splashed.
 I first coated them with gesso. Then I dabbed green stamp ink on them. Next I spritzed
 them with three colors of mist--two greens and a brown. Finally, I sprinkled clear 
embossing powder and used a heat gun to give them the wet look I was going for. 
The leaves I used are Twiggy Branch, and are just perfect for cutting apart and layering,
 so that this one piece can be used on multiple layouts.


For the title (Loving These Moments) title, I covered up the "Loving" word before
 applying the green stamp ink and mist. Then, I covered "These Moments," and applied
 Ranger Enchanted Gold embossing powder, which gave that word a lovely, soft shimmer.

 The gorgeous scrolled element tucked behind the photo is a piece cut off of the
 Parisian Border. This piece is just exquisite, and I love that it has five
 decorative parts, so that border will go far!


For the cluster at the top of my page, I used the beautiful Bella Flourish, a perfect little shelf 
for  the word to sit on. "Treasure" came from ATC Words, a pack that has 11 sweet little words
 plus a couple of stars.

For my second layout I used some more awesome 2Crafty chipboard to create my 
page for this week's  Case File at CSI: Color, Stories, Inspiration. I'm proud 
to say that 2Crafty has been a generous sponsor for our challenge.

Here's the Case File I used for this page:

And my page. This is Ed when he was a young boy. "Ed's Big Jump" was written
 on the back of the picture, so that's what I went with for the title.

I love that 2Crafty has chipboard to suit all different styles, and I found some perfect
 pieces to adorn this boyish, sporty layout.

"Ed's Big Jump"

I used acrylic paint on the chipboard to match the colors in the palette and then outlined 
in pen to add a touch of detail. I used a crackle stamp over the "Awesome," a part of
 Word Bubbles, which comes with six different words in different-shaped speech bubbles. 
The View Master reel is the medium size of 3 elements in the View Finder set.


The Chevron Bits were a perfect accent to lead the eye to the subject of the photo. 
The Film Strips - Small is a perfect border to tuck behind layers. I cut this in half
 lengthwise so I could use the other half on a second layout.

I just love this chipboard! It's just the right thickness to add dimension but doesn't add
 too much bulk so that you can layer it. The diversity of styles and elements is just
 fabulous, and I can't wait to use some more of this wonderful chipboard on my next layout!

Thank you so much for visiting the 2Crafty blog and taking a peek at my creations!
Photobucket

Monday, March 26, 2012

Just Be You - Nina

Hiya 2Crafty followers!  today it is my turn to share around the 2Crafty Love!!

The layout I have created today, is once again showcasing some of the NEW 2CRAFTY PRODUCTS!


I have used the "Just Be You" title and the "Twiggy Branch"

Both pieces were painted with acrylic paint.  The twiggy branch I have hung upside down from the top of my layout page.  To adhere the chipboard pieces to my layout, I have used dimensional magic.

This is quite a simple layout for me, and I really love how these particular 2Crafty chipboard pieces have complemented my simple design.


Now, your task today, should you choose to accept it, is to get busy creating with some of the awesome 2Crafty chipboard pieces - oh, and don't forget to share your creations too, just add a link to where your creations can be found to the comments section of this post.  I love to see the  creative  interpretations of others.

Keep smiling and creating!
Nina