Showing posts with label Mini Tags. Show all posts

Wednesday, December 8, 2021

Life In pictures by Emma Zappone

Hello Lovelies!
Em with you on the blog today sharing a vintage/nature vibed piece.
This project is created using some bookplates that are heavily layered and are created on
its own with no background paper etc. 

I guess it's a little like making a large tag, or mini layout. And of course the chipboard pieces compliment these pages perfectly.


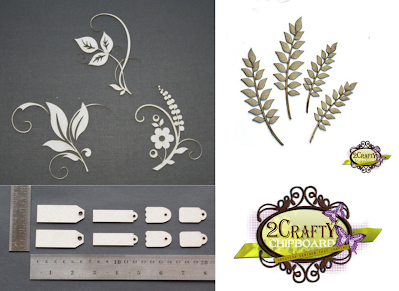
These are the glorious chipboard items.....

Leafy Shrub Set
Tiny Leaf Stems
Mini Tags


I decided to play around with the chipboard more than I usually do. In saying that the
finishes chosen were still simple to execute.
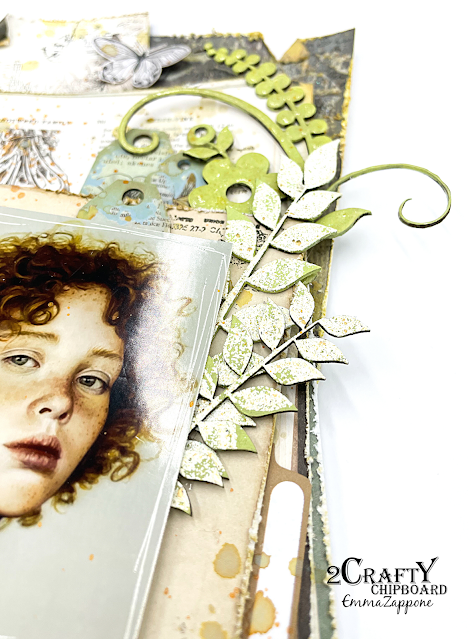


For the Tiny Leaf Stems I chose to paint them in a beautiful green acrylic and then dusted
them lightly with an embossing powder. 
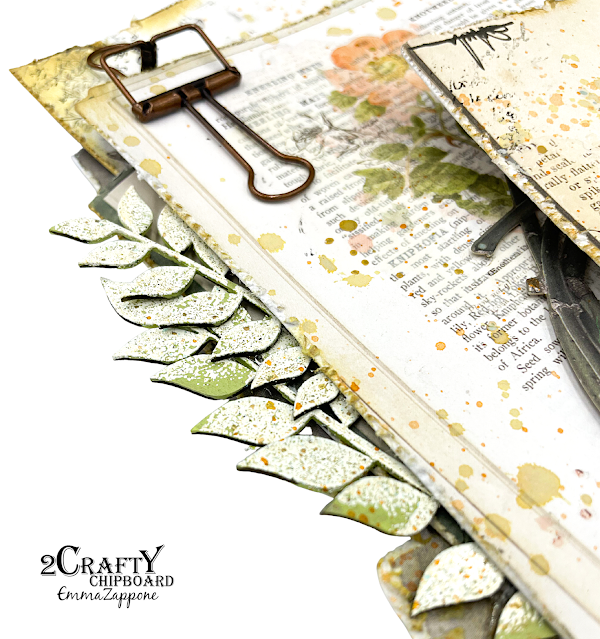


I wasn't after complete coverage on the leaves so leaving them random suited me and
gave way to more detail & interest.
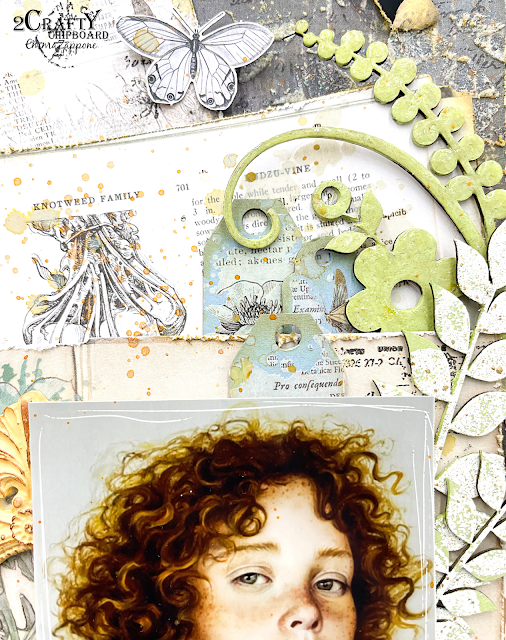


The piece that I chose from the Leafy shrub set was painted with the same green acrylic
as the leaves and this time a clear emboss glaze was used over to create a shine and allow
the green to shine through.
Then the little mini tags were painted in a blue acrylic. Once these were dried I added rub-ons
to create a worn vintage finish but totally compliment the background papers used.
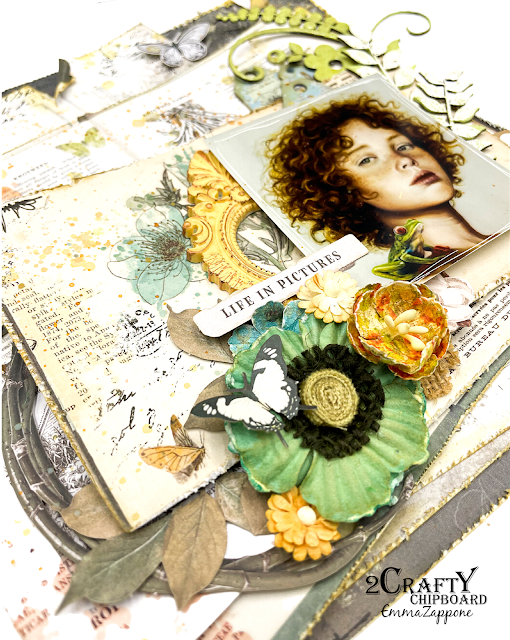


I love the over all look to this piece and the chipboard and resin really make this creation
a stand out for me. I love these colour tones too.

I hope it has inspired you a little.
Happy crafting friends and I will see you later in the month.

Em xx


Wednesday, August 5, 2020

"You Are My Sunshine"
A Different Kind Of Layout
By Jenny J.

Hello everyone!

Hope you are all fine and are taking time for crafting.

Here is my first inspiration for August....


It's not usual for me to create with blues and greens.  
Hope you'll like it!

Here are the 2Crafty chippies I've used


*Mini tags
*Moroccan bits
*Flower doilies
*You are my sunshine
*Asst. mini camera set


I've treated my title, "You are my sunshine", 
with two colors of embossing powders that matches my layout.


I've added a few layers on that.  
Texture on my background with a stencil and a texturing paste.

Then, the "Morrocan bits" is painted with black gesso and covered with wax.
Over that, a piece of "Flower doilies" simply heat embossed with a white powder.


You can see those same steps on the chippies in the little clustering on the right of the page.


Over the fabric arrow, there is a cute little tag 
from "Mini tags".
That piece is covered with black gesso.


I have add also a piece from "Asst. Mini camera set"
also painted in black.


Another close-up of that two toned title.


Hope it will give you some inspiration.
See you later this month with a video tutorial :)

Stay safe!


Thursday, August 22, 2019

Happiness is this by
Sabrina Turpin

Hello 2Crafty fans!

I'm still in a very cheery mood as we're having beautiful weather this summer and a great time having fun before it's back-to-school time next week!
 Today I'd like to share a layout that fits this mood, featuring my husband eating his favorite candy, sour watermelon slices, wearing his watermelon slice shirt! I prepared a layout with fresh, bright colors to go with the watermelon theme, choosing a palette that I don't often pick for my hubby.

"Happiness is this"


On the "Mini Tags", I applied pink embossing ink and traced the contour with black ink. For the "Stars", I applied jade-green shimmering paint.


For the "Mini Branches", I used two coats of peach embossing powder infused with mini sequins and traced the contour with black ink.


On the "Star Bubble Set", I applied two coats of yellow embossing ink.


For the title, "Happiness is this", I simply applied black paint.

 The following 2Crafty chipboards have been used in this layout:
Star Bubble Set [M00666]
Mini Branches [MB013]
Happiness  is this [W00163]
Mini Tags [M00363]
Stars [M00265]


That's all for me today! I hope my layout helped give you some inspiration for your own creations! I'll be back with more ideas soon, wish me good luck for back-to-school week!


Monday, June 10, 2019

"Handsome"
By Sabrina Turpin

Hello 2Crafty friends!

For my layout today I wanted to build around a photo of my pre-teen son showing me his true smile, something that is getting a bit as he's growing up! One moment he can be showing his newfound attitude and the next one he can be the sweetest human being on earth!

With this layout, I wanted to highlight these both sides of him, combining both soft and hard elements. It's one of my simplest layouts in recent times, but I think it really allowed the vibe to come through.

"Handsome".


On the smallest circle of the "6" Circle Revolution Frames", I applied red embossing ink an then applied black embossing ink on top. On the "Mini Tags", I applied gray ink roughly and then I traced the contour with black ink. For the title, "Handsome - script", I used gray pearl metallic paint.


On the "Stars", I applied black embossing powder roughly, then dabbed red embossing ink on top so the black and the original chipboard color would stay visible in certain parts. For the "Circular Panel", I used silver embossing powder.


In this layout, I used the following 2Crafty chipboards:
Mini Tags [m00363]
Circular Panel [m00462]
6" Circle Revolution Frames [66030]
Stars [m00265] 
Handsome - script [w00511]


That's all for me today!
 I will be back in a few weeks with more ideas to share with you.
Until then, have fun creating!


Tuesday, September 25, 2018

"A Moment Captured" with Em

Hi 2Crafty friends,
Emma here today with you all.
The layout I created for today has some pieces of chippy I really enjoyed playing with.

"A Moment Captured"

2Crafty Chipboard pieces I chose.....
Film Strips-Tiny (units of 3)Mini Sampler Set 1 (unit of 3)
A Moment Captured (unit of 3)
Mini Tags (unit of 3)


So for my finishes on the Tiny Film Strips I have black embossed.
The definition on these little pieces are just amazing.


I used the circles from the sampler pack in this layout, and
 for these I just inked with a coordinating distress oxide.


You can also see poking out in places with the paper Tags the chipboard tags,
I used a couple of the smaller ones in the layers. These I inked in black and
then used a gold texture medium applied with a palette knife to look a little distressed.


For my Title piece I black inked the top two words and
 the 'captured' word I gold embossed.
I'm totally loving the gold right now.
It was fun getting a little more 'arty' with this page.

Have you used these chipboard pieces yet?
I would highly recommend you get them into your stash.

Thanks for joining me today and I'll catch you all next month.

Em xx


Friday, March 13, 2015

March Projects - Margaret Mifsud

Hello everyone and welcome to the 2Crafty Blog.  It is my turn again and this time I 
have two Art Journal pages and a card to share with you. 
 
"DOUBLE ART JOURNAL PAGE FOR CSI"
 
  2Crafty was a major sponsor over at CSI in February and I was so thrilled that I was able to be a part of the GDT for Case #156.  This is the double Art Journal page I created. 
 

2Crafty Chipboard product used

 Square Collage Panel

 Leafy Shrub Set 1

 6" Clock Frames

ATC Georgian Frames


All of the chippies were first coated with gesso and then painted with acrylic paint.


My favourite chippy on this page is the Square Collage Panel.  It comes as a 6" x 6" panel but you can cut random pieces from it and use them in a myriad of ways.  I simply cut off a section from one side of the panel and placed it on the left side of my double page and then layered the ATC Georgian Frame over the top.


Here I've used one of the plain circles from the 6" Clock Frames, attached a piece from the
Leafy Shrub Set 1 on top of that and created a lovely circular flourish.  I love how this looks.
It is so easy to configure your chippies so that they fit into whatever it is you are making.
  If you don't have the perfect piece already, you can simply layer them, or cut them apart and
 add bits from a different set and simply and easily create the perfect embellishment for your project. 


This is another piece cut from the Square Collage Panel.

  
"DOUBLE ART JOURNAL PAGE FOR SATW"
 
During March, 2Crafty is a major sponsor for Scrap Around the World and, once again,
 the Team from 2Crafty are Guest Designers.  As the Guest post went live yesterday 
I am now able to show the details of my contribution.
 

2Crafty Chipboard product used

 Square Collage Panel

 6" Clock Frames

Mini Hearts and Stars


Once again I have used a piece from the Square Collage Panel.
 (Did I tell you I really love this chippy??  LOL!!)  I didn't use gesso this time, I simply
 rubbed it over randomly with Black Soot Distress Ink. 


The Clock Frame was treated the same way. 


  The stars are from the Mini Hearts and Stars and they were coloured with acrylic paint.  


  "CONCERTINA CARD"
 
  For my final project I would like to share the card I created for my Grandson's 18th Birthday. 
 Being such a special Birthday, it had to be a special card and so I created a concertina card
 with some pieces from 2Crafty Chipboard's latest release.

 
The front of this card looks fairly busy I know, but I just couldn't stop myself from
 adding all those lovely little chipboard pieces.

2Crafty Chipboard product used

 Bubble Clumps

Card Word Circles - Happy Birthday

Dotty Bits
 
 Fast Forward Arrows

 Mini Tags

 
The small 'Bubble Clump' was coloured with acrylic paints using a dabber.  I love the
 mottled look you get when using this method. 
 
 
  The 'Dotty Bits' tucked in the paper layers at the side were coloured the same as the Bubble Clump but the 'Mini Tag' was inked with Distress Inks and then lightly edged with gold VersaColor.
 
 
'Card Word Circle' painted and 'Fast Forward Arrow' inked.   Once everything 
was dry I randomly splashed some gesso over everything.
 
 
  Love those 'Fast Forward Arrows' and used quite a few of them on the inside of the card.
 
 
This one was painted with acrylic paint ...
 
 
... as was this one.  It was also lightly inked with gold.

 
  The outer edge of this arrow was inked with VersaColor gold and the actual arrow 
itself was coloured with Black Soot Distress Ink.


This arrow was also inked with Distress Inks and edged with the VersaColor gold.
        
 
The inside of the card when fully opened.
 
  Thank you so much for taking a look at my little creations and I hope you have found some inspiration here.  I urge you to take a look at the fantastic array of chipboard pieces that 2Crafty Chipboard produces, you are bound to find something that you simply cannot live without!  LOL!!
 
  and remember, to find a 2Crafty Stockist near you simply send an email to salesat2crafty@optusnet.com
 
Thank you so much for visiting and enjoy the rest of your day!
Take care and God Bless.
  oxox
 
Photobucket