Showing posts with label "Winter Twig Branches". Show all posts
Monday, February 3, 2025
"It's the SEASON to Sparkle"
Layout and tutorial by Marie Sabatier
Hello everyone,
This is my first inspiration from this month of February.
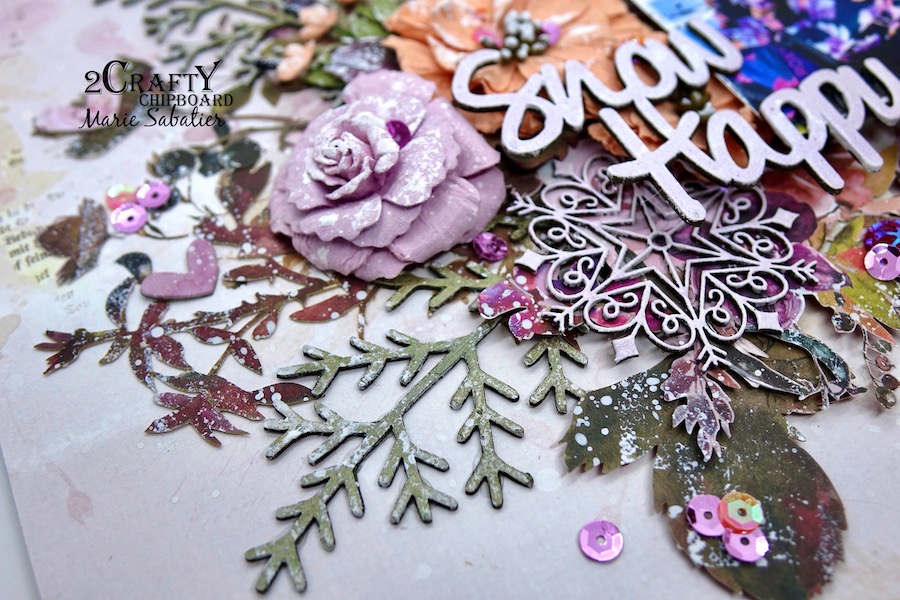
A winter layout with a photo of my granddaughter that I made using a photo editing application.
The colors were my inspiration.
I made a video tutorials that you can watch HERE
The chipboard used:
Once I chose the chipboards, especially these magnificent "majestic-reindeer",
I start by applying a layer of white gesso.
I use glitter embossing powder of the brand "Stampendous" on chipboards "snowflakes".
I start by painting the reindeer with a first coat of white creamy acrylic paint. When I realized my layout, I realized that it was really too 'white'. I apply a layer of metallic wax "Acid" color on one of them.
To soften, I reapply a layer of white gesso.
I insert two branches of "winter-twig-branches" in the middle of my cluster.
I also used a 'Midnight' metallic wax to embellish the title "It's the SESAON to Sparkle" and brushed it with white gesso to break up the overly shiny effect.
Watching the video is a good way to get more detail.
It's always a pleasure to meet you here!
Friday, December 15, 2023
"The Magic of Snow" by Amy Voorthuis
Goodmorning 2Crafty friends,
So glad you are visiting this amazing blog, I really love creating with beautiful chipboard pieces like these. For today I have another 12 by 12 layout as those are my favorites to make. This time I made a wintery layout {my favorite to make} I used two pictures of Abbey in the snow back in 2021.
You know what's amazing, you can order directly from the
2Crafty website here so you can also play with their amazing chipboard pieces.
The Magic of Snow:
2Crafty Chipboard used:
2021's
Crystal Snowflakes
Corner Crackle
Christmas Frame 1
Winter Twig Branches
Snowball Tree
Scrabble Tiles
The Magic of Snow
The beautiful "Christmas Frame 1" was altered with some true snow by {aleene's} after I firstly gessod all my pieces. After that I added some white & pink spray. I really love to alter my chippies with sprays because of the stainlike look. In the middle of the snowflakes I added a pearl drop and the word winter is altered with some white embossing powder.
I cut up the "Snowball Tree" in several pieces and tuck them in my flower cluster they are altered with some wowzers white embossing powder and on the balls I added some nuvo crystal drops. The title was treated with some sprays and wax.
The "Corner Crackle" has to be my favorite piece of 2Crafty Chipboard I tuck that one underneath my first picture. and that one was also altered with some true snow and white spray. The "Twig Branches" I sprayed them with green sprays. All the products used but for the chippies are by 49 and Market.
Thank you so much for your visit today and if you would like
to see more of my work please visit here: Amy's Pretty Papers
Tuesday, February 21, 2023
"Snow Happy"
Layout by Marie Sabatier
Hello everyone,
I am always happy to meet you to present my new inspiration.
In France, we are on winter school holidays.
My granddaughter has just spent a week on holiday in the snow
and this new photo inspired me to create a layout with my favorite chipboards.
"Snow Happy"
The 2Crafty chipboard used:
- Word "Snow Happy"
- Sabine Frame
- Winter Twig Branches
- Foliage Set 10
- Starbright Snowflakes
- Circle Tags Set 2
I was inspired by the colors of the ski jacket to make my layout.
I prepare each panel by applying a layer of white gesso.
I then embellished the title, frame and chipboard "Strabright Snowflakes" with Lindy’s Gang’s
"Pop Rock Purple" coloured embossing powder.
I set up my frame, my photo, and then I formed two clusters.
I added on the "Winter Twig Branches" chipboards a "Lucky Emerald" wax
which I then inserted into my cluster.
By highlighting them.
I did the same for the chipboard "Foliage Set 10".
The snowflake being well openwork it is possible to distinguish the colors behind and mixes
well in the middle of the flowers
And, for more details I added this tag in circle that found its place!
I hope I brought you some freshness and the need to scrape.
Thank you for your visit and see you soon!
Tuesday, November 2, 2021
'Christmas Winterland Cards'
with Lisa Amiet
Hello all!
It's Lisa here on the blog today to share some
Christmas Winterland cards with you!
2Crafty Products used:
For my first card, I have used one of the 'Winter Twig Branches',
for my birds to perch on.
I have also used one of the snowflakes from the 'Wintery Snowflakes' set,
along with a 'Merry Christmas Fine Card Pack'.
For my next card, I have used one of the borders from the
'Lacey Borders Set 1', which I have cut in half,
and used to frame the centre of my card.
I have also used one of the 'Mini Reindeers' in among my elements.
I have left all of my chipboard raw for these cards,
I love the warmth that it adds to my project.
For my final card, I have used another of the snowflakes
from the 'Wintery Snowflakes' set,
along with two from the 'Mini Weather Icons', that I have layered.
Thursday, November 19, 2020
CHRISTMAS STAR by Elena Martynova
Hello crafty friends!
Elena Martynova here on 2Crafty's blog today to share with you my Christmas project.
The New Year is coming too soon, and in my workshop little elves are already working hard creating Christmas projects.
This openwork star has been waiting for its turn to be decorated for the holiday for a whole year. I was saving it to use the new paper collections. Not so long ago, I received a collection "THIS MIRACLE NIGHT" from Craft o'clock, and this is what I used in this work.
I painted the star first with white paint, then added some shimmering acrylic metallics
and stamping with embossing powder.
I decorated them with Lindy's Chalk It Up powder.
See what 2Crafty chippies were useful to me in this layout:
10" Decorative Panel - Flourish Star
Thank you so much for taking the time to stop by today
~ stay safe and well, and see you again soon, love Elena xxx
Tuesday, December 17, 2019
Some Silly Season Fun
with Lisa Amiet
Hello all!
It's Lisa here today to share some silly season inspiration with you.
I have created a set of tags.
2Crafty Chipboard products used:
For these tags I have chosen an Aqua and White colour scheme.
I have inked the edges of the tags, after I had adhered my base paper.
I have used a couple of the 'Flower Medallions',
that I have finished in white.
I have used these under my spiral flowers.

I have also used one of the 'Winter Twig Branches',
at the top of my tag. I have again finished this in white.
The leaf is from the 'Foliage Set 6',
and has been finished in an aqua glitter embossing powder.
Lastly, I have used one of the 'Christmas #Word Set 1'.
again finished in the aqua glitter embossing powder.
For my second tag I have used one of the 'Fine Snowflakes',
finished in white.
I have again used one of the leaves from the 'Foliage Set 6',
finished in the same aqua glitter embossing powder.
To frame my sentiment I have used one of the 'Tiny Star Circles Frames'.
I have finished this in white,
and have then used a silver glitter Stickles on each star.
To finish I have used another of the 'Christmas #Word Set 1',
again embossed in aqua glitter.
I hope that you like what I have created,
and that these tags inspire you to create something festive soon!
Until next time!
Lisa
Subscribe to:
Posts (Atom)


