Showing posts with label triangle clusters. Show all posts

Friday, September 11, 2026

Amazing just the way you are - Laura Gilhuly

Hi everyone!
Laura here to share my next layout!


2Crafty Products used:


6x4 Phrase Stick 3
Circle Stack
Triangle Clusters
Interlocking Grid Panels


I prepped all chipboard with white gesso then began colouring them!


I used gelatos then inked the edges in black


I then began layering the pieces creating dimension


For the title piece I coloured the title part with the yellow gesso then inked the rest.

To finish the layout I added some art stones, sequins and dyed cheese cloth.


Thanks for stopping by


Tuesday, November 21, 2023

"My Lil' SUPER HERO"
Layout and tutorial by Marie Sabatier

Hello everyone,

It is always a pleasure for me to present you a new project. 
A layout with my grandson, my superhero. 

Of course, I opted for this nice chipboard model that looks like a shield.


My Lil' SUPER HERO


I made a video tutorial that you can watch HERE


The 2Crafty chipboard used:


- My Lil' Super Hero Title
- Triangle Clusters
- Doodled Arrows
- Word Circle Set 1


As you can see in the video, I started by applying a layer of white gesso on each chipboard.

Which I then covered with a "Silver Queen" embossing powder and finished with a layer 
of "White Gold" metallic wax.

After placing my photo on layers of paper, I created an embellishment group on the left side by inserting the chipboard template "Word Circle" and a triangle piece.


On the shield I used a stamp with "mottled" patterns to not cover it entirely. 

The meaning of my layout is well represented by this generous title, which I love!
I add an arrow to draw attention to the photo.


In order to add details, I randomly place pieces of triangle. 


I love my little guy in this picture, ready to jump as a superhero!

I hope you find time to watch the video.


Thank you and you to play with our beautiful chipboards.


Tuesday, February 1, 2022

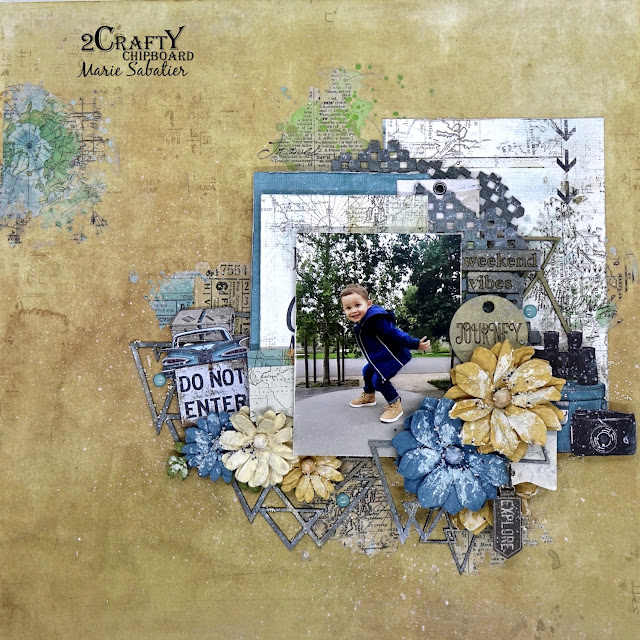
"JOURNEY"
Layout By Marie Sabatier


Hello everyone, 

I meet you to present my first layout of this month of February. 

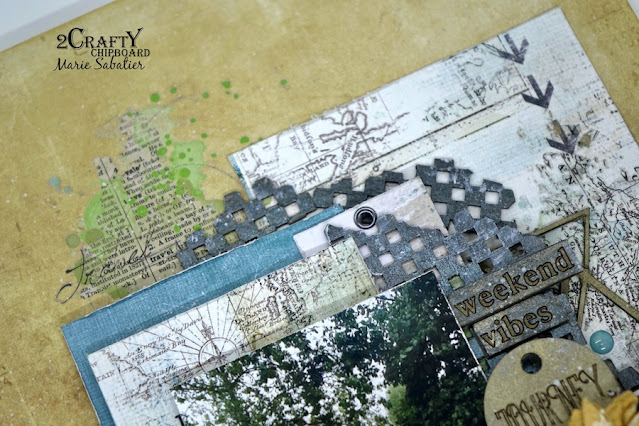
I chose to make a layout with this photo of my grandson Leo who is ready to pounce. 
I love when he poses but unfortunately it's rare.


"JOURNEY"


The 2Crafty chipboards used : 

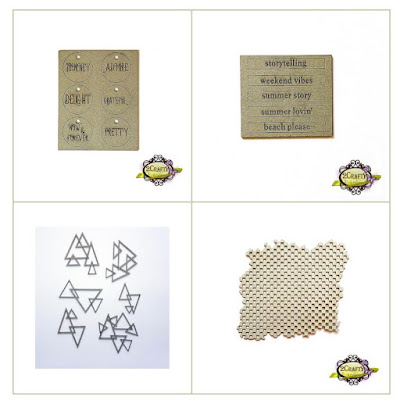
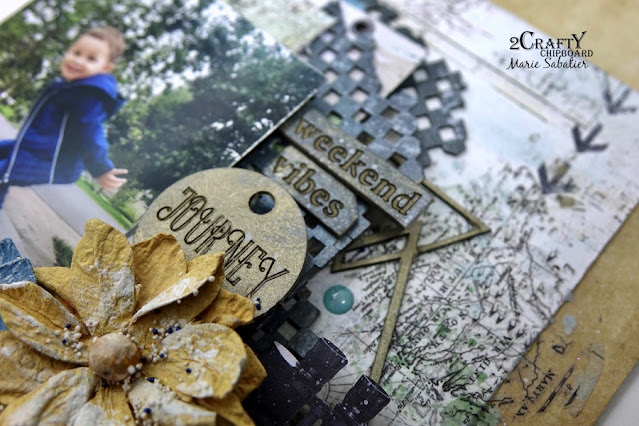
- "Journey" Circle Tag Set 2
- "Weekend Vibes" ATC Title Sticks Set 4
- Triangle Clusters
- Checkeboard Panel


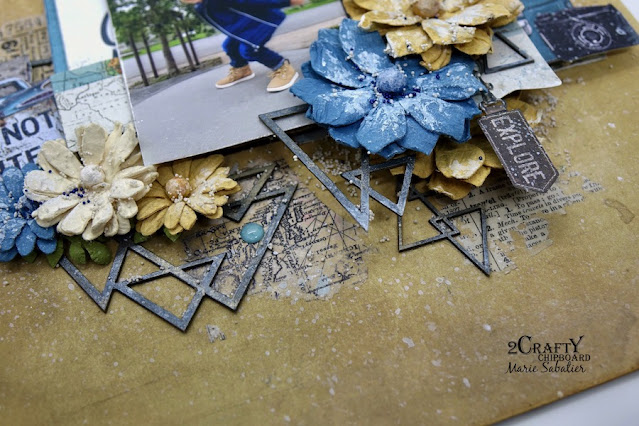
Each particle board has been embellished in the same way. 
I applied a coat of shiny metallic paint in "Hämatit" color.

On the "Triangle Clusters" chipboards I added a little "Turquoise Satin" 
and White Gold" colored wax.


It's the first time I've used them because I thought it was difficult to position them, 
but in the end it seemed pretty good to me!


On the "Circle Tag" chipboard I just rubbed with "White Gold" wax.

I really like the chipboards titles at 2Crafty they are numerous and 
adapt well to different styles of layout.


I then slipped this chipboard "Checkeboard Panel" into the papers. 
It brings relief in the middle of my cluster of embellishment.


That's it, for me it's over but come back tomorrow for other inspirations.


Good scrap and see you soon!


Wednesday, October 17, 2018

October Inspiration with Lisa Amiet


Hello 2Crafty Peeps!

It's Lisa here today to share some more inspiration with you.
Isn't the year flying past?!

Today I have a layout that I created featuring my son,
one of my permanent models ;)
Can I say I LOVE how this turned out, I hope you do too!


I am a huge fan of black backgrounds, and I love this one! It's not all black ;)
There are some splashes of my favourite colour!


The feature piece of this layout has to be the 'Fiddlesticks Panel',
 that I have finished the same colour as my splatters and papers :)


I have also used one of the Geo tags from the 'Assorted Mini Camera Set',
that I have embossed it white. 


I have also used a couple of the 'Triangle Clusters', also embossed in white.
I have then added some word stickers to them.


Oh that panel is one of my favourites! 


A pic of the dimension to the page.


I hope you like what I have created!
Some inspiration for you to take some crafty time out today.


2Crafty Products Used:


Until next time!

Take care

Lisa


Tuesday, July 3, 2018

July Inspiration - "You Make Me Happy"
by Elisa Ablett

Hi Crafters,

Elisa here from the design team, sharing my latest layout with you and the first of
 my July inspiration featuring the gorgeous chipboard from 2craftychipboard.

I wanted to tie in a few elements from my chosen photo including my son's
smile and cheeky personality and also the patterns from his shirt as well.

I chose to work with the some awesome chippy pieces plus the new
Cocoa Vanilla  'Boys Rule' range of papers and elements and my gel plate.

"You Make Me Happy"


Here are my chosen chipboard pieces from the great range at 2Crafty:

1. Triangle Clusters
2. Sequin Negative Bits
3. You make me Happy title
4. Family Symbols
5. Circle Nesting Frame

Circle Stack (units of 3)

I am always trying to find interesting ways to jazz up
 my chipboard, so lets take a closer look!


For my title - You make me happy, I painted it black and then smoothed a 
metallic wax in silver over the painted chipboard. 

This gives quite the distressed metallic look! 
I will be doing this again for sure.


For the triangle clusters, I embossed them with an old glitter embossing powder 
that had sprinkles of glitter in it with a black base colour. 

It went perfectly with the metallic theme I had started with my layout. 


For the background, I added the sequin border piece that came in the Sequin negative pack.
I coloured this with black ink and then added a layer of clear glitter pen over the top.

Also I embossed my little man piece of chipboard with a lovely blue black embossing powder
to match the blue in his shirt and the rest of the layout. To make him pop out a bit,
I added a star behind the chipboard.


Last but not least the chipboard that just keeps on giving!! Circle Stack, I have
 made quite a few layouts using the stack of circles so far. As you can see in the above photo,
I used a circle to frame my photo, to make the photo stand out more, I used the circle to
mat a piece of paper with a subtle background design. 

This is a great technique to use with all those chipboard frames you have stashed away!!
Try it today and tag me in the post, I would love to see what you create!


Well that's it from me today, I hope you have been inspired to pull out 
some chipboard today from the great 2Crafty range.

Thanks for stopping by the blog 

Elisa xx


Monday, July 31, 2017

An Extra Share by Tammy Klingner


Thought I'd pop in today with a few bonus pages.
I recently was lucky enough to go on the amazing 10th and final
Escape2Create retreat in Port Lincoln, South Australia.
A weekend filled with creativity, inspiration, friendships, laughs and decadence!
So good for the soul.
I created these layouts whilst there, and of course they have used lots of my favourite
 2Crafty Chipboard on them, so thought I'd share them here as well.
First up is:

"She Drives you Crazy"


I used the following 2Crafty Chipboard:

"Alpha Set 1"
"ATC Tiny Hearts & Stars"
"Circle Stack"
"Circular Panel"


 I painted some of the "Circle Stack" in black, and some in white.

I trimmed some circles from the "Circular Panel" and painted these white.

I added these to my page, ensuring some were underneath my paper stack and towards 
one side of my layout to create movement, and draw the eye into the layout.


I also painted the letters from the "Alpha Set 1" for my CRAZY title in white too.

I really like how the white and the black pop off the page.


I painted some of the stars from the "ATC Tiny Hearts & Stars" in a
vibrant deep blue and also placed these randomly around the circles.


I also created a layout titled..

"Amazing"


 For this layout I used the following 2Crafty Chipboard:

"Triangle Set"
"Mini Word Set 1"


 I added a bright fun paper to the "Assorted Triangles" and cut them out. 
I also traced around a few of these triangles with a pen. 
This gave the page a 'fun' feel which is perfect with my photos and the story of my layout.


I painted the word 'amazing' from the "Mini Word Set 1" in a silver as I'd used a fun embellishment in silver, yet hadn't used any other silver on the layout, so doing this tied them together.


I like the fun feel I created on this layout.


My final layout for today is titled...
"Happiness"


I used the following 2Crafty Chipboard:

"Line Words - Happiness borders"
"Tiny Triangle Clusters"
"Triangle Clusters"


 I painted the happiness title from the "Line Words - Happiness Border"
black and ran this down the length of my page.
I really love these line titles. 
 So cool.


I painted some of the "Triangle Clusters" and the "Tiny Triangle Clusters"
 in a vivid blue and added these in a triangular shape around my photo.


Another bright happy layout celebrating a gorgeous friend of mine.
So that's it from me today.
I hope you enjoyed the extra inspiration today.

If you'd like to see more my blog is HERE
Much love,
Tam
xxx