Showing posts with label Steampunk Elements set1. Show all posts

Thursday, May 14, 2026

'Adore'
with Lisa Amiet

 Hello 2Crafty Lovers!
It's Lisa here today to share some scrappy inspiration with you,
a layout featuring my son. 


 2Crafty products used:


 'Mini Family Icons'
'Mini Number Panels'
'Arrow Gear Clusters'
'Steampunk Element Set 1'
'Fine Word Set 1'
'Industrial Light Bulbs'

 
For this layout, I used one of the 'Industrial Light Bulbs',
on the right side of my photo. I finished it in black, 
and then roughly painted the light bulb element
 to make it look like light.  

I also used one of the 'Mini Number Panels',
also finished in black. 

 
I also used one of the 'Arrow Gear Clusters',
also finished in black and adhered on the right side, 
layered with some light bulbs elements from my papers.

 
For my title, I used one of the words from the 
'Fine Word Set 1', again finished in black,
and adhered under my photo.  
 
I also used one of the 'Mini Family Icons'
also in black and layered on a tag. 
I also used one of the 'Steampunk Elements Set 1'
in this cluster of elements.  

 
On the left side of my page, 
I used two more of the 'Industrial Light Bulbs',
finished the same as the previous piece, 
and layered in the top left corner of my page. 

I really love how the black pops against
 the yellow and neutral tones of my papers.
I hope that you like what I have created.

Until next time!

Lisa


Thursday, February 19, 2026

Attitude - Laura Gilhuly

 Hi everyone!
I am back today to share another masculine mixed media layout


2Crafty Products used:


Banners Flags
Chevron Bits
Word Circle Set 2
Steampunk Element Set 1
Steampunk Arrow Set 2
Scribble Circles
Harlequin Clumps


After prepping the chipboard with white gesso I applied rangers distress mica stain in
 Winter Frost to most of the chipboard.


I allowed it to dry naturally then layered Dylusions Black and Ranger Distress Stain in
Lost Shadow and also allowed to dry naturally. 
 When completely dry I applied some Ranger vintage photo distress ink over it and black ink to the edges.


I used the same Vintage Photo ink on the title!


Thanks for stopping by


Tuesday, March 11, 2025

Dude - Laura Gilhuly

 Hi everyone!
Laura back today to share my first March layout!


2 Crafty Products used;


Steampunk Corner 5
Industrial Light Bulbs
Steampunk Chain Clock Cluster
Assorted Chain Lengths
Steampunk Gears Medium
Steampunk Element Set 1
Steampunk Arrow Set 2
Dude
Steampunk Gears Small


This is our youngest working on his truck and all these steampunk and masculine pieces were just perfect for this layout

I covered all the chipboard with white gesso then let it dry.


I then 'pounced' some heavy texture paste and let it dry.


I applied some navy blue paint then spritzed it with water.  I added Finnabair mica powder in blue and brown then spritzed with water and finally Dylusions ink spray in black marble and postbox red. 


To finish and accent the texture on the chipboard I dry brushed silver metallic craft drops from Elizabeth Craft Designs on top.


I hope I have inspired to get creative with your awesome 2Crafty Chipboard.


Wednesday, May 24, 2023

"destinations"
Layout by Marie Sabatier


Hello everyone,

It is always a pleasure to meet you to present my new project for the month of May.

A travel-inspired layout.
And the original photo of Leo and his mom that I found in coordination with my theme.

"destinations


The 2Crafty chipboards used:


- 6 X 4 Phrase Stick Set 1
- 12 X 12 Clock Face Frames
- Luggage
- Steampunk Element Set 1 


I apply a layer of white gesso to each chipboard. 

To choose the colors, 
I took as a starting point the moodboard of this magnificent collection of papers.

I had part of a previous layout left. 
On the "Clock Face" chipboard I started with orange ink. To add texture I apply a pattern that I emboss with a powder to emboss orange too. I stamp a pattern of lines in black and finish with finger applied wax in the shades of pink and blue.


For the chipboard "Luggage" I embossed a color powder "Café au lait" 
which I then waxed darker for a more vintage look.

I added these luggage in color to contrast the whole.


Here too, I had one word left of the phrase "beautiful destinations" that I simply added. 
Nothing is lost in scrap!


And these "Steampunk" that I had never used before, that I find beautiful 
and that I place in prominence. They fit so well into my disposition.


I hope the layout gives you some ideas for using our beautiful chipboard!


Thank you very much and see you soon.


Thursday, September 22, 2022

'Live your Adventure'
a layout by Rachael Funnell


Hello & warm welcome..
Today I have a layout  to share with you which I have created 
and features my nephew and some GREAT 2 Crafty Chipboard pieces...


2 Crafty Chipboard used:
Live YOUR Adventure 
Industrial Pipes/Mechanics
Steampunk Element set
Steampunk medium size gears


Let's start with the Construction Set chipboard pieces
 which are fairly new...  I have inked those pieces with 
black & yellow before gluing them down..


Next for the Steampunk Element &
a couple of Steampunk Medium size gears
I have gone with inking these pieces sliver...


Lastly for the title....  I have added a nice
 a thick coat of gesso to the Live your...
& then inked the 'Adventure' with black ink...

Thanks for stopping by 
Until next time

Friday, April 29, 2022

Odis P. - Created by Emma Zappone - BONUS VIDEO

 Please meet Odis, he is the sweetest of them all.
Gentle and kind, Odis only wants what is best for all of earths creatures.


Check out the beautiful chippy I chose this week.....

Grid Panel
Polaroid Frames
Steampunk Element set1


So this page was inspired by another one of Lisa Aisato's art works off Pinterest. I loved that Odis looks so tranquil and yet boyishly dishevelled. His name came about by some Tim Holtz stickers I had in my stash. And so the page took form. I have a video for you today also, so you can see the story unfold.
Plus I love the chippy used in this piece, old and new pieces together.


Let's start talking about the finishes on the chipboard. They all were painted with an acrylic paint to start with, except the Polaroid Frame as this also had a little crackle paste on it before painting. I wanted to use muted tones to match the tones in the image. I blended some Distress Oxide inks over the Acrylic to add a chalky, old look to them.


The frame was painted in a darker blue to match the blue hues in the image. Distress Oxides were also blended over the top, especially where the paste was laid. 


Once the paint and the Oxides were added, I added a little dry brushing of Gold acrylic to all the chipboard pieces. This added a little bit of shine, but not impacting the more demure look I wanted on the pieces. I love how this Steampunk Element piece picks up all the light and dark shades.


While I stamped the background papers, I added a little stamping to the chipboard also. This gives just that extra bit of interest and helps tie them to the whole composition.

I would love it if you stopped by and checked out my video here....


Thank you for joining Odis and myself.

Stay crafty everyone.
Em xx


Monday, February 7, 2022

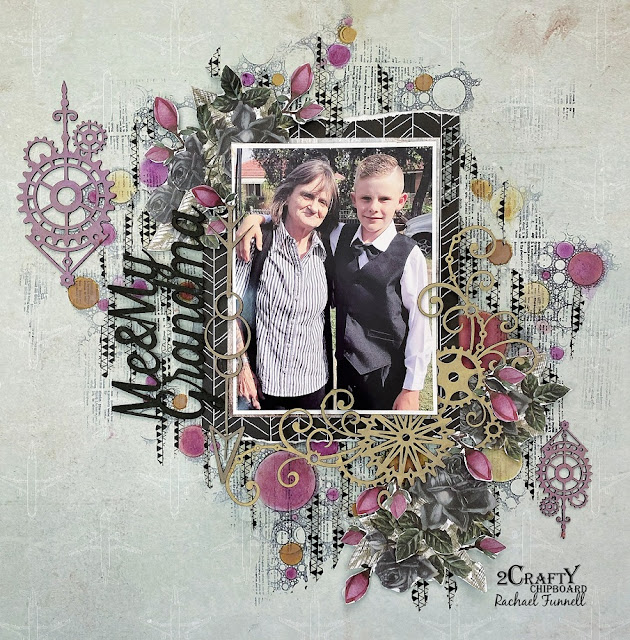
'Me & My Grandma'
layout by Rachael Funnell


Hello 2 Crafty Fans!
Rachael with you sharing another 
2 Crafty Chipboard inspiration....

This fun funky mixed media page 
featuring a grandma & my nephew..


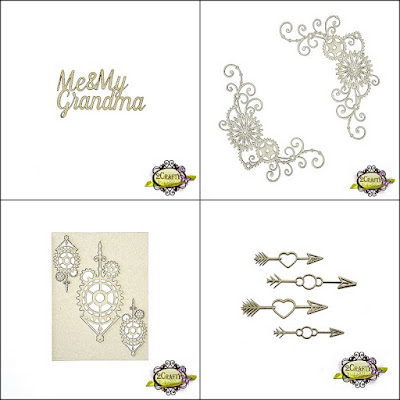
2 Crafty Chipboard used:
Me & Grandma title
Corner steampunk set 6
Steampunk Element set 1
heart & circle Arrow set


Once I had created my mixed media background 
& chose my colour scheme, 
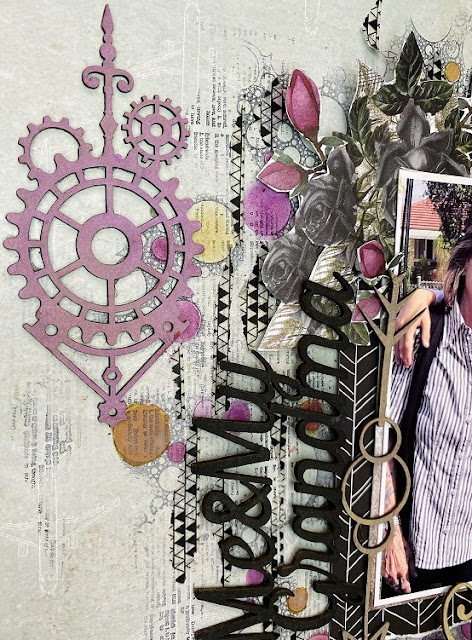
I went with inking my title with black..


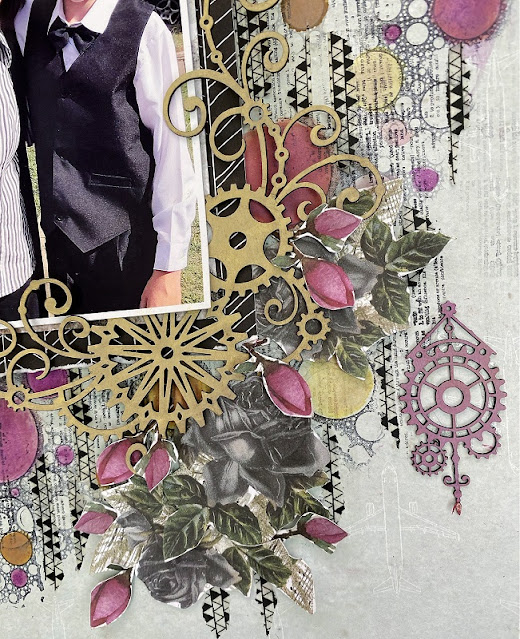
The Corner steampunk & the Circle Arrow
have been inked with with Distress  - Vintage Photo
& lastly for the Steampunk elements I have inked them with 
Distress - Seedless Preserves which is the like a nice deep dusty pink..


That's it from me for now..
Take care & untill next time
HAPPY Craftying!!!