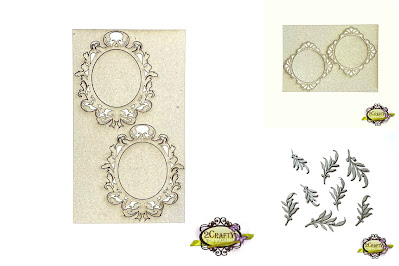
Showing posts with label Foliage Set 6. Show all posts

Tuesday, June 2, 2026

'Cherish'
with Lisa Amiet

 Hello 2Crafty Fans!
It's Lisa here today with some scrappy inspiration for you.
I created this layout, for a bit of summer feeling, 
now that its getting cooler."

"Cherish"

 
2Crafty products used:
 
 
'Fine Word Set 1'
 'Foliage Set 6'
'Grid Panel'
'12 x 12 Stacked Filmstrips'


For this layout, I used the '12 x 12 Stacked Filmstrips'
as the base layer under my photo,
which I finished with aged white embossing. 

 
I also used a few of the 'Foliage Set 6' pieces,
which I finished in a turquoise to match my papers & photo,
and tucked into my clusters. 


I also used a piece one of the 'Grid Panels',
also finished in the same turquoise,
 and stacked under my photo. 

 
 I then used one of the words from the 'Fine Word Set 1',
which I embossed in the same aged white finish,
and layered over the grid panel piece.  
 
 
I really like the beachy feel to this layout,
bringing a little warmth back.
I hope you like what I have created.
 
Until next time!

Lisa
 

Tuesday, February 6, 2024

City of Love Cards by Tania Ridgwell

Hi there!
Tania joining you today to share the first of my DT projects for February.  I have created a set of cards. 

"City of Love Cards"


2 Crafty Chipboard Used:

*Card Sentiments - Various
*Foliage Set 6
*Photo Adornment - Element Set 2

I created each of my card bases using the gorgeous Mintay City of Love Paper Collection.
I used Lilac Rose Opal Polish to colour the Photo Adornments and Foliage chippie pieces.  Once dry I gave them all a light coat of Frost White All Purpose Ink.
I coloured each of the chippie sentiments with the Frost White All Purpose Ink also.
To construct each of the cards I embellished them with fussy cut flower elements and blooms.  I cut the Photo Adornments in half and tucked them and the foliage pieces into the clusters on each card and to finish each card I added a Chippie Sentiment Title to them.

See each card below.


Thats' all from me today, I hope I have inspired you all a little with my City of Love Cards.
  Until next time thanks so much for stopping by.
Tania xx

Thursday, June 8, 2023

Priceless Memory Altered Wooden Circle Plaque by Tania Ridgwell

Hello there!

Tania with you today popping in to share the first of my DT projects for June.
  I have altered a Wooden Circle Plaque.

"Priceless Memory"


2 Crafty Products Used:

*Photo Adornment - Flourish Set 4
*Priceless Memory Title
*Foliage Set 6
*Photo Adornment - Decorative Rod Set 1


I have used the gorgeous Paper Rose Dear Isabella Collection to create this project. 
 Once I chose the paper for the background of my circle plaque I set about decorating.


I painted the Photo Adornment - Flourish Set 4, Photo Adornment - Decorative Rod Set 1 and Priceless Memory Title with Pink Thistle Opal Polish. I also sponged on a little bit of Gold Paint on the chippie Title.  The Foliage Set 6 chippies were painted with Monte Arte Gold Paint.

I added my photo first and then set about decorating around it.  I added lots of beautiful blooms around the photo.  I cut the Decorative Rods in half and tucked a half under the top and bottom of the photo to the left side.  The other two halves I put alongside the left and bottom of my photo. I tucked a flourish into the flowers at the top and at the bottom of the circle plaque.  
I randomly tucked the foliage chippies into the flowers around the photo.  I then added the Priceless Memory chippie Title to the right side of my photo.  To finish of my project I lightly sponged on some gesso on the flowers and chippie pieces.


Thats' all from me today, I hope I have inspired you all with my little Beyond the Page project. 

 Until next time thanks so much for stopping by.

Thanks Tania xx


Tuesday, December 20, 2022

'Simple Moments'
with Lisa Amiet


Hello all!
I don't know about you but in all this Christmas craziness
I felt the need for some summer colour,
so I created this layout.


2Crafty products used:


I have used one of the 'Flourish Adornment Set 7',
which I have first embossed in white,
followed by a second coat of distressed green glaze, just on the ends,
for a two-tone effect. 


I have also used one of the 'Foliage Set 6',
which I have finished in a peach colour
 to coordinate with my papers and flower.


I have also used one of the 'Mini Swirls 1',
which I have also finished
in the white and distressed green glaze.


For my title, I have used the
'Simple Moments make Great Memories',
which I have finished in the distressed green glaze to match my layout colours. 


I hope that you like what I have created, 
a little pop of summer colour for you. 

I hope that you all have a wonderful Christmas
and a happy New Year.

Until next time!

Lisa x


Sunday, November 20, 2022

'Simple Moments'
with Lisa Amiet


Hello 2Crafty fans!
It's Lisa here today to share some scrapping goodness with you.

I felt the need for some summer colour,
so I created this layout.


2Crafty products used:


I have used one of the 'Flourish Adornment Set 7',
which I have first embossed in white,
followed by a second coat of distressed green glaze, just on the ends,
for a two-tone effect. 


I have also used one of the 'Foliage Set 6',
which I have finished in a peach colour
 to coordinate with my papers and flower.


I have also used one of the 'Mini Swirls 1',
which I have also finished
in the white and distressed green glaze.


For my title, I have used the
'Simple Moments make Great Memories',
which I have finished in the distressed green glaze to match my layout colours. 


I hope that you like what I have created, 
a little pop of summer colour for you. 

I hope that you all have a wonderful Christmas
and a happy New Year.

Until next time!

Lisa 


Thursday, March 17, 2022

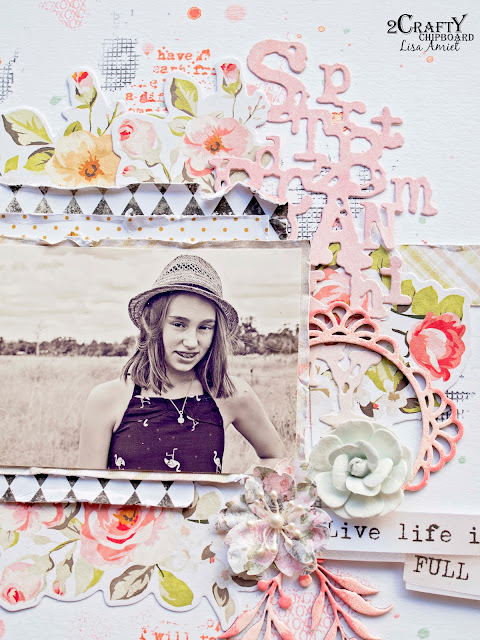
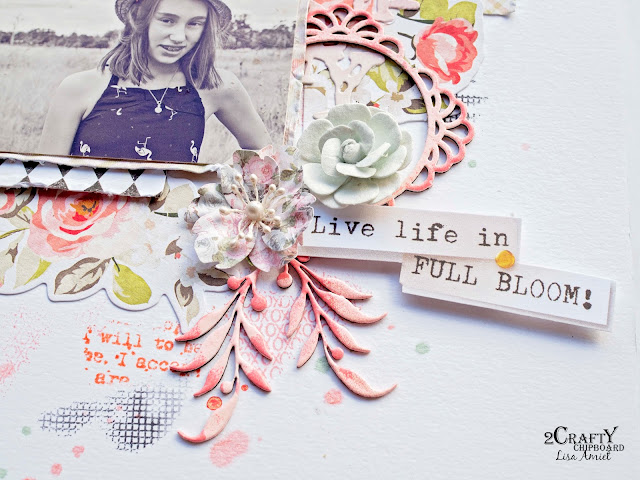
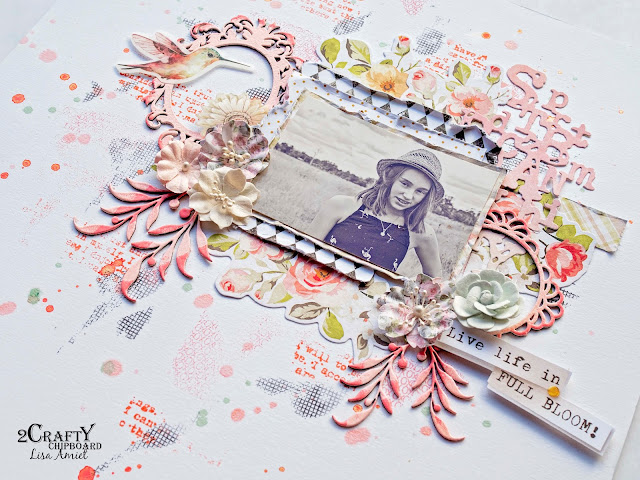
'Live Life In Full Bloom’
with Lisa Amiet


Hello 2Crafty fans!
It's Lisa on the blog today to share some 2Crafty inspiration with you.

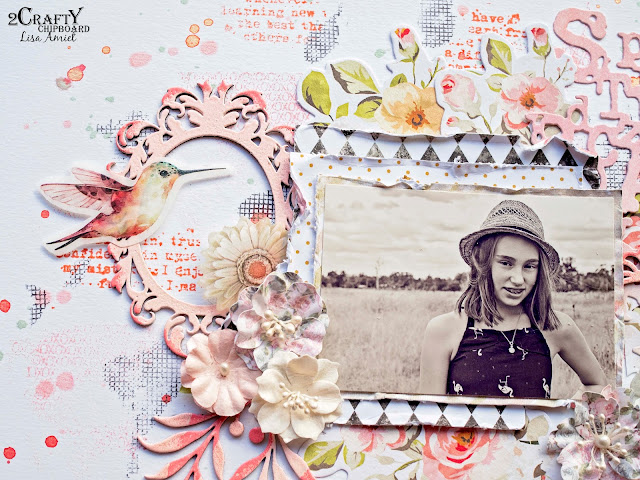
I have created this layout featuring my daughter,
and I have chosen some of the gorgeous
'Mini Decorative Frames' to use on my layout.


2Crafty Products used:


The first is the round 'Mini Decorative Frame Set 8',
that I have first embossed in a pale pink.
I have then embossed only the edges in a darker pink. 


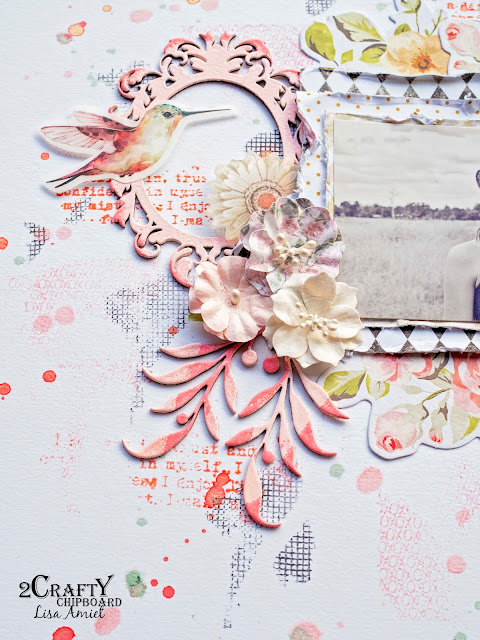
I have then also used one of the oval 'Mini Decorative Frame Set 3',
that I have again given the two-tone pink embossing finish.
I have then layered them with elements from my papers, and some flowers.


For my foliage I have used two of the 'Mini Foliage Set 6'
with each floral cluster. I have given both a two-toned pink finish, 
although they differ slightly. 


I really like how the two-tone finish highlights the gorgeous frames
 and foliage against the white background paper.


I hope that you like what I have created,
 I had a lot of fun going all girly on this page.

Until next time!

Lisa x


Tuesday, December 14, 2021

"A Home is not a home without a Dog"
Layout By Marie Sabatier

Hello loyal friends of 2Crafty.

Here is my second inspiration for this month of December. 

I was inspired by this photo to make my layout. It's the little puppy that my son has just adopted, it's a female called "Sayka" a ball of happiness.

He left home in the spring and couldn't do without our dogs, as the title suggests...


"A Home is not a home without a Dog"


The chipboard used:


- Title "A Home is not a home without a Dog"
- Circle Dot Frames
- Houses
- Foliage Set 6


I wanted to give him this layout for his Christmas decoration. 

So i'm still having fun...


I embellished each chipboard in the same way. First, a layer of white gesso 
then layers of golden acrylic paint. 

On the particle boards "houses" I added patterns with transfer rub-on.

To get different golden hues, I painted with metallic waxes, and opal waxes.


For the title and the chipboards "Circle Dot Frames" and "Foliage Set 6" 
I proceeded in the same way but adding nuances.


I wanted to get closer to the color of the dress of "Sayka" in the end I'm quite satisfied ...


Hope you liked this layout and you yourself will be inspired.


Marie