Showing posts with label 12x12 Weathered Clock Face Frames. Show all posts

Wednesday, February 18, 2026

Love You by Tania Ridgwell

 Hello there! 

Tania joining you today to share the last of my DT projects for February. 
  I have created a layout for my second share.

"Love ❤️ You"


2 Crafty Chipboard Used:

*Love You
*Feather Outline Set
*12 x 12 Weathered Clock Face Frames
*Oversized Flower Stem Set 1
*6x4 Phrase Stick Set 4


I have used the beautiful Uniquely Creative 'Whisper's of Wisdom' Collection to create the base for my Layout.


I coloured the medium sized Weathered Clock Face Frame & Oversized Flower Stem chippies with Lilac Rose Opal Polish and once dry I randomly dabbed on some gesso to tone done the colour.  The Feather Outline, Love You & Love You Long Time (from 6x4 Phrase Stick Set 4) Title chippies have been painted with a couple of coats of gesso.


I placed the Weathered Clock Face Frame chippie and my photo on my background page first.  I then added the Oversized Flower Stem & Feather Outline chippies along the bottom of my photo.  I embellished my page with lots of paper blooms and coordinating creative cuts.  I added the Love You chippie Title along the bottom and the Love You Long Time chippie across the top right.


Thats' all from me today, I hope I have inspired you all with my Layout.  Until next time thanks so much for stopping by.
Tania xx

Wednesday, September 17, 2025

BeeYOUtiful by Tania Ridgwell

 Hello there! 

Tania joining you today to share the last of my DT projects for September. 
 I have created a layout for my second share.

"BeeYOUtiful"


2 Crafty Chipboard Used:

*BeeYoutiful Set
*6 x 6 Circle Frame Set
*12 x 12 Weathered Clock Face Frames


I have used the gorgeous 49 & Market 'Botanical Buzz' Collection to create the base for my layout.  


I coloured all the chippie pieces from the BeeYoutiful Set with Golden Glow Opal Polish.  Once dry I randomly dabbed onto some gesso onto the BeeYOUtiful title.  I coloured the assorted circles and the Weathered Clock chippie with Heidi Swapp Chartreuse Color Shine.


I added a some distressed paper under my photo and then cut the Weathered Clock chippie in half and added a half under the top and bottom of the distressed paper.  I added lots of paper blooms around my photo and then tucked in the Honeycomb & Bee chippies amongst the flowers.  I added the assorted Circle chippies around the flowers and finished of my page by adding the BeeYOUtiful chippie title along the bottom left of my photo.


Thats' all from me today, I hope I have inspired you all a little with my Layout. 
Until next time thanks so much for stopping by.
Tania xx

Thursday, April 17, 2025

"All About Love"
Embroidery Hoop
with Amy Voorthuis

Hello and good morning lovely 2Crafty friends,
How wonderful of you all to stop by the 2Crafty blog, for today I have a little something else to show you. This time I made a spring embroidery hoop, but my printer was acting up so I didn't used
the picture I wanted too. But this is still a cute picture of your beautiful children Kevin & Abbey! 
Enjoy my post....


All About Love:

Gorgeous 2Crafty Chipboard used: 
 12x12 Weathered Clock Face Frames
11" Celia Frame
One Love Title
Frame Celia's Flourish
Fine Fancy Butterfly Set
Crazy About You


All the chipboard pieces are altered with two layers of white gesso. Then I treated the two celia frames {those are my favorite frames from 2Crafty by far} with two layers wowzers white embossing powder, I also did that with the top part of the word "about" the bottom part I used my alcohol marker in a light denim blue color. I also used that for the word love.


The butterflies are also altered with my alcoholmarker in the color "straw yellow" then I layered them on some light yellow paper from the same collection I used here which is the NEW maja design collection called Spring Garden. On the centers of the butterflies I added some nuvo crystal drops, the clock face I just painted with two colors of acrylic paints in blue & yellow!

 Hope you all enjoyed my post thank you so much for stopping by, I will be back with another project soon hope to see you back then.... 
Meanwhile if you would like to see more of my work you could visit here: 
Amy's Pretty Papers

Friday, October 4, 2024

You Have My Whole Heart by Tania Ridgwell

Hi there!
Tania joining you today to share the first of my DT projects for October.
  I have created another layout. 

"You Have My Whole Heart"


2 Crafty Products Used:

*Foliage Set 12
*Mini Dotty Bits
*You Have My Whole Heart Title
*12 x 12 Weathered Clock Face Frames


I have used the gorgeous Mintay 'Traveller' Collection to create the base for my layout. 


I coloured the Weathered Clock Face Frame chippie with Aged Mahogany Distress Ink and then randomly dabbed on some Old Denim Wax to it.  The Foliage and You Have my Whole Heart title chippies have been coloured with Heidi Swapp color shine.  Once my title was dry I also randomly dabbed on some of the Old Denim Wax.  The Mini Dotty Bits chippies have been coloured with the Old Denim Wax.  I added some paper layers under my photo and then tucked the layers between the Clock Face Frame chippie and added it to my background page.


I added lots of paper blooms to the bottom left and top right of my photo and then tucked in the Foliage chippies amongst the flower clusters.  I added some of the Mini Dotty Bits chippies to each of the flower clusters.  I finished of my page by adding my You Have my Whole Heart title.


Thats' all from me today, I hope I have inspired you all with my Layout.  Until next time thanks so much for stopping by.
Tania xx

Tuesday, August 6, 2024

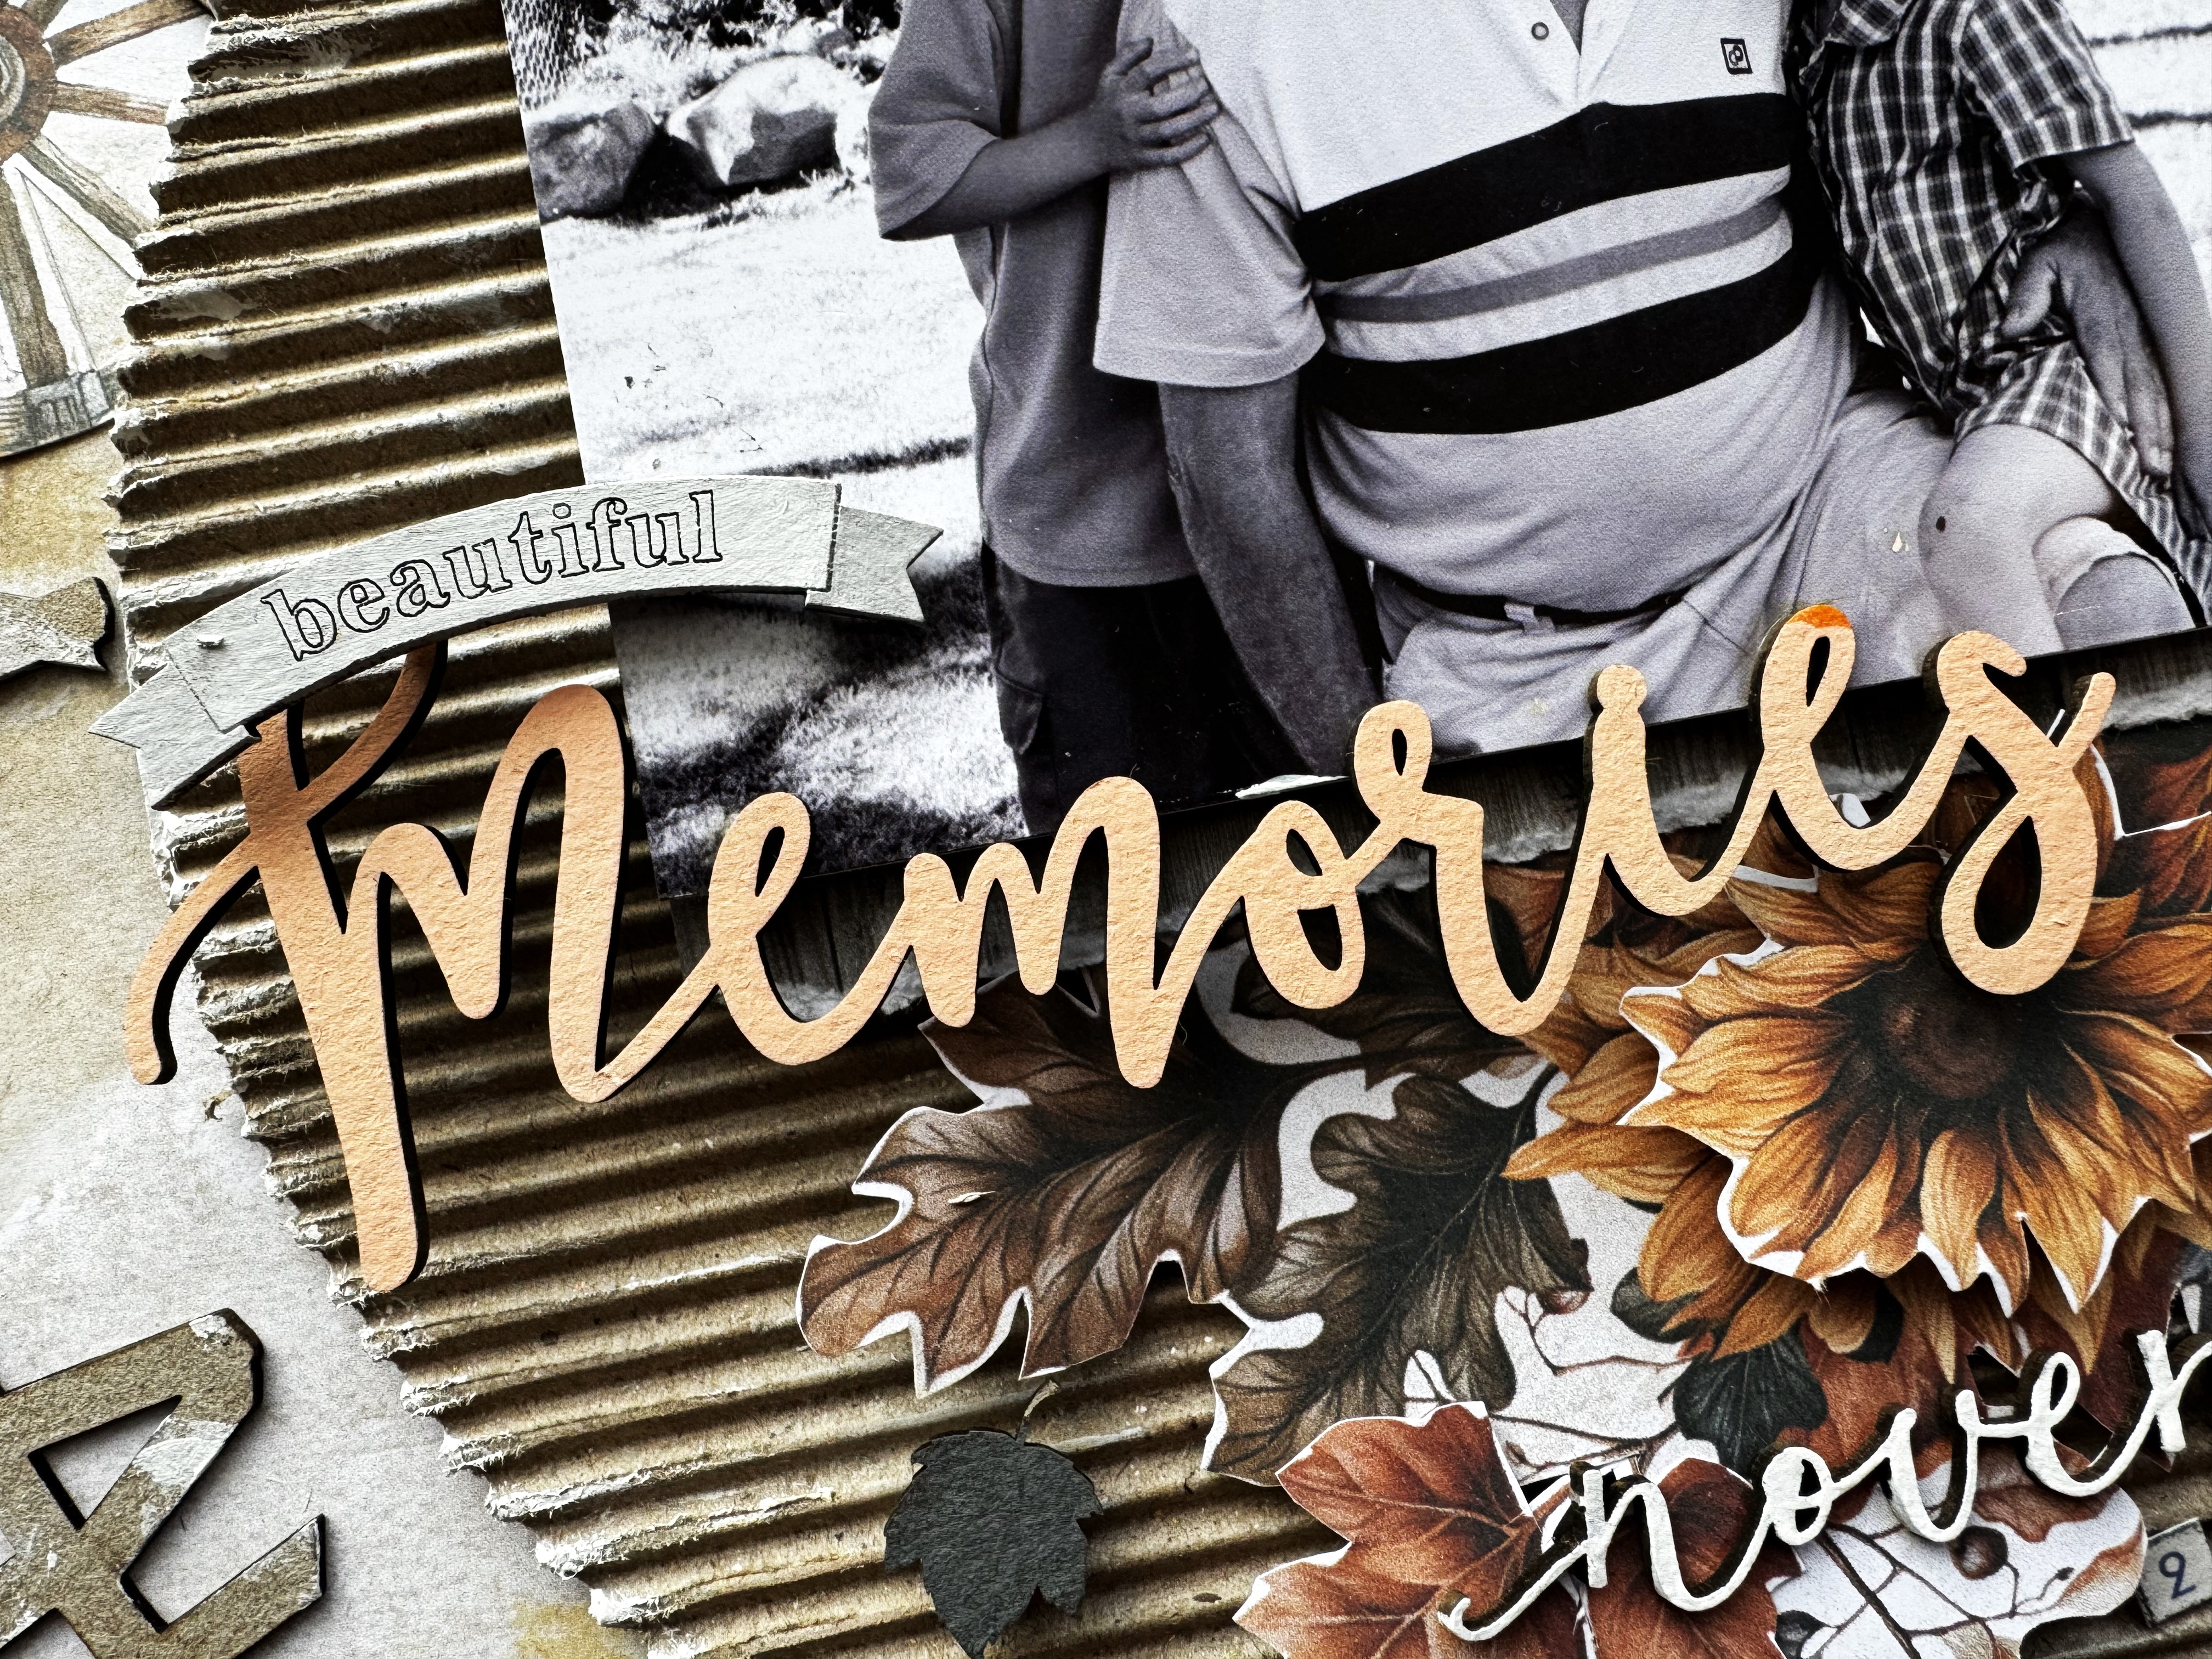
'Beautiful memories'
Layout by Rachael Funnell


Hi there!
Rach back with you today sharing my first layout for this month
featuring some really fantastic 2 Crafty Chipboard pieces...


2 Crafty Chipboard used:
Memories script title
 Fine monthly word set
 ATC word banner set 1
12x12 weathered Clock face frames
ATC - Maple leaves
Bulldog clip set


So let's start with this fabulous 12x12 weathered Clock face frame 
where I glued this clock face to base of my page, then with a sponge ramdomly dabbed on some gesso.
Once the gesso was dried, I then added a little pale orange colour using Tim Hotlz - Distress Oxide - Dried Marigold...

Next up and to the right side of my photo, I have added a Bulldog clip, 
painting the bottom half with gesso
The papers I have used are the newly released GORGEOUS Studio 73 - Autum Dreamer collection


Next, we have my title where I have used the Memories script title, Inking this with the same pale orange I added to the clock face.
 Then I went one step further and have the added the word Beautiful banner from ATC word banner set 1, giving this banner a coat of gesso and then gluing it to of  the top of the the word memories...


I then added the word November from Monthly fine words set I have added two coats of gesso too.
And lastly for the SUPER CUTE ATC - Maple leaves where I have inked these with a brown using Tim Hotlz - Distress Oxide - ground espresso..

Thanks for popping by,
 I do hope I have inpsired you in some way..
Until next time


Wednesday, July 24, 2024

"Seeing the World"
Layout by Marie Sabatier

Hello everyone,

I am delighted to have the opportunity to present my third project for July.
I propose a layout on the theme of travel using this beautiful title "Seeing the WORLD".
I love this picture where my grandniece points her finger at the sky through the porthole.

"Seeing the WORLD"


The chipboard used:

- See the World Title
- 12 x 12 Stacked Filmstrips
- 12 x 12 Weathered Clock Face Frames


This is the first time I use this chipboard "Stacked Filmstrips".

In order to get a vintage effect, I prefer not to use white gesso and directly apply the ink 
"Distress Oxide". I opted for the shades "rustic wilderness", "spiced marmalade" and "fade jeans".
For this presentation, I place it horizontally. 
Its grandeur and originality make it a magnificent support.


Above I use the chipboard "Weathered Clock Face".
To contrast with the colors of the 'Filmstrip', I opt for the matte wax 'Rusty Brown' then I rub it with the metallic wax 'Firebird'. The shine and the small orange tip bring a touch of sparkle, 
just like the butterfly of my paper.


To improve the clarity of my layout, I chose to embellish the title with clear ink. 


I really enjoyed making this layout. I hope it will make you want to create.

Thank you for visiting 2Crafty!


Tuesday, May 21, 2024

"Enjoy the Journey"
Layout by Marie Sabatier


Hello everyone,

For my second inspiration this May, I made a layout using a photo 
of my grandson taken on the occasion of the school party. 
I opted for this beautiful paper that will accentuate the chipboards even more. 

"Enjoy the Journey"


The chipboards used:

- Enjoy the Journey
- 12X12 Weathered Clock Face Frames
- Textured Tile Bits
- Squiggly Circle Arrow Journal Spots


Sometimes it is complicated to select colors to embellish the chipboards, 
but for this arrangement, I opted for the black color without hesitation.

I used Oxide Distress inks.

I chose an imposing size for the chipboard "Weathered Clock Face Frames". 
I tinted it with the color "black soot".
For the title, I needed a flashy color. I mixed "spiced marmalade" and "mustard seed". 


In the latest news, there are these superb "Textured Tile Bits". 
It reminds me of an 'electronic circuit'. I like it.
With the black, I added a touch of green "peeled paint". 


To frame this pretty pendulum pattern, I use the chipboard "Squiggly Circle Arrow Journal Spots"
They are a perfect match!


I hope you enjoy this page as much as I enjoyed creating it. 

If your vendor does not have the chipboards, do not worry, 
they are available directly on the site. 


Thank you very much for your visit.


Wednesday, April 10, 2024

Togetherness my favourite time - Laura Gilhuly

 Hi everyone!

Laura here today to share my first April project!


2 Crafty products used:


Cartias swirl

12x12 Weathered Clock Face Frames

Togetherness my favourite time

Flourish 2


I trimmed the 12x12 weathered clock face frames so they ended at the side of the page then added texture paste and allowed to dry.  Once dry I painted them a dark brown, dried and dry brushed some white paint to accent the texture I applied earlier


I also applied the texture paste to the Cartia's Swirl and Flourish 2.  I then inked with uncharted marine distress ink and added white paint (which seems like blue because I used distress ink)  


I wanted the title to stand out from the other images so I painted it white and layered it above a few die cut images.


Thanks for stopping by