Showing posts with label "Holly Twig Branches". Show all posts

Friday, November 7, 2025

Altered Christmas Wreath by Tania Ridgwell

Hi there!
Tania joining you today to share my first project for November. 
I have altered a Christmas Wreath that I picked up from Kmart.


2 Crafty Chipboard Used:

*Poinsettia Set
*Merry Christmas Title
*Holly Twig Branches
*Celebration Swirls


The wreath before I altered it.

I coloured the Poinsettia chippies with a mixture of Kaisercraft Red Iridescent & Gold Shimmer Sprays and the edges I painted with Brush Leaf Interior Antique Gold Paint.  The Holly Twig Branch chippies I coloured with Kaisercraft Rose Gold Iridescent & Gold Shimmer Sprays.  The Celebration Swirl chippies have been coloured with Heidi Swapp Chartreuse Color Shine and the Merry Christmas chippie I coloured with Kaisercraft Gold Shimmer Spray.


To construct the wreath I added all my Poinsettia chippie pieces first and then added my paper blooms.


I then tucked in the Holly Twig Branch chippies amongst the Poinsettia chippies and paper blooms.  I kept some of them as is and some of them I cut into pieces.


I add the Merry Christmas chippie title along the bottom of the Wreath and finished if off by randomly dabbing on some gesso onto the Wreath, chippie pieces and paper blooms to give it a snow like effect.


Thats' all from me today, I hope I have inspired you all a little with my Christmas Wreath. 
 Until next time thanks so much for stopping by.
Tania xx

Monday, December 30, 2024

"Two Christmas Cards"
with
Amy Voorthuis

  Hi lovely creative peeps, 
Hope you are having a wonderful & creative day this second last day of the year 2024, for today I have two Christmas cards to share with you and I used some of the amazing chipboard pieces 2Crafty Chipboard offers. Enjoy this post.....


Two Christmas Cards:

Amazing 2Crafty Chipboard used: 
Festive Vine
Frame Viney Circles
Crystal Snowflakes
Word Circles Christmas
Holly Twig Branches


Card 1: A Season of Magic and Wonder

In my last post I told you that I am hooked Twin/Aqua markers to color my chipboard it's so addictive and very easy to color the smallest lines. It's not that I will never use acrylic paint again but this makes my scrapping time a little bit faster.  


On the holly twig branches & festive vine after I painted them with the markers, I treated it with some snow and matt wax in a brown shade. The snowflake was just treated with some white gesso and shimmer spray. 


Amazing 2Crafty Chipboard used: 
Frame Mini Doodled Set
Foliage Set 11
Crystal Snowflakes
Holly Twig Branches
Fern Leaf Set


Card 2: Magical Christmas Wishes:

That fern leaf was treated with some green acrylic matte paint, snow and matte brown wax. I always love it to not use traditional colors for my cards 


And aren't those images sweet? I made these cards for my colleagues and they loved them. 

 Hope you all enjoyed my post thank you so much for stopping by, I will be back with another project hope to see you back then.... 

Meanwhile if you would like to see more of my work you could visit here: 

Amy's Pretty Papers

Thursday, September 12, 2024

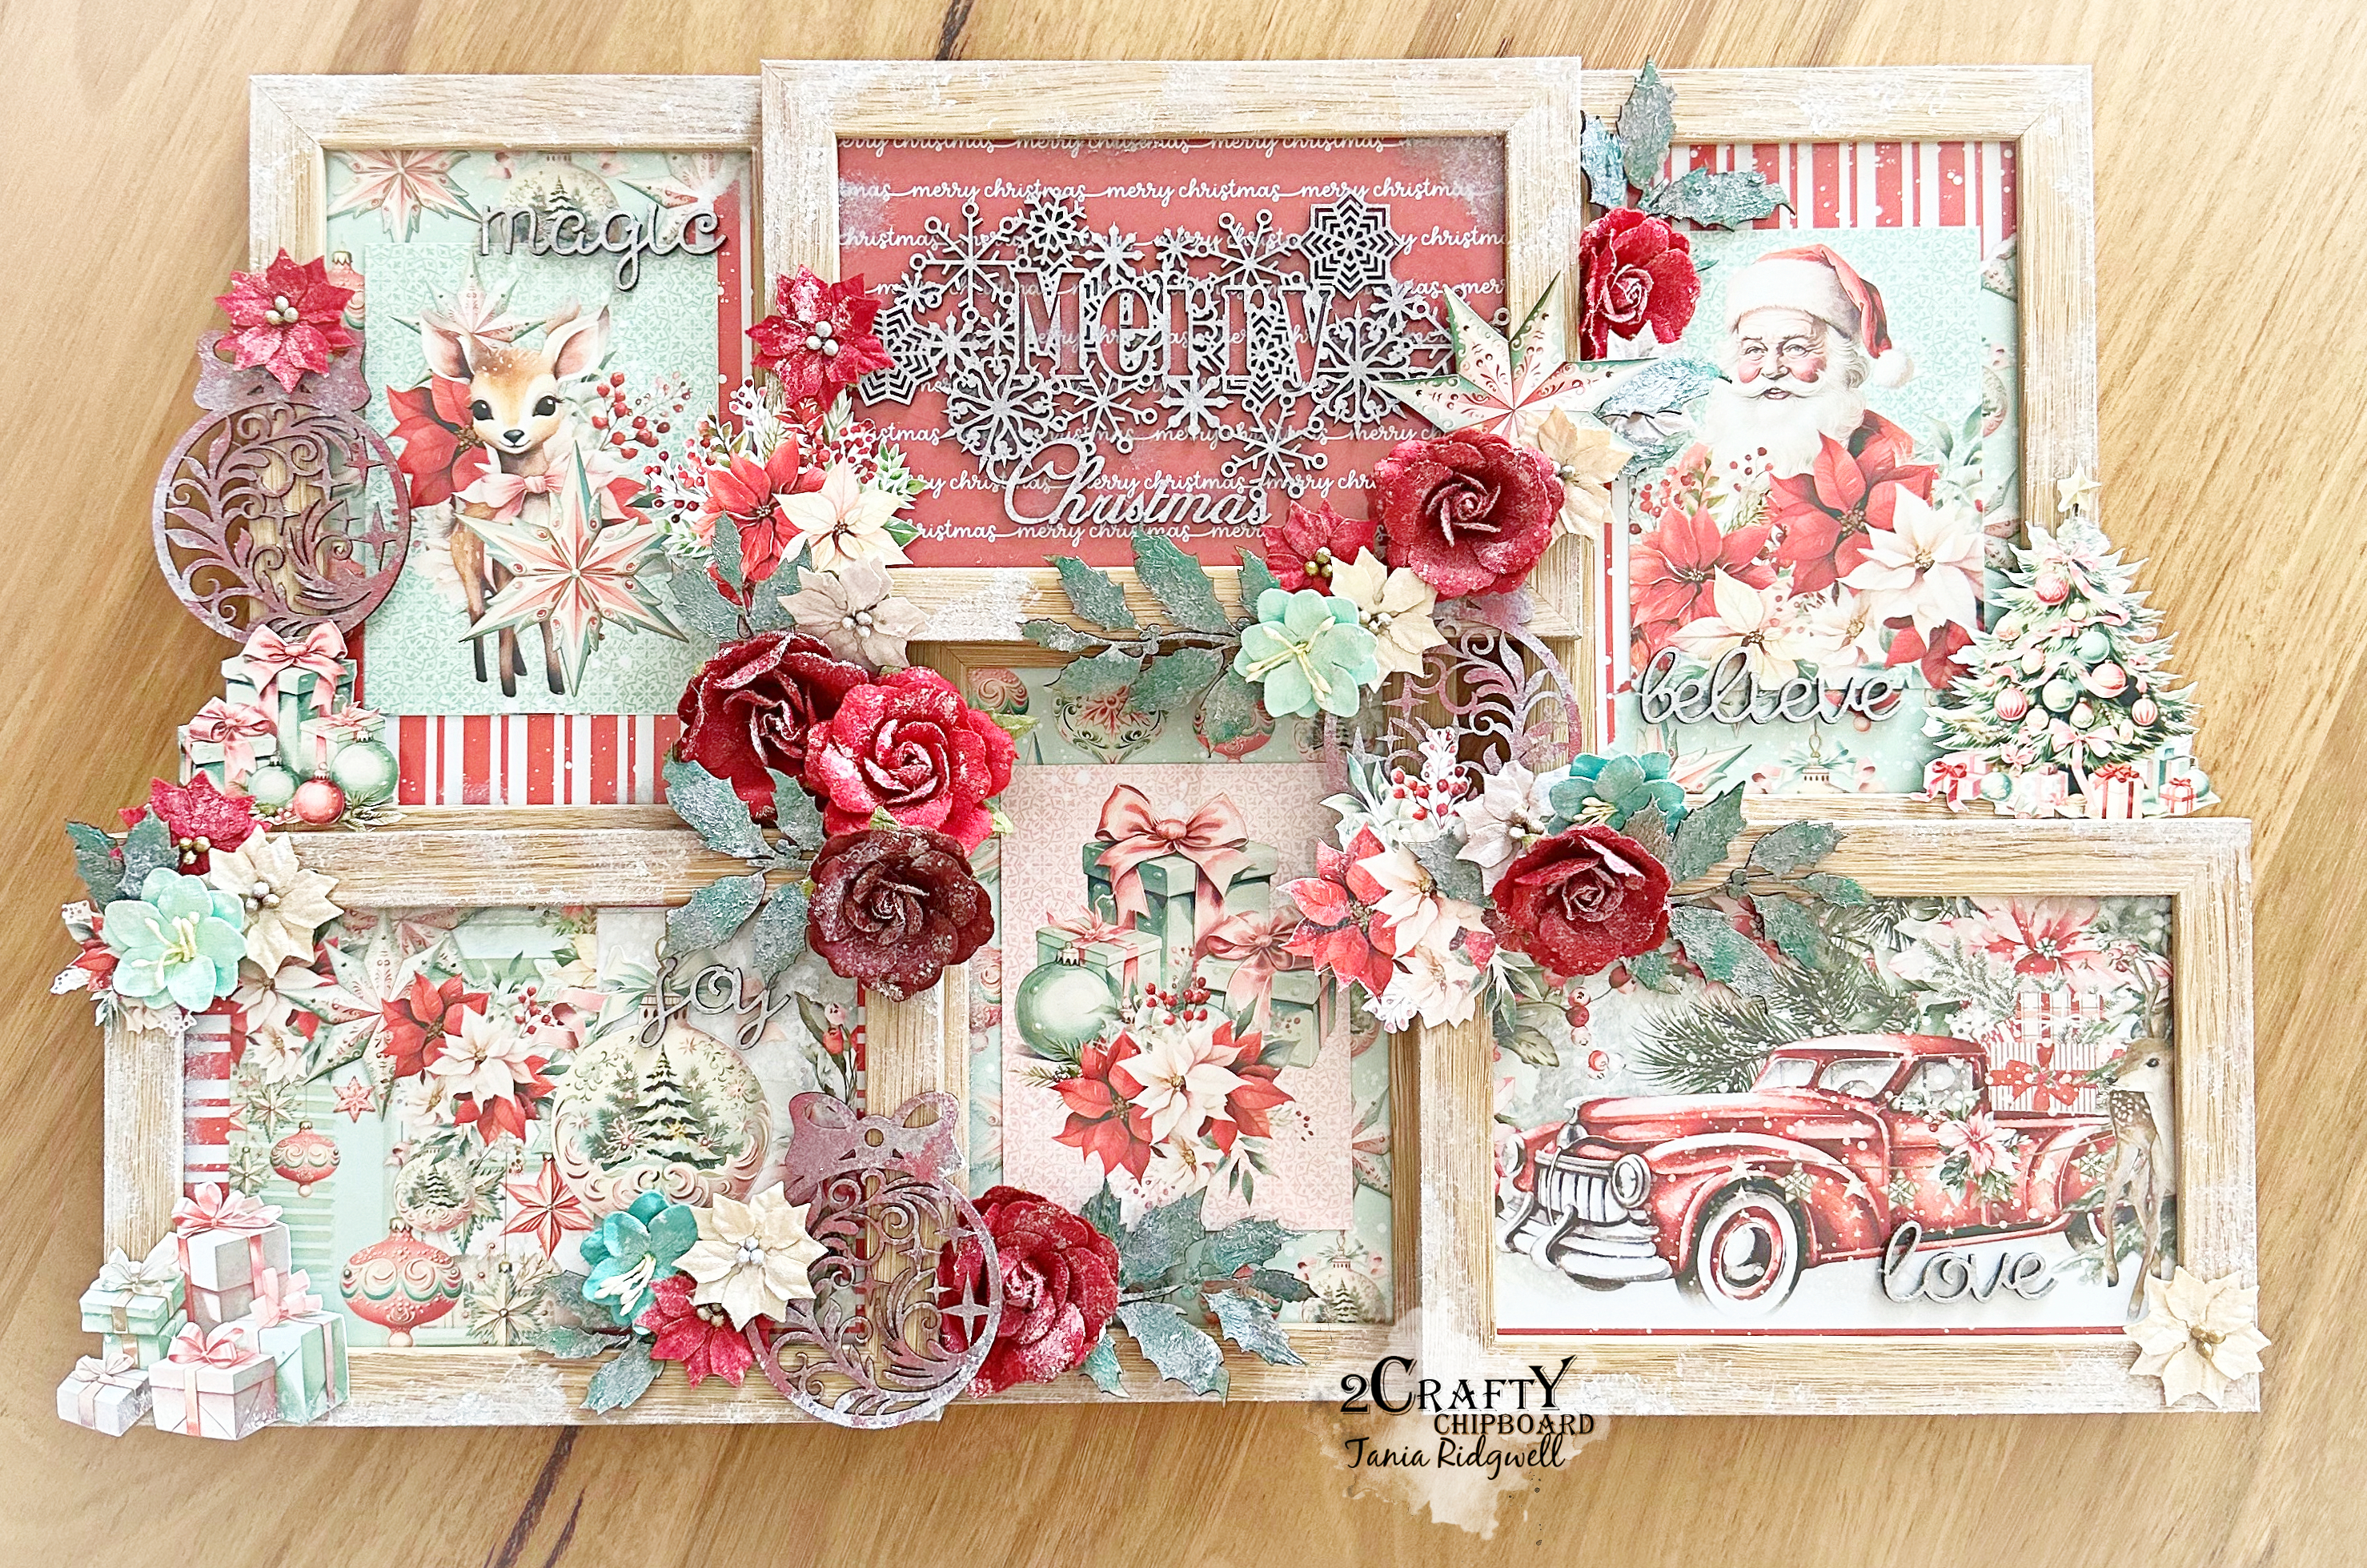
Merry & Joy Altered Collage Frame
By Tania Ridgwell

Hello there! 

Just popping in today to share a bonus DT project I created for September.   I have altered this Collage Frame. 

"Merry & Joy Collage Frame"


2 Crafty Chipboard Used:

*Christmas Cluster
*Christmas Lacey Bauble Set
*Christmas Mini Word Set 2
*Holly Twig Branches


I have used the gorgeous new Mintay Merry & Joy Christmas Collection to decorate each of the inside photo frame panels.


I coloured the Christmas Cluster and Christmas Mini Word Set 2 chippies with Silver leaf paint.  The 
Christmas Lacey Bauble chippies were coloured with Heidi Swapp color shine and once dry I roughly dabbed on some of the Silver Leaf Paint.  Lastly I coloured the Holly Twig Branch chippies with Envy Colourblast Colour Paste and once they were dry I also randomly dabbed on some Silver Leaf Paint.


I decorated the collage framed by adding fussy cut elements and lots of paper blooms. 


I added the Christmas Cluster to the top photo panel and then tucked in the Christmas Lacey Baubles  and Holly Twig Branch chippies amongst the fussy cut elements and paper blooms.  I added some words from the Christmas Mini Word Set 2 to a few of the photo panels.


To finish off my frame I randomly sponged on some gesso on the frame and to the flowers, fussy cut elements and chippies to give it a snow like effect.


Thats' all from me today, I hope I have inspired you all a little with my Altered Christmas College Frame.  Until next time thanks so much for stopping by.
Tania xx

Tuesday, November 7, 2023

Christmas Time Altered Tree by Tania Ridgwell

Hi there!

Tania joining you today to share the first of my DT projects for November. 
Last year I created one of these Beyond the Page Wooden Christmas Trees and
enjoyed making it so much I decided I would make another.  


2 Crafty Chipboard Used:

*Ornate Snowflakes
*Holly Twig Branches
*Swirly Holly Set
*Christmas Mini Word Set 1


I kept the Christmas Tree raw and decorated each panel with gorgeous Christmas
 papers from Paper Rose called Christmas Time.


I painted the Ornate Snowflakes, Swirly Holly and Celebrate & Christmas from the Christmas Mini Word Set 1 chippies with Gold Mont Marte Paint. 

 Once dry I randomly dabbed on some Colour Blast Snow White Colour Paste.

I dabbed on a thick coat of Art Alchemy Green Gold paint to the Holly Twig Branches
 and once dry gave them all a light coat of Chopped Pesto Ink Sp
ray. 


I attached my photo to a couple of distressed paper layers in the same paper that I decorated the frame with and then placed it on the tree.

 I cut the large Swirl from the Swirly Holly in half and added one half to the top of my photo and the other to the bottom of my photo.  I then embellished the tree with assorted flowers.

 I tucked the Holly Twig Branches and Ornate Snowflakes randomly into different areas of my flower clusters and to finish I added true snow to the Tree and randomly over the chippies and flowers.

That's all from me today, I hope I have inspired you all a little with my Altered Christmas Tree.
  
Until next time,
Thanks so much for stopping by.
Tania xx

Wednesday, November 11, 2020

It’s Beginning To Look A Lot Like Christmas
By Marie Claude Rodier

 Hello lovelies,

As soon as Halloween is finished, my family shifts into Christmas mood.
This year especially, we were all happy to embrace it and everyone was happy to help
decorating the tree and the house.

I did a lot of fussy cutting in this layout, layering flower pieces on top of each other.
2Crafty chipboard store has lots of Christmas Themed pieces.
It was easy to use a few of them to create a beautiful Christmassy theme.


“It’s Beginning To Look A Lot Like Christmas”


It’s beginning to look a lot like Christmas title piece was 
embossed twice with vintage gold powder.

 
Maggie's Swirl pieces were also embossed in gold
And cut in half with pieces placed on top of each other.


Holly Twig Branches were embossed with two different green powders to create a contrasting effect.             A few touches of white modelling paste were also added here and there to recreate snow texture.

J

                                                          2Crafty Product used...                                                                                                                It’s beginning to look at lot like Christmas                                                                                                            Holly Twig Branches                                                                                                                                       Maggie’s Swirl


Until next time, be happy and be creative!

Marie Claude
xx


Sunday, December 22, 2019

A Christmas Tradition
by Sabrina Turpin

Ho ho ho 2Crafty fans!

Holiday season is back and it's my favorite time of our cold winter here in Quebec!
Today, I'm sharing a layout showing what has now become a Christmas tradition for me
and my kids: fun pictures with photo filters. I also prepared a video showing the various
 techniques I used to prepare the chipboards.


"A Christmas Tradition"


For the "Holly twig branches", I used green metallic paint and applied black ink on the border.


On the "Wire Stars", I applied red glittering embossing powder.


With the "Fine Snowflakes", I used white embossing ink and then 
applied some shimmering glaze on top.


For the title, "A Christmas Tradition", I used white embossing powder 
and dabbed a bit of red embossing ink on top.

I used the following 2Crafty chipboards in the layout:

Holly twig branches [m00613]
Wire Stars [m00623]
Fine Snowflakes [m00102]
A Christmas Tradition [w00013]


That's all for me today! I wish you the best holidays and I'll be seeing you soon,
 at the begining of the new year. 

Until then, have fun creating!