Showing posts with label "Card Word Circle Sentiments". Show all posts

Wednesday, July 16, 2025

Grandma's Attic Cards by Tania Ridgwell

Hello there! 

Tania joining you today to share the last of my DT projects for July.
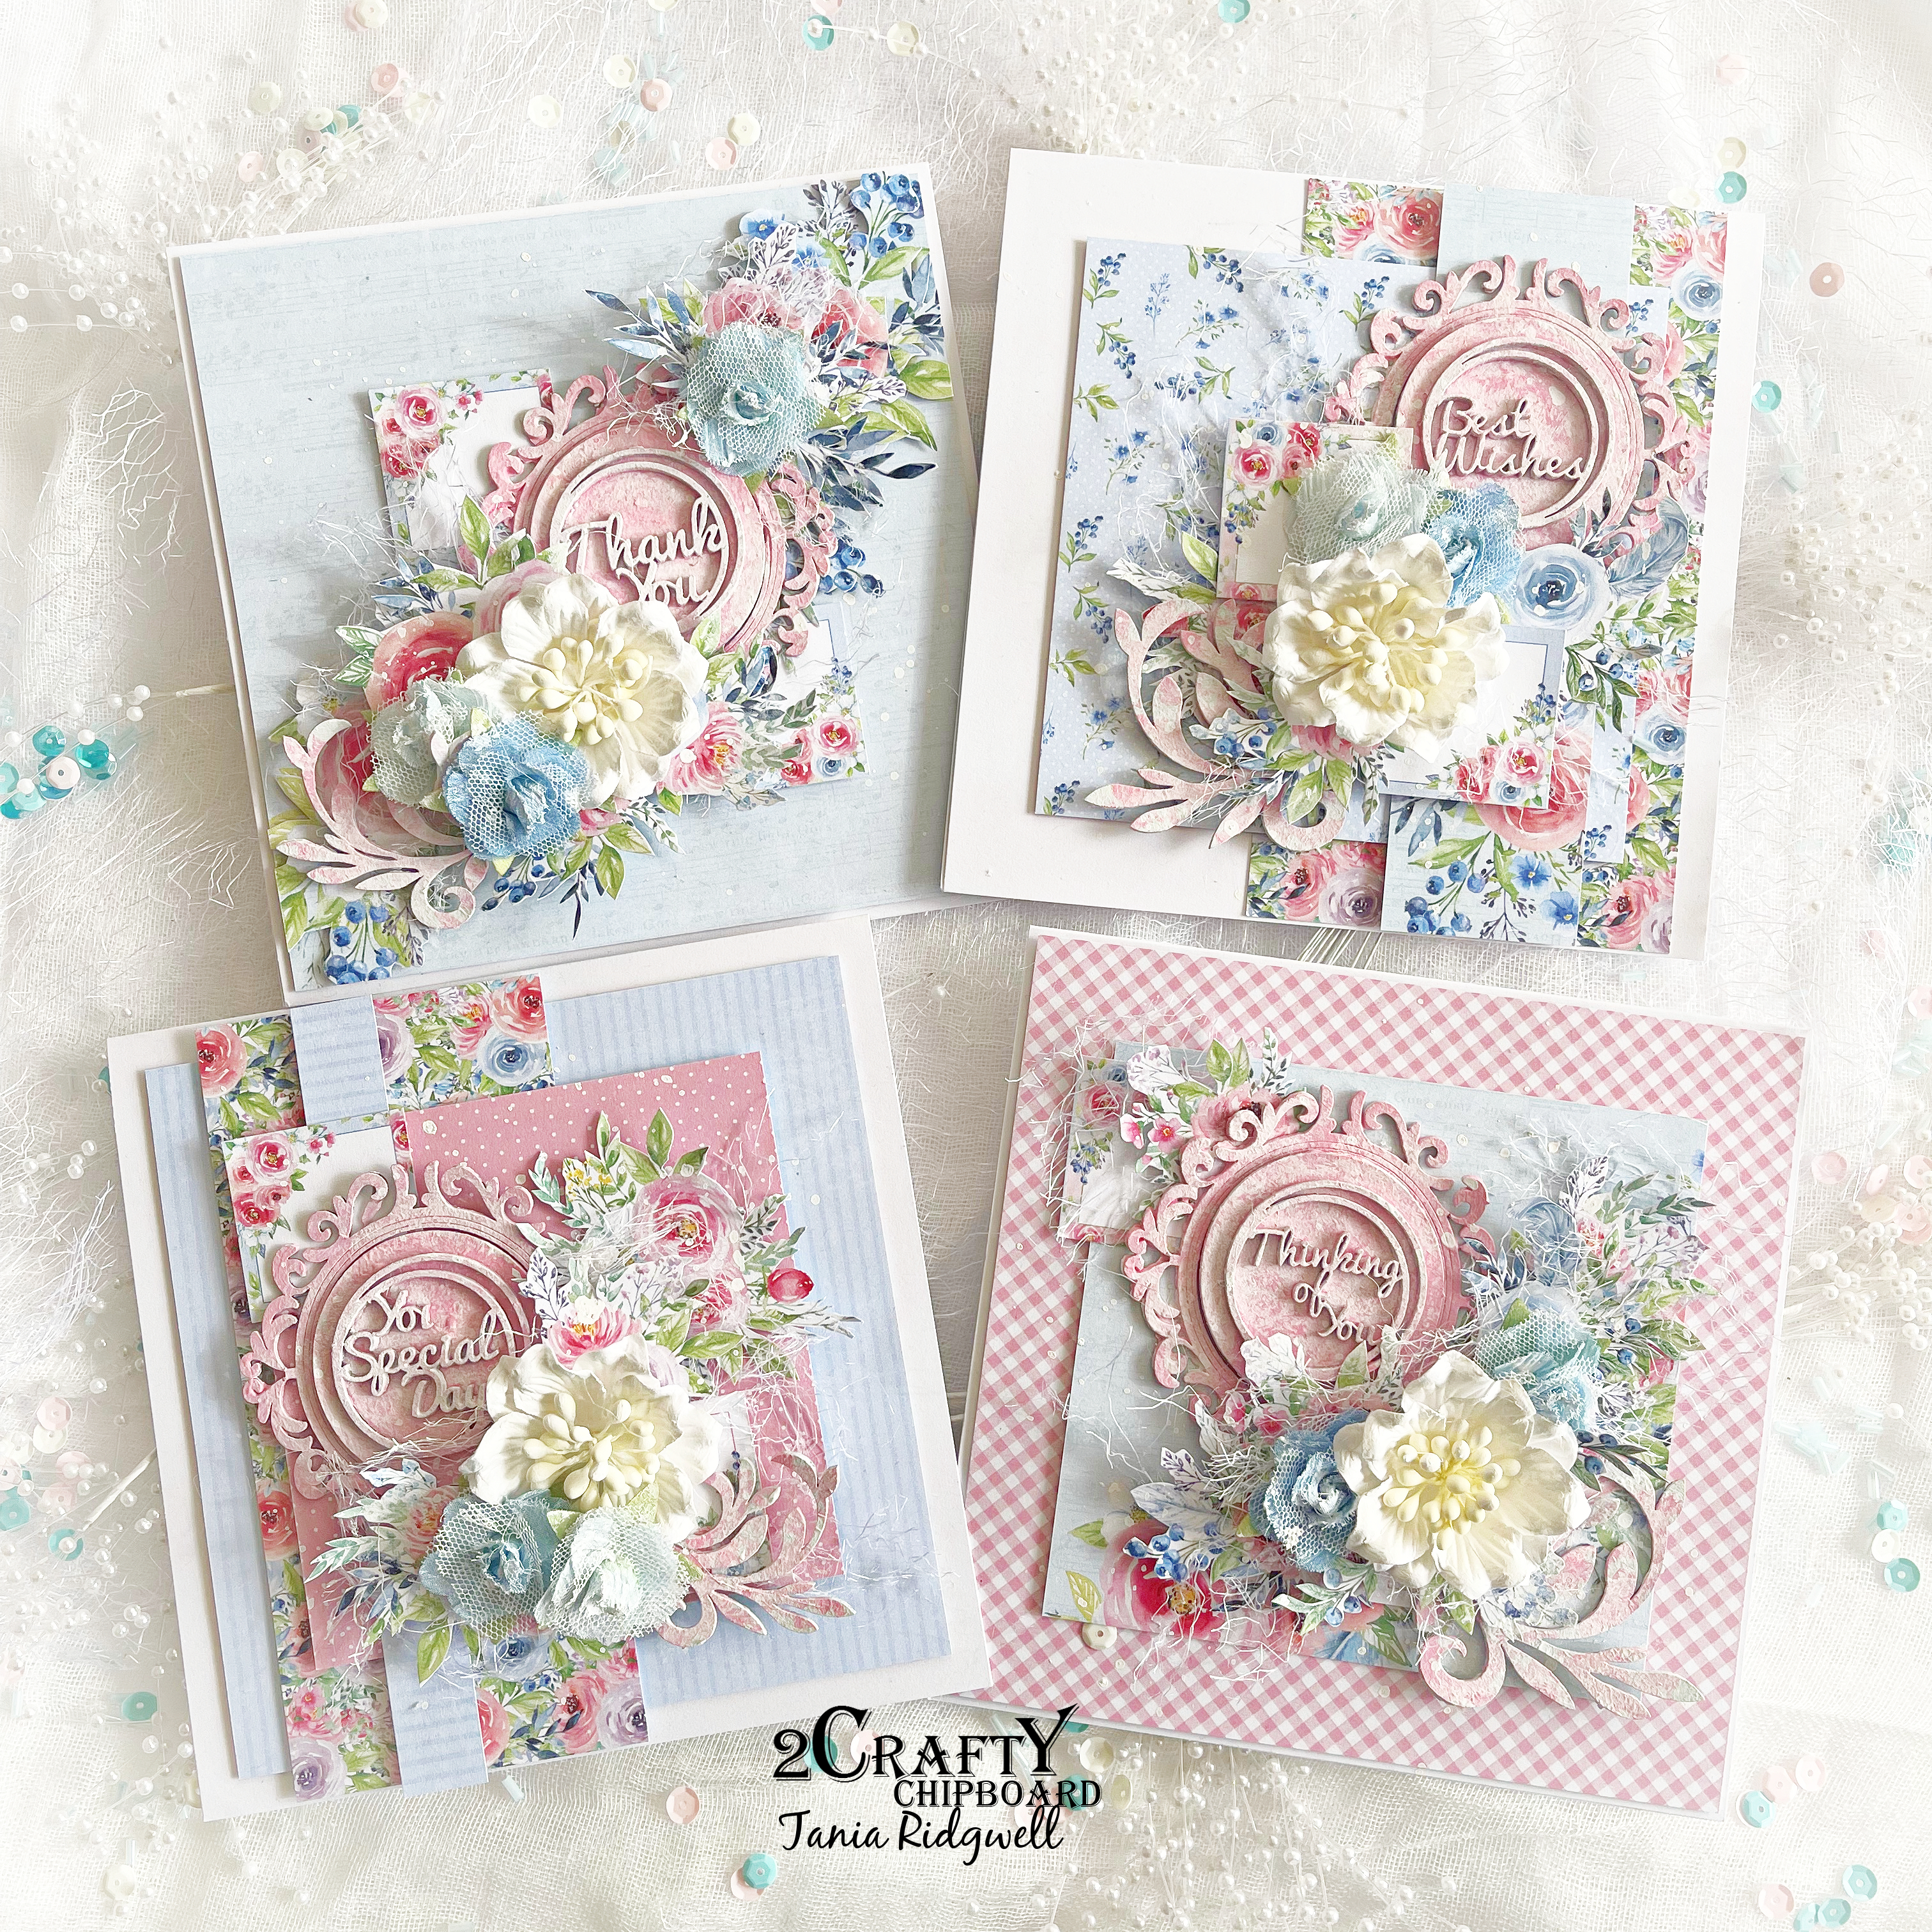
  I have created a set cards for my second share.


2 Crafty Products Used:

*Hexagon Outline Frames Set
*Frame Doodled
*Card - Word Circle Set - Sentiments
*ATC Butterflies
*Mini Branches
*Foliage Set 18


I created each of my card bases using the gorgeous Mintay "Grandma's Attic" Paper Collection. 

I first gave all the chippie pieces a couple of coats of gesso.  I then used coloured the Frames, Butterflies and Sentiment chippie pieces with Golden Glow Opal Polish.  I left the Mini Branches and Foliage chippie pieces as is with just gesso on them.

To construct each of the cards I added either a Hexagon or Doodled Frame chippie to each.  I 
then embellished them with die cut flower elements from the Mintay Flora Books 8 & 9 and paper blooms. I tucked in either the Mini Branches or Foliage chippies amongst the blooms and finished each card with a chippie Sentiment from the Card - Word Circle Set.

See each card below.


Thats' all from me today, I hope I have inspired you all a little with my Grandma's Attics Cards. 

 Until next time thanks so much for stopping by.
Tania xx

Tuesday, September 13, 2022

Bluebird Song Cards by Tania Ridgwell

Hello there! 

Tania joining you today to share a bonus DT project I have created for this month.
I have a set of cards to share with you all. 

"Bluebird Song Cards"


2 Crafty Chipboard Used:

*Mini Decorative Frame Set 6
*Card Word Circles - Sentiments
*Flourish Adornment Set 7 


I created each of my card bases using the gorgeous Paper Rose Bluebird Song Paper Collection.

I just love the pretty colour palette in these patterned papers. I gave each of the chippies a coat of gesso first, once dry I painted them all with Dylusions Rose Quartz paint.  As I didn't want the pink paint to be to vibrant I sponged on some gesso over each piece.

To construct each of the cards I added all my chipboard pieces.  I then embellished them with fussy cut flower elements and assorted flowers.  I finished each card by dabbing a small amount of gesso on all of the flowers.

See each card below.


Thats' all from me today, I hope I have inspired you all a little with my Bluebird Song Cards.  
Until next time thanks so much for stopping by.

Tania xx


Wednesday, November 21, 2018

Tags By Bec Genet

Hi everyone today I'm stopping by to share two tags that I made for 2Crafty Chipboard.

I always make layouts but this time I decided to switch it up and make some tags instead,
I've been very time poor this month so tags are much faster to make. To also save time
 I used only liquid pearls on my chipboard pieces again because it's just so quick and easy to do.


2Crafty Chipboard Used:
Card Word Circles - Sentiments
6in Circle Revolution Frames
Dotty Bits
Lacey Border Set
Flourish Adornment Set 3

Thank you Tag


On the Thank You Tag I used the chippie pieces: 
Card Word Circles - Sentiments, 6in Circle Revolution Frames and Dotty Bits

I used 2 of the 6in Circle Revolution Frames, a large one that I coloured with Nuvo Crystal Drops in Wedgewood Blue and I only used half of this frame. The smaller 6in Circle Revolution Frame I coloured with Nuvo Crystal Drops in Midnight Blue. The Thank You title from the Card Word Circles - Sentiments was also coloured in the same colour. Tucked under the flowers is two pieces from the Dotty Bits which are coloured with Ranger Liquid Pearls in White Opal

Here are my close ups:


 Best Wishes Tag


On the Best Wishes Tag ...
I used the chippie pieces Card Word Circles - Sentiments, Lacey Border Set 
and Flourish Adornment Set 3. 

I cut the Lacey Border Set into 2 pieces and coloured them with Nuvo Crystal Drops in Wisteria Purple. The Flourish Adornment piece was coloured with Nuvo Crystal Drops in Neptune and I also cut this piece in half. Half was placed at the top of the tag and the other half at the bottom of the tag. The  Best Wishes Title from the Card Word Circles - Sentiments pack was coloured with Nuvo Crystal Drops in Raspberry Pink.

Here are the close ups:


Thanks for stopping by.


Thursday, May 12, 2016

Cards for All Occasions
By Jennifer Snyder


Hello. 
 Jennifer Snyder here today to share some cards I created through the month. 
 I have many events coming up this Spring where I'll be grabbing my cards.  

BUT before I start...
Please remember to become a blog follower & leave a blog comment to
be eligible to go in our monthly draw for a great chippie prize pack.

For my first purple card, I used 2Crafty "Frame Vintage Oval "  as the main decoration.
  I kept the top treatment simple by embossing it in gold.  I thought gold would be
 a perfect combo for the rich purple.  


Behind the frame is an old piece of a book page.  The book is a junker from 1894 - 
so yeah it's super old.  While that may sound very cool, and it is, old book pages
 are more brittle than a thin piece of mica.  They actually do not make great
 embellishments and are not durable, unless a coating or sealant is added to 
them to preserve them.  I  sprayed mine with a sealant.  I often go over mine
 with a matte gel medium as well. 

If you scroll to the third card on my post, you'll see the very old book from which
  I've been ripping pages.  Comes in handy as a photo prop too.  


This is the second card.  I do love the fun and delicate art deco frame I used here. 
 It absolutely needs no treatment applied to it.  It's superb as is.  

Here is the 2Crafty piece I used,  "Frame Artdeco" 


The third card is rather simple and sort of plain but I really love the simplicity. 
 My husband requested a basic yet manly card for a musician friend having a
 difficult time.   I know that the 2Crafty "Card Word Circle Sentiments" are
 perfect to pop on any card and off you go.  

Cards do not need to be overly embellished to be appreciated.  
I absolutely know that the gentleman appreciated the thought. 

Here is an image of "Card Word Circle Sentiments"


I inked the "Card Word Circle Sentiments" and glued it to some patterned paper,
  then cut the paper out.  Yes, I glue it down first, then I cut around it.  I always
use this technique when adding paper to the chipboard as a background.  
I think this is the easiest and best way to assure perfection.  


Thanks for stopping by and following the creativity here at 2Crafty.  


Please remember to become a blog follower & leave a blog comment to
be eligible to go in our monthly draw for a great chippie prize pack.


Photobucket