Showing posts with label scribble circles. Show all posts

Thursday, February 19, 2026

Attitude - Laura Gilhuly

 Hi everyone!
I am back today to share another masculine mixed media layout


2Crafty Products used:


Banners Flags
Chevron Bits
Word Circle Set 2
Steampunk Element Set 1
Steampunk Arrow Set 2
Scribble Circles
Harlequin Clumps


After prepping the chipboard with white gesso I applied rangers distress mica stain in
 Winter Frost to most of the chipboard.


I allowed it to dry naturally then layered Dylusions Black and Ranger Distress Stain in
Lost Shadow and also allowed to dry naturally. 
 When completely dry I applied some Ranger vintage photo distress ink over it and black ink to the edges.


I used the same Vintage Photo ink on the title!


Thanks for stopping by


Monday, March 7, 2022

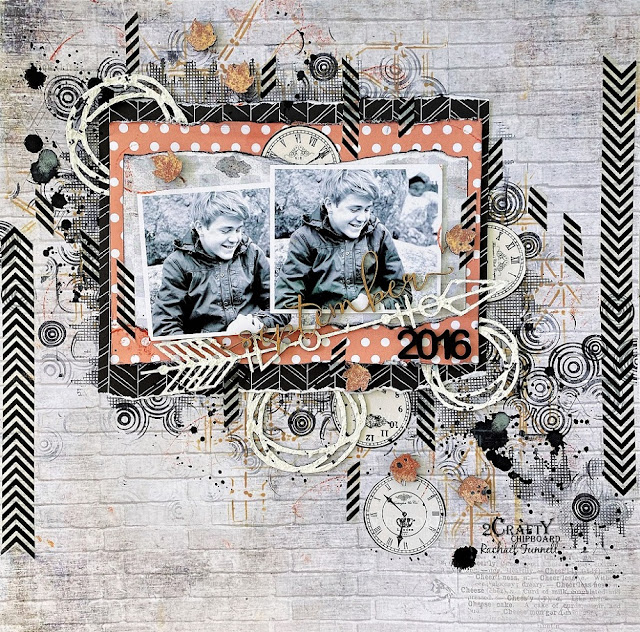
'September 2016' layout
By Rachael Funnell


Hello everyone!
Rach with you sharing some more 2 Crafty inspiration
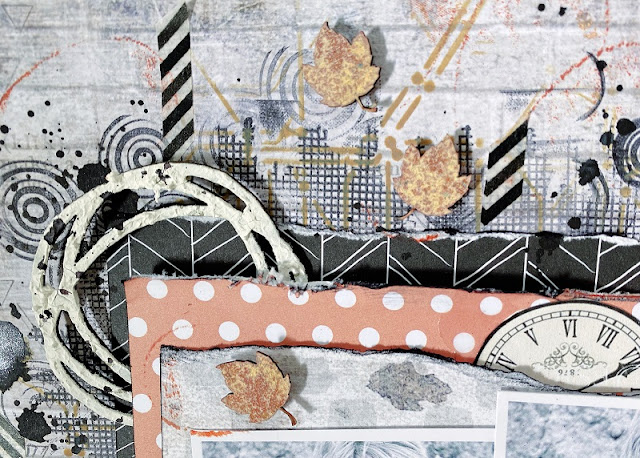
using some great 2 Crafty Chipboard pieces, I have created this masculine grungy layout.


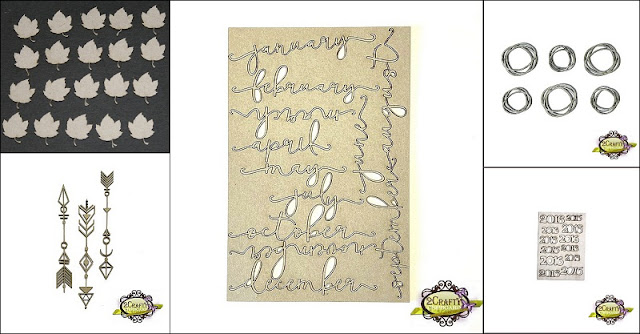
2 Crafty Chipboard used:
ATC - Maple leaves
Aztec Arrow set 1
Fine word Set - Months
Scribble Circles
2016


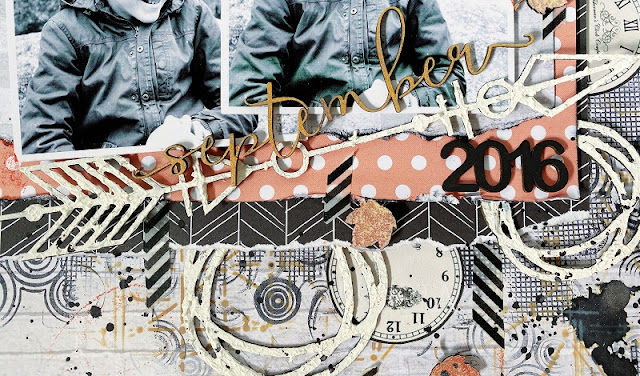
Starting with the title, September 2016
Inking the fine Word September month with an orange color
 using  Tim Holtz - Spiced Marmalade. And the 201, I've inked with black.

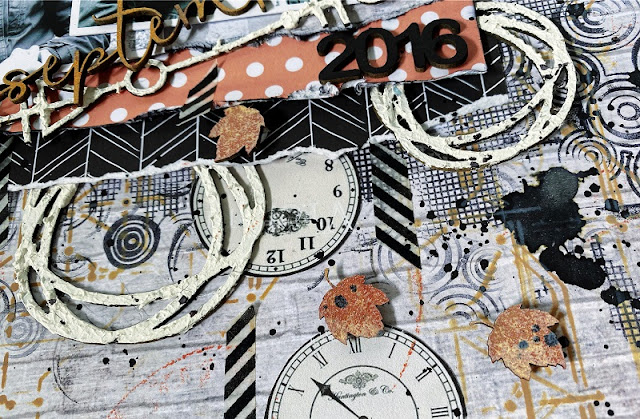
Next for the Scribble Circles & the Aztec Arrow
which I was wanting them to be a bit more grungy like, 
So I went with giving them a nice thick coat of crackle paste.


And lastly for those SUPER CUTE  ATC - Maple leaves
Started with a coat of gesso, then inking them again using the 
Tim Holtz - Spiced Marmalade and finished these 
beauties off with a light inking of a darker orange. 

I'm pretty happy with the end result, I hope you like it too
Thanks for stopping by today!


Sunday, May 17, 2020

'To the Moon & Back'
with Lisa Amiet


Hello 2Crafty lovers!
It's Lisa here today to share my latest creative inspiration with you.

There have been lots of girly layout for me lately,
but I really needed a good dose of boyish fun.

'To the Moon & Back'


2Crafty Products used:


I have started by mixing two of my fave papers from this collection.
I love working on a diagonal direction on my page, 
so I have cut the papers and adhered them together.


I wanted my chipboard to stand out from the page, 
but I also wanted it left raw to add some warmth to the cool coloured papers.

I have used one of the 'Scribble Circles',
to layer my sentiment and stickers onto. 
I have then layered this onto a tag from the collection.


I have also used one of the 'Checkerboard Panels',
also left raw, but cut in half, with each piece on either side of my photo.


I have then layered some matching embellishments,
 under and on the chipboard, to make it part of my layers.


To finish I have used one of the 'Arrows Funky' in the corner of my page, 
following that same diagonal line. I love these arrows, they are all so different. 

I hope that you like what I have created,
 and that it inspires you to get crafty today.

Until next time!

Lisa


Thursday, March 5, 2020

#FUNTIMES
A Funny Layout By Jenny J.

Hi everybody!

Here is my first inspiration for March.

#Funtimes

Here are the 2Crafty chipboards I've used on this layout...


*6 inch funky line panel
*hashtag word set 2
*leafy silhouette
*scribble circles

At the beginning, I've applied clear gesso over my background paper.  
After that, some modeling paste with a stencil, some random stamping and a
 touch of watercoloring with a spray. Then, I was ready to build up my layout.

Treated my "6inch Funky line panel" with the same spray.  
Lifted up my photo with a piece of cardboard.


I chose my title among the chippies of "Hashtag word set 2".  
#FUNTIMES was just the perfect match with my pic.  
That chippie is emnbossed with Lindy's Geranium Coral Blush.

Below this, you can barely see the "Leafy silhouette" leaves, 
which are embossed also but with another powder.


I've also included some "Scribble circles"
simply painted in white, to complete ornament clusterings.


As my final touches, 
flowers, flairs and some fussycut butterflies to complete everything.


Hope you like it!
See you later this month for another fun inspiration ;)
xxx


Wednesday, November 6, 2019

"Everyday moment"
by Tammy Klingner

Hi there,
Tam here today to share my latest.....


A layout documenting my daughter and her study habits.....
I wanted to capture and remember this as she will be moving out in the near future, and it will be these everyday moments that I will miss the most.


I used the following 2Crafty Chipboard....
"everyday title"
"Light bulb word set 1"
"NEW Scribble Circles"
"Dotty Bits"


This month 2Crafty are sponsors over at CSI and this is for their current case #300.
I always enjoy solving their cases.

Let's take a look at it....


You will find all of the clues over on the Challenge Site HERE
I love using as much as possible from the list.

I used the following:
I love that colour scheme - black, white, powder blue, fuschia and orange. I also used polka dots, labels, fussy cutting, flowers (I combined the two), text pattern (on strip and in background of flowers), plus signs, light bulb, notebook paper, computer (in photos), brush font, spiral punch, clips.
My journaling was written on labels and I documented a workspace.
Phew!! 
Fun though.

So let's take a closer look at the chipboard....


I painted some of the NEW Scribble Circles in a fuschia colour and scattered these across the page, tucking them underneath things.
I purposely went from the top left to bottom right corner, and ALWAYS make sure at least one of the circles are half off the page.  This helps create movement and guides the eyes into the layout.


I painted some of the Dotty Bits and tucked these amongst the vertical strips - this made them look a bit like scallops.


I added both the pink and the orange to my everyday title for a gorgeous ombre effect.
I really love doing this with my titles and chipboard.


Finally, I painted one of the light bulbs in a soft blue.
I positioned it near my daughter's head to represent 'ideas'.

I'll pop back later in the month with some more chippy inspiration.
Luv Tam
xx

My blog is HERE