Showing posts with label Decorative Doily. Show all posts

Wednesday, May 8, 2024

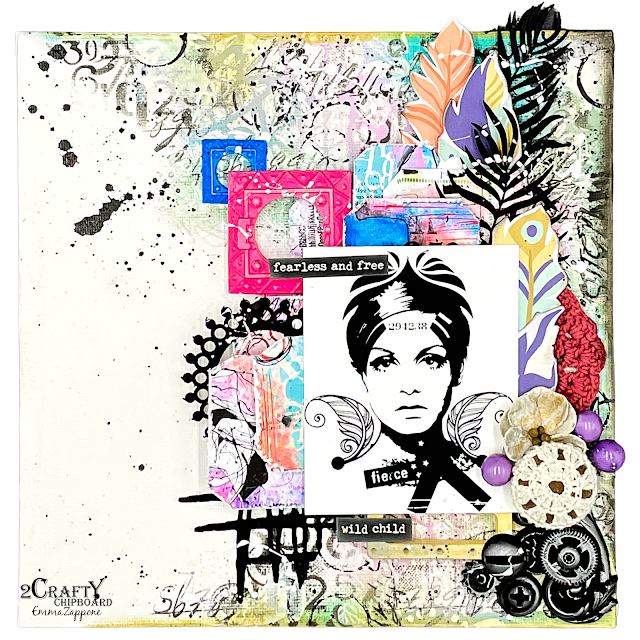
This Moment - by Emma Zappone

 Hello 2crafty friends.
Em with you today, this time sharing an 8x8 canvas.
 Canvas' are really becoming one of my favourite surfaces to work with.


This project I really wanted to only work with black & white, with just a small hint of 1 colour,
which I chose to be pink.


Here are the chipboard elements used on this project....

Decorative Doily 6"
Foliage set 2
Circle Flowers


In keeping with the B&W theme, I painted all the chippy in black gesso.


This made them really stand out from the white and when the pink elements were added.


Once all the papers, chippy and embellishments were added I flicked with white ink to add that contrast against the black.


I love this concept of neutrals with one small pop of colour. I think I will be trying it out again real soon.
Hmmm, I wonder what colour to use next.....

Till next time, stay Crafty.
Em xx


Wednesday, April 12, 2023

'Absolutely Unique' by Emma Zappone

Hello, hope you are all doing well.
Emma with you today, sharing my first project for April. 
This project uses a blend of awesome chippy and resin castings, plus butterflies,
my absolute fave way of creating. 


And lets check out the awesome chipboard used....

Decorative Doily
Lattice Leaf set
Jeremy's vines


I knew this page needed a dark background to really make the chipboard elements 'pop' off the page more with the colours I wanted to use.


This projects colours were deeply inspired by this amazing Pinterest image.
So the Vines are painted in a wonderful orange acrylic, with a light scattering off vintage emboss powder over the top to add a slight softness to the larger pieces. I flipped one of the pieces over so they could mimic butterfly wings.


The Lattice leaves were simply stamped with a script stamp in a Stazon blue. And then clear embossed which darkened up the chipboard beautifully with a gorgeous shine.


That gorgeous Doily was painted with black acrylic and then 2 different waxes to add a beautiful shine and glam to it.


I do love the dramatic feel this page has with those bold colours on dark.

I hope you found some inspiration from this page and I look forward to seeing you again later in the month.

Stay Crafty, Em xx


Tuesday, November 30, 2021

Fearless & Free by Emma Zappone BONUS VIDEO

 Hi all, can you believe we are at the end of November already?
This month/year has been crazy!!
Today I share colour and simplicity.


Here are the chipboard pieces I used.....

2c Fern Leaf Set
Squiggly Bits
Decorative Doily


I kept my chipboard simple to be striking against the colour layers.


I primed them all with Black gesso and then left them just like that.


The black against the colour looks so good! Simple yet striking.
Keeping the pieces real and beautiful in their own rights.


There is a small video available to see all the elements come together. I hope it inspires you.


Have a great day everyone.
Em xx


Friday, October 8, 2021

Brave with Emma Zappone

Welcome everyone.
Emma here with you today.
And today I share a 9"x12" layout with you entitled 'Brave'.


Check out the awesome chipboard used on this project...

Decorative Doily
Lattice Leaf Set
Pointy Flower Vines


Again this project I kept it sweet and simple with my finishes on the chipboard.


The beautiful pointy flower vine was painted with a pink acrylic paint and once dry 3
different wax finishes were applied. All the colours were chosen to reflect the paper
choice and photo used.


The stunning lattice leaves are again painted with an acrylic first and then a couple of
Matte wax to draw out the shade of blue to match the layout.


And this final piece which I think is my favourite decorative doily is also painted
with another pink/purple acrylic and a couple of matte waxes. 


I love the simplicity of the mediums on all the chipboard pieces, yet the outcome of the
page is striking, bright and playful. 

I hope this page has inspired you a little today.

See you all soon, Em xx


Wednesday, May 19, 2021

Simple Moments Make Great Memories
by Sabrina Turpin

 Hello 2Crafty friends!

I hope you're all doing well!
Today I'd like to share a layout featuring my two pre-teens showing how much they
like when I take picture of them! My son in particular really dislike any form of photo shoot
so when I asked him to take the pose with his sister he wasn't cooperating much!

"Simple Moments Make Great Memories"


For the "Aztec Feathers", I applied some teal embossing powder
 then rubbed a bit of purple wax on top.


On the "Aztec Flower Set 1", I applied one coat of black gesso, rubbed a bit of purple wax
and finally dabbed some teal metallic embossing ink. For the "Decorative Doily", I used
two coats of teal shimmering paint and dabbed some silver embossing ink.


For the title, "Simple Moments make Great Memories", 
I applied two coats of silver embossing ink.

I used the following 2Crafty chipboards in this layout:
Aztec Feathers [m00812]
Aztec Flower Set 1 [m00810]
Decorative Doily [m00818]
Simple Moments make Great Memories [w00567]

That's all for me today!
I hope you enjoyed my creation and that it gave you some ideas for your own creations!
I'll be back in a few weeks with a new layout to share. 
See you soon!


Friday, January 10, 2020

Moment
by Sabrina Turpin

Hello 2Crafty fans!

Happy new year to all! I hope your new year celebrations were amazing! I sure had a great time taking some time off with my family. Off course I took the opportunity to do a lot of crafting! Today I'm sharing a layout I prepared with a picture we took on new years eve.

"Moment"


On the "Decorative Doily" behind the picture, I applied burgundy embossing powder.


For the "Mini Foliage Flourish", I applied some diluted teal paint and then inked the border with brown. 


On the "Berry Vine Set", I applied a shimmering green/gold paint and inked the border with brown ink.


For the title, "Moment loopy font", I applied a vintage gold wax with my fingers very roughly. Then, I rougly applied brown ink on top.

In this layout, I used the following 2Crafty chipboards
Decorative Doily [M00818]
Mini Foliage Flourish [M00800]
Berry Vines Set [M00805]
Moment Loopy Font [W00255]


That's all for me today! I'll be back soon with more ideas to share with you guys! Until then, happy new year again, may the year fill you with love, joy, health and craft supplies!


Thursday, October 10, 2019

Summer
by Sabrina Turpin

Hello 2Crafty fans!

The cold weather is starting to set in here in Quebec, where the tree leaves are starting to fall and we've already had the first night where it actually froze outside!
 I'm already missing the summer gone only a few weeks ago, so a layout with some summer memories is the perfect thing to cheer me up!

"Summer"


For the "Flourish Adornment Set 7", I used red embossing ink and applied black ink on the borders.


On the "Ella's border", I used charcoal metallic paint, slightly diluted with water.


On the "Decorative Doily" behind the picture, I applied irridescent rose-gold paint and inked the borders in black. For the title, "line words summer", I cut the chipboard to only use the word "summer" and then applied some tea colored ink.

For this layout, I used the following 2Crafty chipboards:

Ella's Border [db0105]
Line Words -Summer Borders [db0091]
Decorative Doily [m00818]
Flourish Adornment Set 7 [pa0050]


That's all for me today!
 I hope you enjoyed this layout and it gave you some inspiration for your own creations!
 I'll be back soon as we venture through the very colorful fall season here in Quebec.


Monday, September 23, 2019

Video Tutorial
'Beauty Within' layout
By Rachael Funnell

Hello 2 Crafty chipboard FANS!
Rach here with you today sharing my latest creation,
a layout featuring my gorgeous girl..


2 Crafty Chipboard pieces used:


Filigee arrows
Beauty title
Decorative doily
Corner twig branches
6x12 Alpha Set 1
Scrabble tiles


Altering the chipboard pieces by
either inking, adding a few coats of gesso
 or adding a coat of beeswax paste....


No need to go into more detail
as I have created a
video tutorial for you all to watch...

Please click the play button & hopefully enjoy
 the process on how this page came together...


Thanks for popping by
& Until next time!