Hello everyone! Welcome back to the blog.
Today I have an easy step-by-step photo tutorial for you. I try to explain my process as clear as I can and make it easy to follow. A lot of layouts look complicated, but when the process is broken down to a few easy steps, anyone can do it!
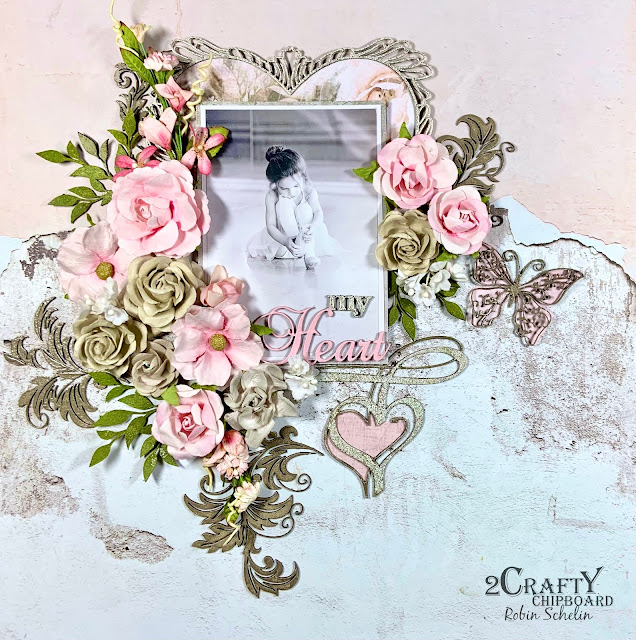
This layout was made for a friend of mine. This is her little tiny dancer. I loved using this photo of her little girl on this layout and hope she will like it too.
"my Heart"
Beautiful 2Crafty I used:
Heritage Heart Frame
Heart Charms
Fine and Fancy Butterfly Set
Mini Branches
Corner Thick Vine
Title - You Hold the Key to My Heart
As Always, I first coated all the chipboard with white gesso. I altered all the chipboard before I glued it down on the layout. This makes it so easy to complete the composition.
The Heritage Heart Frame, and the Heart Charms were heat embossed with a mix of Recollections Champagne and Glitz White Pearl embossing powders. The bottom heart and thin swirl on the Heart Charm was heat embossed with Imagine Ink Mushroom embossing powder for contrast.
I used Imagine Ink Mushroom embossing powder on the Corner Thick Vine. I cut the whole piece up so I could use it around the layout.
The Mini Branches were painted with Hookers Green Acrylic Paint,
Then the butterfly from the Fine and Fancy butterfly Set was heat embossed with Imagine Ink Mushroom embossing powder.
For the title, the word "my" was heat embossed with the same mixture as the Heritage Heart Frame and the Heart Charm. The word "Heart" was painted with pink Acrylic Paint.
I cut some patterned paper and glued it to the back of the Heritage Heart Frame to add some color and make the frame stand out under the photo.
For the title, I only used "my Heart" from the title piece, You Hold the Ket to My Heart. I glued it directly to the bottom right of the photo.
I then cut a small piece of solid pink patterned paper and glued it to the back of the small heart of the Heart Charm then placed it under the title.
I first laid the all the chipboard down, on the left of the photo, then placed the flowers I wanted to use down to figure out exactly where to glue the chipboard down. (Does that make sense?) I always lay out the whole layout before gluing it down so I don't have to worry about ripping it apart because something isn't right. Usually I mark where things go with a pencil. Easier that way.
Anyway, Chipboard is now glued in place!
Did the same think on the right of the photo.
Now it's time for the flowers! I just arranged them sweeping down the left of the photo, then added a few to the upper right.
For the butterfly from Fine and Fancy Butterfly Set, I added some of the same pink patterned paper that is behind the small heart in the Heart Charm. Glued it down and it's finished.
Hope you like this super easy tutorial and that it inspires you to use your chipboard! See you soon!


