Showing posts with label world globe. Show all posts

Wednesday, March 19, 2025

"World Traveller"
Layout by Marie Sabatier

Hello everyone,

Welcome to the 2Crafty website.
I present you my second inspiration of this March.
An invitation to travel with a layout embellished with a collection of splendid chipboards, 
accompanied by photos of my grandchildren during a train trip.

"World Traveller"


The chipboard used:


I went a bit overboard with the number of chipboards, but I liked them all!
I outlined the center of my page with a solid-colored piece of paper.
I positioned my two photos that I framed with the chipboards "thin-square-stacked-frames" that I embellished using embossing powders of Lindy’s Gang color "Golden Angel Wings".At an angle of the photos, I create a cluster of embellishment, I add a tab "page-tab-set". They are great to bring a little bit of detail. In order to create a contrast, I add some "grungy-spatter-bits" that I tinted darker.


I used a piece of the 'luggage' chipboard.
    I used embossing powder to embellish it and personalized it with embellishments from the paper collection. I love how it turned out. It's what makes scrapbooking so magical. In the background of the title, I add a chipboard "circle-arrow-journal-spots".  To make it more obvious, I place a 'laser-cut' element in the center. I choose to leave the title covered with a single layer of white gesso, simply.


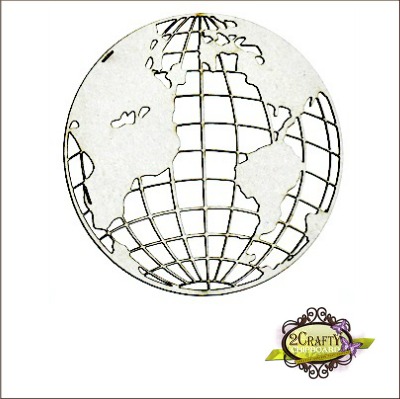
    On each photo, I added a phrase with the "mini-title-stick-set-6" chipboard, which I also embellished with embossing powder. For an extra touch of fun, I added white embossing powder. The first piece I glued to the center of the plain paper was the "world-globe" chipboard. I used a wide range of colors to achieve a result that suited me!!!


        A close-up showing the chipboards I used. 


As always, I loved the transformation of each chipboard.
Thank you so much for stopping by.


Saturday, March 2, 2019

Travel Inspiration
with Lisa Amiet


Hello 2Crafty Fans!

It's Lisa here today to share a layout with you.
Some travel inspiration, as this is a photo of my daughter on a recent cruise.


2Crafty Products Used:


For this layout I have used the 'World Globe',
 that I have painted in a base colour,
 and then lightly sponged over a lighter peach colour.
 I like how the two tones give it a bit more texture and depth. 


I have also used some of the 'Film Strips Tiny',
that I have painted in a mint colour to match the colours of my papers.


Lastly I have used a 'Compass'
that I have painted in peach and mint to match my layout, 
with another of the 'Film Strips Tiny',
for my corner cluster.


There are so many fabulous travel themed chipboard pieces available from 2Crafty,
these are just a couple of them :) 

I hope you like what I have created,

Until next time 

Lisa 


Thursday, July 19, 2018

"Night City" Layout
PLUS VIDEO TUTORIAL
by Elena

Hello! Elena with you today!

 It's great if life is full of adventures and travel. A week ago my husband and I returned from 
a trip to Belarus. It's a small country in Eastern Europe (if you don't know:))).
 We drove through small villages and were impressed with how simple the locals live.
 Their life is calm and measured in contrast to the inhabitants of large cities.
 That's where the time rushes, life is boiling and everyone is in a hurry to live!
I like big cities, nd one of the cities where I dream to visit is Sydney!
So I decided to visualize my dream  and made a page with a photo of Sydney at night.
 
"Enjoy the Journey"

 I used a piece of Ecopaper paper as the background. I chose it first of all for the black
 background, which was perfect for the photo. I also liked the fact that it has a dial -
 as a symbol of the transience of time.

I love the 2Crafty title chippies. They are large and with a very beautiful font!


 As usual, the main decorations of my works are chippies by 2 Crafty. This chip in the form
 of globe - just gorgeous. I covered it with Lindy's dark blue powder. In the tutorial,
which I have prepared for you, you can see all the nuances of creating my page.


 The new chips Steampunk Strips fit perfectly to the theme of
the work and added dynamics and expression.


My step by step Tutorial...:

TO VIEW VIDEO CLICK HERE


2Crafty Chipboard used:


Hope you got some ideas for your future use of 2 Crafty chipboards & I 
 hope you enjoy the selection of chipboard that I have chosen for my layout. 

Thank you very much for your visiting today! 
See you !

Monday, April 9, 2018

April Projects & Video Tutorial with Kripa


Hello friends,
Today, I have two scrapbook layouts and a video tutorial to share with you all.

‘Journey’

A few days ago, I found a box full of travel photographs and decided to make layouts of at
least a few of them. Instantly, I decided to use the World Globe chipboard piece as the main embellishment. Once, the papers and basic composition were finalized, I chose
 Groovy flowers and the word journey from Mini Travel Word Set 1 to add along.


 I almost always paint my chipboard pieces and started off by applying a layer of white gesso
on all pieces. The groovy flowers and world globe got a layer of peach paint. After the first
layer dried, I applied white paint on the World globe to tone down the colour and then
stamped using green ink. You can see the exact process in the video tutorial below.


I wanted the title to stand out glossy as opposed to the matt layers of paper,
so it was embossed with white embossing powder.


Here is the video of how the page came together.
I hope you enjoy watching.

TO VIEW VIDEO CLICK HERE


2crafty Chipboard Used:
* World Globe 
* Groovy Flowers
* Mini Travel Word Set 1

'Day at the Beach'

This a layout is all about a day at the beach. The photograph has been altered to
sepia tones to keep with the shades of teal, blue and brown in the layout. 

As is my usual style, I applied a layer of white gesso on all the chipboard pieces
 – Fishing Net Bits, title – A day at the beach and a few ATC Tiny stars. The first two
 pieces were painted on with a few blue shades of twinkling H2Os. I was after
a distressed look, so only applied paint in a few places.


The stars on the other hands were painted on with Vivid Ultra Metallics True Silver. The
 stars are tucked under layers of fussy cut elements - can you spot one behind the pirate ship?


2crafty Chipboard Used:
* Fishing Net Bits 
* Title Day at the Beach
* ATC Tiny hearts & Stars

Thank you for visiting us today.
Happy creating,
Kripa


Saturday, December 31, 2016

"Treasure"
Last Project by Priscilla Lim

Hello everyone, 
It's 31st December and I hope that 2016 has been a good year for everyone.
Otherwise I wish for the not so lucky ones a very peaceful and joyful 2017.

Today, I am writing this post with mixed feelings.
I am happy to sign off for a wonderful year but at the same time, sad that this will be
 my very last post for 2Crafty as I will be leaving the team. Sob sob....

So for my last project, I have created a layout using my favourite color combo. 
Mint, Pink and Gold. The best color combination in my opinion :)


These are the 2Crafty supplies I have used in the above layout:

 Here are some close up photos for a good glimpse on the chipboards and
 how I layered them between the embellishments.

I wish to highlight that I have only dabbled on either Gold or White paint
on all the 2Crafty chipboards used on page. 
This is a very simple step to alter the chipboards but already so appealing. 


Above you can see where I've tucked the Swirly Star Border.


Close up of the Avery Vine above and the lovely title below, both have been painted in gold and then had swipes of white paint dabbed on, giving a weathered effect.


Alrighty, that's all I have to share today. 
It has been great fun working with 2Crafty Chipboards and I think you have
 all been inspired by the wonderful works of our talented team. 
Keep visiting this blog and continue to be wowed by the amazing works in 2017.

Once a crafter, always a crafter.....
so I am sure that I will bump into you all on the other social pages. 

Lots of love and Take Care!