Showing posts with label Christmas. Show all posts

Thursday, February 27, 2025

Family Is The Best Part Of Christmas - Laura Gilhuly

Hi everyone!
I usually scrapbook really great photos, but sometimes I need to scrapbook a memory with a very bad photo.  As scrapbookers we want to preserve our memories....we are stewards of our family histories.  Sometimes this means including photos that are not very good quality.  I have been so fortunate to have been given so many photos of my husband and his family and recently I received all of my mothers photos as well.  Its a challenge to use these photos but I love the memories they evoke and I am up for the challenge.


2Crafty product used:


Holly Flourish

Family is the Best Part of Christmas

Engraved Baubles


This is Christmas in 1972.  I am the one little one with the huge grin and very washed out face.  The other people are my siblings.

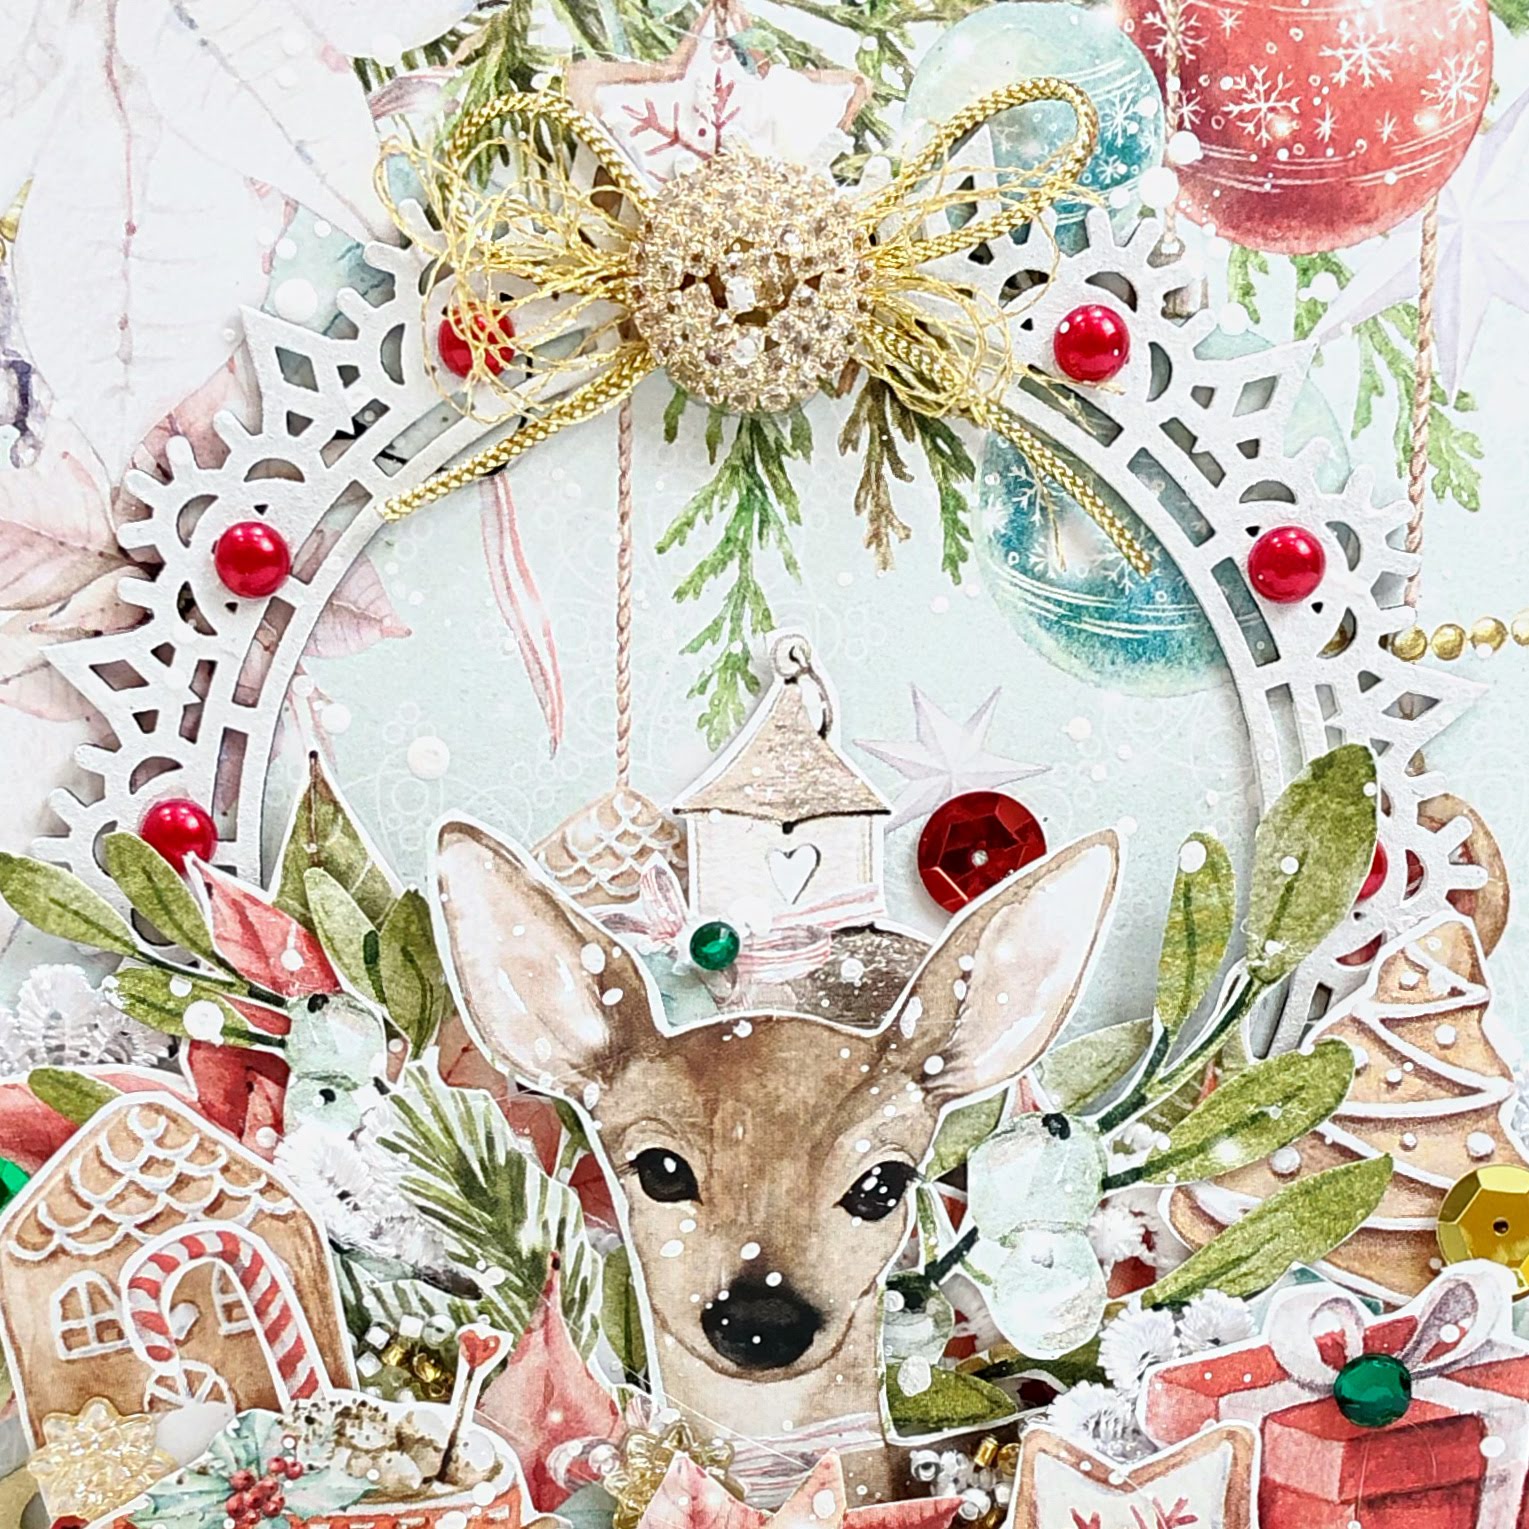
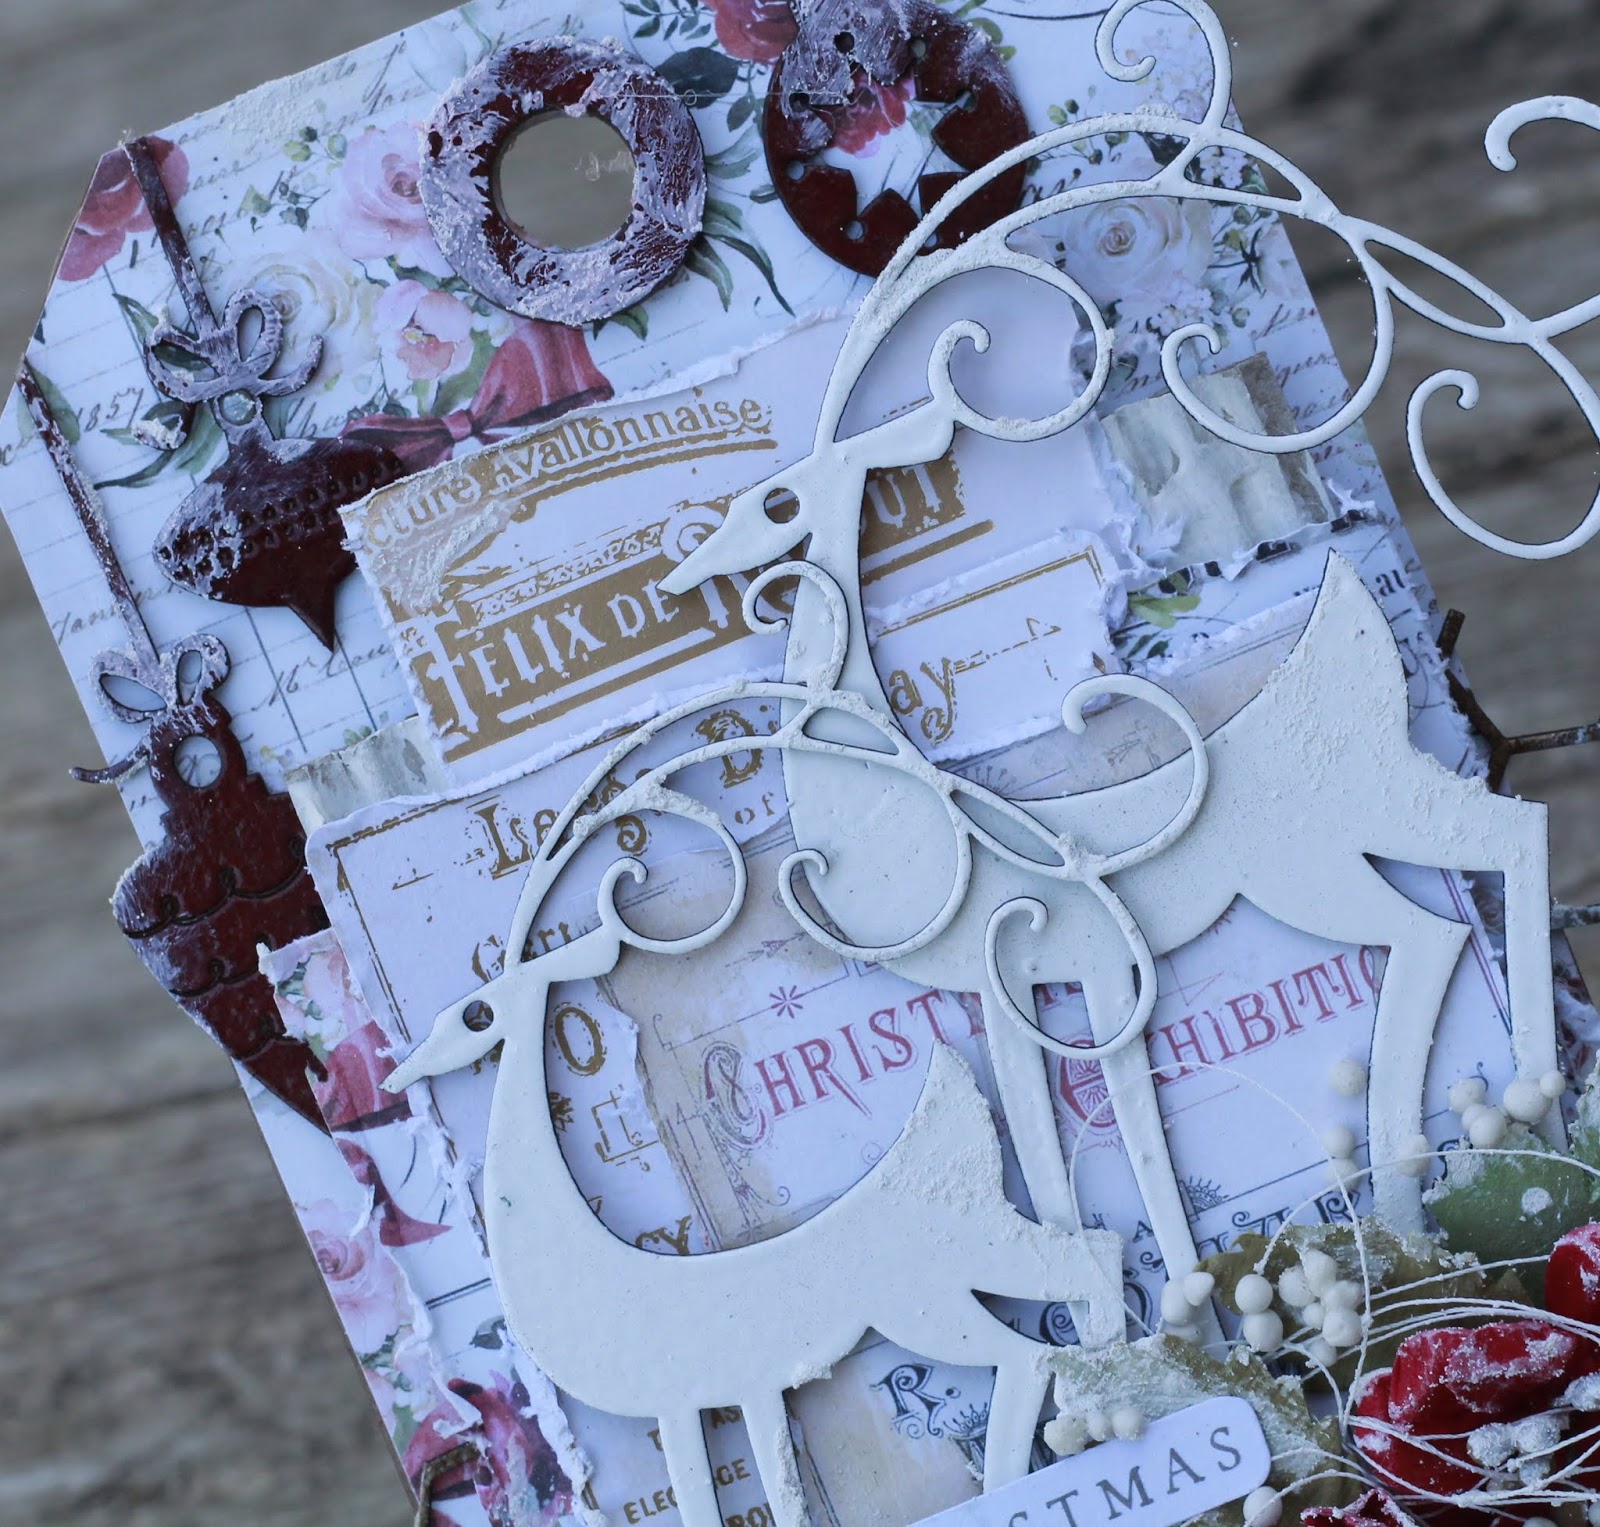
I covered all the chipboard pieces with white gesso before I started to alter them.
I wanted to keep with the vintage feel of the papers and the photo.  I used Elizabeth Craft Designs water colour paints in olive green and deep green and Ranger liquid pearls in brass.


The beautifully festive flourish I painted with ECD water colours in dark brown, burnt umber, scarlet, crimson, olive green and deep green.  I added a bit of the brass liquid pearls also.


I used the liquid pearls on the bauble that I painted with the ECD green water colours then added some Pinkfresh beads.


Thanks so much for stopping by


Monday, December 18, 2023

Sweet Christmas Treats Star Decoration by Tania Ridgwell

Hello there!

Tania joining you today to share the last of my DT projects for December and final project for 2023.
  I have altered a wooden Star Plaque.

"Merry Christmas Star Decoration"

2 Craft Products Used:

*Holly Flourish
*Star Bright Snowflakes
*Deer Set
*Card - Merry Xmas Words


I have used the gorgeous Paper Rose Studio Sweet Christmas Treats Collection to create this project.  Once I chose the paper for the background of my star plaque I set about decorating.


I fussy cut a large window scene from one of the papers from the collection and adhered it to the star.  I fussy cut lots of beautiful Poinsettias and Holly sprigs from the papers too and added them randomly around the window scene.
I coloured the Holly Flourish and Star Bright Snowflakes with Mont Marte Silver Paint.  Once my chippie pieces were dry I cut the Holly Flourish in half and tucked one of each of the halves into the Poinsettias along the right side of the star.  I added two of the Star Bright Snowflake chippies to the left of the star and the third to the right.


I added a couple of raw Deer chippies also tucking them into the fussy cut elements.  I added a few blooms around the poinsettias and finished off my Star plaque by adding a Merry Christmas chippie title from the Card - Merry Xmas Words pack which I painted with Silver Adirondack Metallics paint along the top. 


Thats' all from me today. 

 I would like to wish you all a very Merry Christmas and safe and Happy New Year with loved ones.

 Until next time thanks so much for stopping by and see you in the new year!!!

Thursday, December 24, 2020

'Christmas Eve'
By Rachael Funnell


Hello everyone!
 
Today being Christmas eve here in Australia
I thought it would be a great idea to create a Christmas themed layout 
featuring a selfie of me & my boy on Christmas eve 2019...


2 Crafty Chipboard used:
Christmas title
12x12 BG Alpha
Bauble flourish
2019
The Stars from Santa & Stars set


Starting off with this beautiful Bauble flourish, 
where I kept it quite simple with applying a light coat
of gesso and a little thicker layer around the edges..


The SUPER CUTE stars Santa & Stars set
I went with something a bit different when adding colour,
 inking them with a Pinky Rose..


The next piece is the 2019,
where I added a coat of gesso 
then once the gesso dried inked with blue... 
 

Repeating the process for my title!
A coat of gesso, then inking Christmas with a sliver
and the letters EVE with a teal...


That is it from me this year!! 
I hope I have brought you some inspiratiion in 2020...
I would like to wish you all A VERY MERRY SAFE CHRISTMAS
filled with  lots of love, laughter, good food & great memories for you to capture...

I'll be back in 2021
xx

Sunday, October 18, 2020

Christmas 2020 Mini release

Hi 2Crafty Fans

 Well hasn't 2020 been a strange year and one that saw lots of people turning to their
craft to help with all the self-isolation, hence we have been run off our feet
keeping our retailers in chipboard and have not had a chance to design much at all this year.

Today I'd like to share our new Christmas products, only a small release, but some cute pieces
that I hope you will like.  Please share with your retailers if you'd like them to order anything
in for you, I hope to have these on the Wholesale website early next week.


Gnomes have been popular this year, so went with the trend, also some lovely new Snowflakes.


These Frames come in a 11" and 6" size.


Loooove the Holly Frame Set, whether used as is or cut up I know the DT girls will love that one.


Just a few new Christmas titles.


Thanks for your continued support of our little brand, hope we can get through
 2020 safely and that 2021 is much better for us all.

Vanessa
2Crafty Owner
 

Monday, November 18, 2019

"Christmas Card"
PHOTO TUTORIAL
By Ro Miqueletto

Hello 2Crafty friends!


"Christmas Card"

My second project of this month, a Christmas card with beautiful and delicate chipboards.


 The 2Crafty Chipboards Used:

Pointed Doily Frames
Formal Flourish 3
Fine Word Set 2


Details:


Step by step how I made this card:

Materials I used:
 2Crafty Chipboards, Mintay Papers, white Cardstock, white and gold acrylic paint,
pearls and ornaments.

Step 1: Fold a sheet of white cardstock (28,0cm x 20,0cm)


Step 2: Glue a paper (19.5cm x 13.5cm) over white paper.


Step3: Paint the chipboard with white acrylic paint.


Step 4: Paint the chipboard you painted white with gold acrylic paint.

  
Step5: Glue a paper (19.0cm x 13.0cm) over the paper pasted in step 2.
Glue the chipboard and lace to decorate.


Step 6: Paint the chipboards with white acrylic paint.


Step 7: Choose one of the chipboards, I used the biggest one and paste it.
Cut out and paste a Christmas picture.


Step 8: Choose Christmas image and paste over the picture you pasted in step 7.
Glue a crystal ornament (I recycled an earring).


Step 9:  Paint the Magical chipboard with gold acrylic paint and paste over the picture.
Embellish the chipboard frame with red pearls and a beautiful gold ornament in the center.


Ready! You have a beautiful Christmas card to give away!
I hope you enjoy!


My Blog:
https://romiqueletto.blogspot.com/2019/11/christmas-card.html


Sunday, November 3, 2019

"Christmas Frame" Home Deco
r By Ro Miqueletto

Hello 2Crafty friends!

This is my first project  of this month of November.

A frame made with recycled box for you to decorate your home for Christmas.

"Christmas Frame"


2Crafty Chipboards used:

Holly Vine Wreath
Frame Edith's
Merry Christmas Card Pack


Holly Vine Wreath was beautifully painted with gold metallic paint.
 With the paint still wet I added transparent glitter.


The arabesque frame I split and used one on each side of the box to decorate.
 I painted with white acrylic plaster and again added transparent gliter.


The title Merry Christmas is beautiful and the perfect size for the frame.


Hope Ican inspire you in some way!


Sunday, October 20, 2019

Christmas Tag By Karan Gerber

Hi Friends and welcome to the 2 Crafty Blog today.

Its Karan  Gerber here to share some Christmas Decor with you using some
of the Christmas selections of chipboard that 2 Crafty has to offer. 

With Christmas on my mind I thought it would be nice to create some Home Decor as
 this beauty would be perfect sitting on a plate stand with fairy lights around the bottom. 


The base is designed from the Tim Holtz etc tags and these are a very
 thick chipboard designed for mixed media. 


I heat embossed the Reindeer in white; the ornaments were cut apart from the
 border and used individually and heat embossed with Crimson embossing powder.


The Chicken Wire was embossed with Ancient Amber embossing powder and I
 cut it in half and it sits on either side of the paper layers. 


I love how this tag turned out and I hope I have inspired you to 
think about your Christmas Home Decor!


2 Crafty Chipboard Used:
Chicken wire
 Ornament Border
Blitzen 


Until Next Time:
 Happy Scrapping