Showing posts with label ros madley. Show all posts

Sunday, June 19, 2016

A Layout, A Card & A Goodbye
With Ros Madley


"This Face Makes My Heart Smile"


Hi there friends,
 
Before we start...
Please remember while your here be sure you have
become a blog follower & leave a blog comment to
be eligible to go in our monthly draw for a great chippie prize pack.

This page started as a need to water colour.
I stamped out a row of one of my fave stamps and coloured with some water pastels.


I have used one circle from the from the 6x6 Circle frames and a couple of scrap pieces
 from the inside of Revolution Circles.  I have used a black texta to draw a border around
 the edges of these. I have mounted a large Tag on top of the circles. 
This has been painted with a metallic gold paint.


The photo has been positioned inside a Jenna Frame which
 has been coloured with a black Big Brush pen.

I used the same pen to colour the This Face Makes My Heart Smile title and
then heat embossed this with iridescent powder.  It’s given the title a glittery
 multi coloured layer that looks fab.


"4 You - Card"

I wanted to keep my chipboard black and white for my card.  By sticking to these 
basic colours, the chipboard doesn’t get lost on the bright background.


The number 4 from the 12x12 Numbers pack, the loopy word you and the bird from 
Tree with Sparrows  have been painted with a light coat of gesso.


 I have also used Harlequin Clumps and a Circle Dot Frame.

These have been coloured with my go to black Big Brush pen.


You, loopy font (unit of 3)

These are  my last Design Team projects for 2Crafty Chipboard.

Thank you everyone for your gorgeous words and support over the
past 12 months.
It's been fabulous ♥


Photobucket

Sunday, June 12, 2016

Cool, by Ros Madley

  Hi everyone, Ros here today to share this layout
using some great 2Crafty pieces.
 
"Cool"


I have used Alpha BG font as the base of this layout.

I painted it a nice shiny red so that it would stand out against my background.


I layered the letters all different ways to make a squareshape.

My photo cluster has been framed with a Circle Revolution which I have coloured with
 a Big Brush marker.


I have coloured the Gears in with metallic paints and layeredthese over some circles and 
banners cut from paper scraps.

The title is a Word Bubble.  I have cut the word out of thebubble shape, coloured 
with a Big Brush and mounted on white cardstock.


My page has been finished off with a scattering of stars from
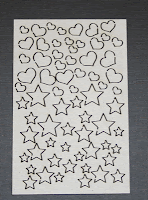
the ATC Hearts and Stars.

 Aren't they so cute!


2Crafty Chipboard used:


Photobucket

Thursday, May 19, 2016

A Layout and a Step By Step With Ros

#adorable

 Hello there 2Crafty fans, thanks for stopping by the blog today.

Please remember while you are here  to become a blog follower & leave a blog comment to
be eligible to go in our monthly draw for a great chippie prize pack.

For this page I reached into my stash of washi tape to start my 
background.   I've then added some coloured paste and stamping
to add a little texture.

I mounted my photos in a couple of Polaroid Frames.
These have been coloured with my black big brush.


I wanted my chipboard pieces to look a little rustic like the
weathered paper.  To get this effect I have heat embossed the
Heart Charm Chipboard with a grey embossing powder and then randomly
 applied some shabby blue powder over it.


The chipboard tags have been given a light coating
of gesso.  I have once again delved into my stash and found
an old roller stamp with a woodgrain print.
Perfectly matching with the paper.


The title on this page has been made with two different titles.
The #selfie set and the word title, Just Adorable.
It has been heat embossed with Shabby blue embossing powder. 
 I love the look of these powders on chipboard pieces.

Heart Charms (units of 3)

Just Adorable (unit of 3)

Selfies Word Pack  (units of 3)

Mini Tags (unit of 3)

Polaroid Assortment Frames (unit of 3)


Gift Box

I needed to make a gift envelope for a gift card.  After a bit of thinking about which
 way to go I decided to recycle an old perfume box.

I started by measuring out some patterned paper and scoring where the folds will be. 
 I have then inked around the edges with my chosen colour.


Double sided tape has been used to stick my paper to the box.  I left a small space
 on the top and bottom of the box because I think it looks neater and this gives
 it a nice little border.

Then I took a piece of hessian and cut to the required size and frayed the top and 
bottom.   This has then been stuck around my gift box with some strong
 glue.  A ribbon has been added and a bow tied.  I chose to use a black ribbon 
to match the colour of my recycled box.


Two pieces of the chipboard I used, a Leafy Rounds and a Breanna's Swirl
have been cut in half.


The Leafy Round has been heat embossed in black with some gold metallic melts.  
For the Breanna's Swirl, I heat embossed with a white powder and then over top 
 some of this, I have heat embossed with a lilac colour to match the inked edges.

The three pieces of chipboard have been layered on top of the ribbon. 
 I used 3D matte gel to hold these in place.


To finish off the box I added a few flowers and a Mini Tag.  I left the tag blank 
and then just needed to add the name of my gift recipient to this.


Leafy Rounds  (unit of 3)

Breanna's Swirl (unit of 3)

Mini Tags (unit of 3)


Photobucket