Showing posts with label vintage. Show all posts

Thursday, January 24, 2019

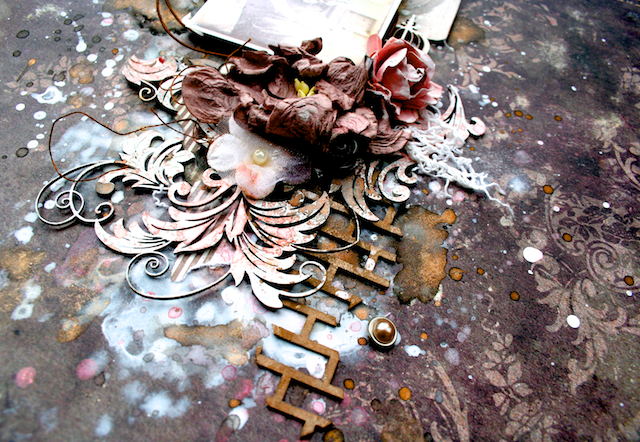
Love of my Life - Layout by Olga Bielska

Hi 2 Crafty fans! 

Olga Bielska back today to share my new vintage layout with fantastic 2Crafty chipboards.


The amazing 2Crafty Chipboard products are beautifully composed with layers and vintage style.


 I created lots of layers and using different elements and incorporated the chippies therein.


For all the chipboard pieces here, I have applied Finnabair's  pastes after a layer of white gesso.


2 Crafty Chipboard Products Used

Love of my Life (unit of 3)Rose Set (unit of 3)

Grid Panel  (units of 3)

I really hope that I was able to inspire you!
See you soon with a new 2Crafty project.


Wednesday, January 9, 2019

"Moment"
Mixed Media Layout By Olga Bielska
PLUS A VIDEO TUTORIAL

Hello friends of 2Crafty Chipboard!

It's Olga Bielska here today to share some inspiration with you.
Today I want to show my new vintage layout  using gorgeous  2Crafty chippies.


This layout has a process video tutorial to go with it to show you 
how I made the layout. I hope you enjoy my video:


TO VIEW VIDEO CLICK HERE

 I created lots of layers and using different elements and incorporated the chippies therein.


For all the chipboard pieces here, I have applied Lindy's
embossing powders after a layer of white gesso.


For the vintage look and dull finish on the project I added some splash with a sprays.


These are the awesome 2Crafty Chippy pieces I have used:...

   Swaying Branches (unit of 3)

Fine Word Set 3 (units of 3)  Frame Lucy's Flourish (unit of 3)

Thank you all for visiting us today. 

Creative Hugs!


Tuesday, February 23, 2016

Two Vintage Layouts By Lisa Griffith

Hello crafty friends!! I have prepared two layouts 
this month, both in my favourite vintage style.
 
But before we start..
Please remember to become a blog follower & leave a comment to
be eligible to go in our monthly draw for a great chippie prize pack.
The more comments you leave, the more chances to win.
'Spread Your Wings'

I love finding vintage photographs on Pinterest and this one caught my eye for the 
lovely girls and the beautiful patterns in their clothes. 

I used the following 2 Crafty Chipboard pieces:
'Mini Branches'
'Doily Frames'
'Birds Set'
'Leafy Shrub Set 1'
 

I painted the 'Birds Set' with black acrylic paint and then lightly brushed 
on some metallic silver paint to give the wings some motion.


For the 'Doily Frame' and the 'Leafy Shrub Set' I embossed them both
 with sparkly black embossing powder to add some shine.


And the last chipboard piece I used, the 'Mini Branches'. I firstly coated them with white gesso,
then I painted them with bright green watercolor paint and then stamped them in black ink.


'Miss Potter'

This is a photograph I found on Pinterest of Beatrix Potter with her pet mouse. 
Who remembers falling in love with all of her sweet little animal characters?

2 Crafty Chipboard pieces used:
'Corner Thick Vine'
'Brick Panel'


For the 'Brick Panel' I kept it simple with some brown ink, and for the 'Corner Thick Vines' 
I painted them white, and then splashed them with some pink mist to give it a weathered look.


I hope you have found a little inspiration today :)


Photobucket

Saturday, December 12, 2015

Winter Inspiration By Athanasia

'Frozen in Time'

Hello 2Crafty friends!
Winter is here in Greece, so as cold wind, cozy mood and warm sweaters.
I think my layout today shows this wintery feeling...
This photo is by Finnabair's Ephemera and I really love how old and 
timeworn it looks. I used the Tiny Vivian's frame , the set of three 
Spiral Snowflakes and a Pen Nib.
 I really love how they look on my composition.


In order to alter the spiral snowflakes I used White Gesso and white Glitter.
First I applied the gesso with a sponge and then I spread the glitter.
The gesso works just like glue, so the snowflakes where ready to use in no time!


I wanted the Tiny Vivian's frame to be black, so I painted it with
 black silk by ColourArte with a paintbrush.


For the pen nib (below) I used 'Vintage Photo' distress ink with the applicator and a little bit
 of white gesso in some spots. I stacked it on the page with staples.


2Crafty chipboard Used

Spiral Snowflakes

 Frames Tiny Vivian's  

 Pen Nibs


Spiral Snowflakes (unit of 3)   Frames Tiny Vivian's (unit of 3) Pen Nibs (units of 3)


"Christmas Tree Decorations"

With only a few days left until Christmas I decided to make some more

 decorations for my Christmas tree.

Here is how I made them. Very easy and quick!
You will only need White Gesso (you can also use any kind of glue like 
Gel Medium or craft glue), glitter and of course 2Crafty Chipboard :)


First you have to cover the chipboard with gesso. 


Before it drys, spread a generous amount of glitter.
Gesso will work as a glue.


Use the tweezers to remove the chipboard from the glitter and give it a good shake to remove the excess. Repeat the process if you have left some spots without glitter.


Tie some thread and your decorations are ready to hang on the tree.


2Crafty chipboards on this project:

Blitzen
Spiral Snowflakes
Wire Stars


Blitzen (unit of 3) Spiral Snowflakes (unit of 3)    Wire Stars (unit of 3)


Please remember to become a blog follower & leave a blog comment to
be eligible to go in our monthly draw for a great chippie prize pack.


I hope you got some ideas from today's projects!
Have a lovely crafty day!

Athanasia


.

Photobucket