Hi 2Crafty fans. Welcome back to the blog.
Today I'm sharing a step-by-step tutorial using beautiful emerald greens.
I do hope you find the tutorials and videos that we do useful. And that by following them you are inspired by all the different processes and techniques the Design Team employs to create their beautiful projects. Each one of us has our very own style of scrapbooking. By seeing how others achieve their finished project, I think we all come away inspired to try new things.
I hope this inspires you!
"this GIRL"
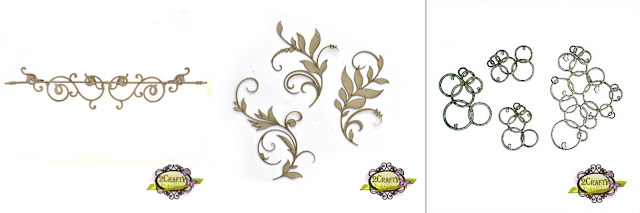
2Crafty awesomeness used:
Tahnya's 11" Border
Leafy Shrub Set 1
Hear Bubble Set
Spacers from the 6" Clock Face Discs
Leafy Shrub Set 2
this GIRL - title

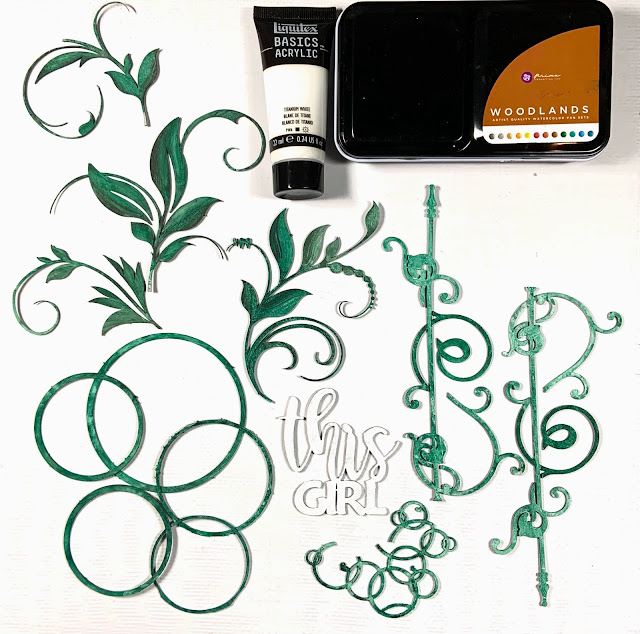
On all the Chipboard, except for the title, I used Prima's Woodlands Water Color set. I first used a few coats of Deep Moss, then went over them Shadow to darken them up a bit. While they were still wet, I streaked through the leaves with Shadow again to add a dimensional look.
The title was painted with Titanium White Acrylic paint.
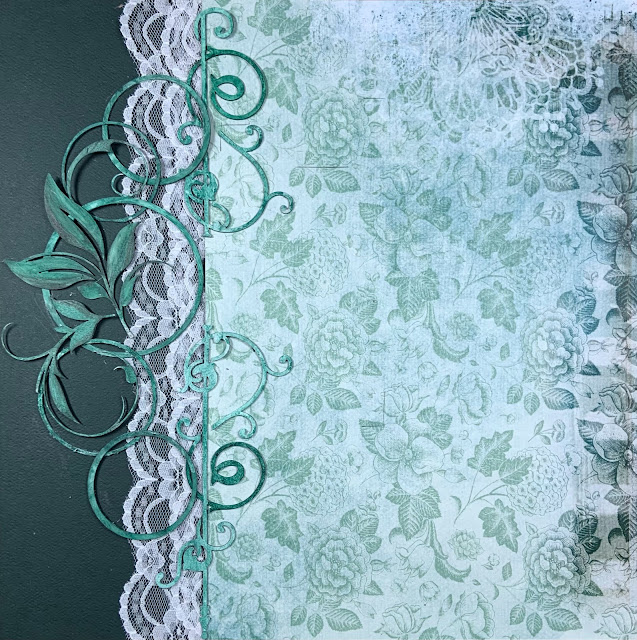
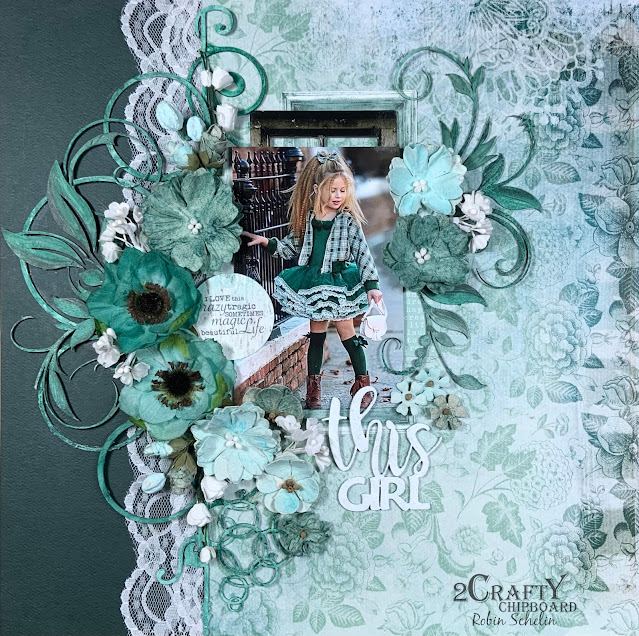
First, I cut the patterned paper and placed it on top of the dark green cardstock. I added 2 layers of lace and glued them between the papers.
I then cut Tahnya's Border in half and placed the pieces along the edge of the patterned paper. I took the spacers that came in the 6" Clock Discs set and placed them all down the left side of the layout over the lace. (Use everything you can girls!)
Then I added leaves from the Leafy Shrub Set 1 and 2 to the center over the circles.
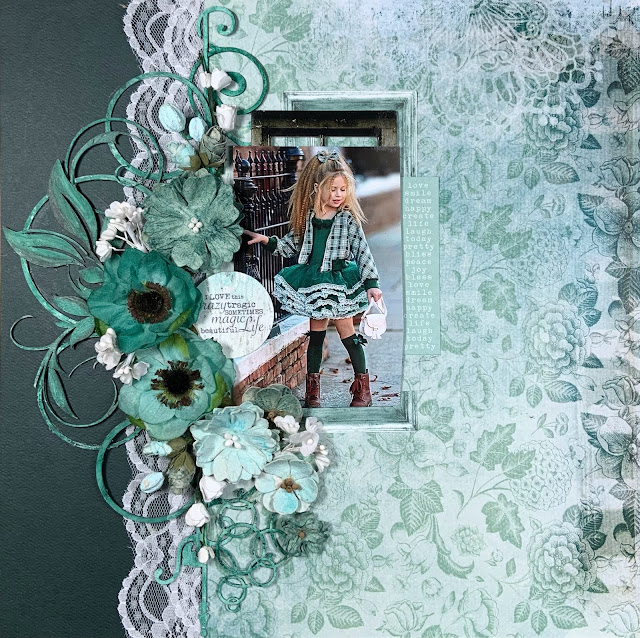
Next I added the photo matted with a wooden and an ephemera frame, with an ephemera circle piece over the photo on the left and a strip of ephemera words on the right.
I finished off the left side of the layout adding the flowers and circles from the Heart Bubble Set on the bottom.
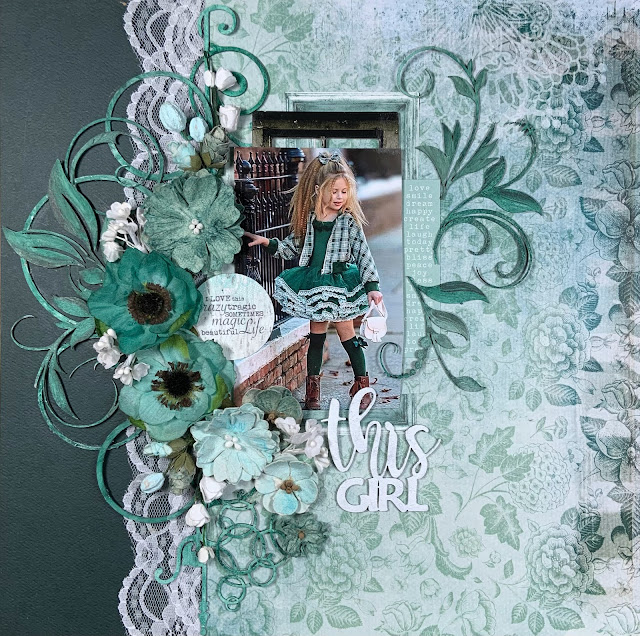
Next I glued down the Chipboard from the Leafy Shrub Set 1 to the upper right side of the photo.
Then I placed the title, this GIRL, on the bottom of the photo.
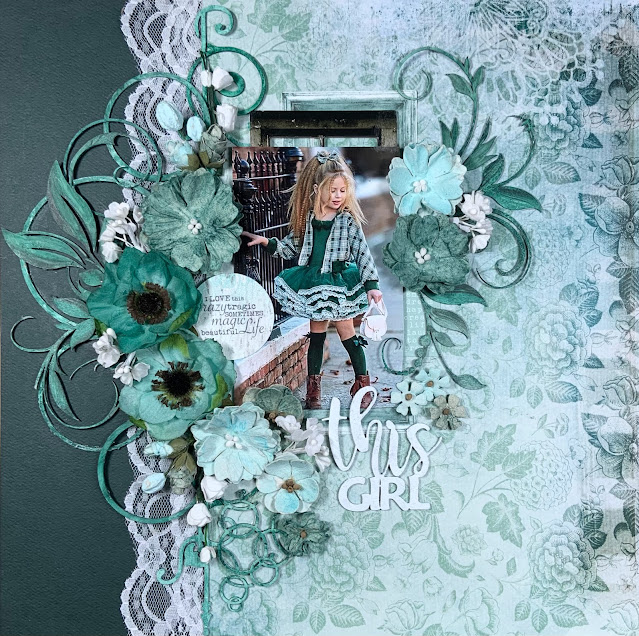
Then after adding the flowers on the right, it's finished.
I hope you liked this tutorial and found it easy to follow. Follow the other DT members for more tutorials and videos.
Until next time, take care and keep safe!