With Christmas fast approaching,
I wanted to create a decoration to personalise my home.
The 10' Decorative Star seemed the perfect beginning
for me to work with and then I found the Ornament Sampler
in my 2Crafty stash and it all came together so beautifully.
I hope you love it as much as I do. It's so satisfying to make your
own decorations.

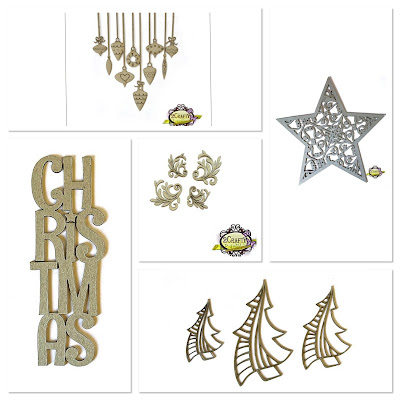
2Crafty Chipboard used...
Ornament Sampler
10' Decorative Panel- Flourish Star
Funky Outline Christmas Trees
Flourish Adornment set 7
Christmas Vertical

Here are the instructions to create this decoration;
Step 1. Coat all the chipboard pieces with Gesso. Paint the Star with Finnabair
Mermaid Sparkle. The Christmas Title with Finnabair Dragon's Eye. The Flourish
and Trees are painted with Finnabair Butterfly Spells.
Step 2. Emboss the Ornaments with Stampendous Shabby Green embossing
powder and Lindy's Gang Midas Gold.
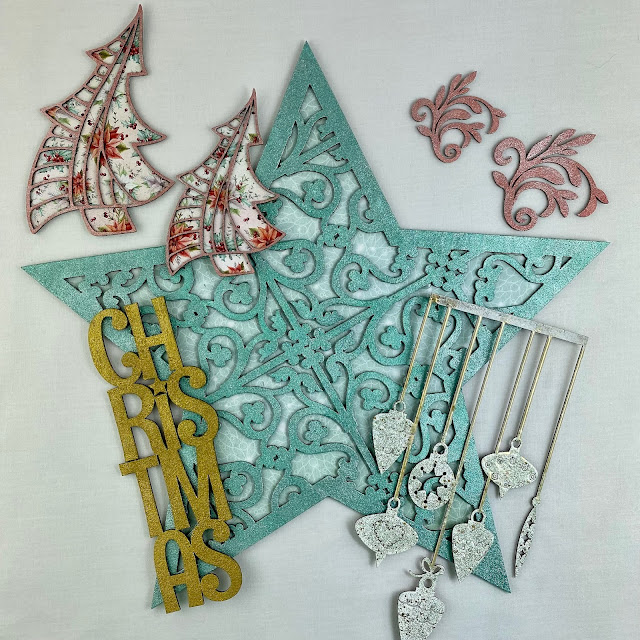
Step 3. Glue the Star onto a piece of paper. (I used Mintay Christmas Stories) Cut
around the outside so the star is now backed with printed paper.
Step 4. Glue two Christmas Trees to a different printed paper for contrast and cut
them out.
Step 5. Attach the Trees using foam squares for the smaller one to raise it.
Do the same for the title.
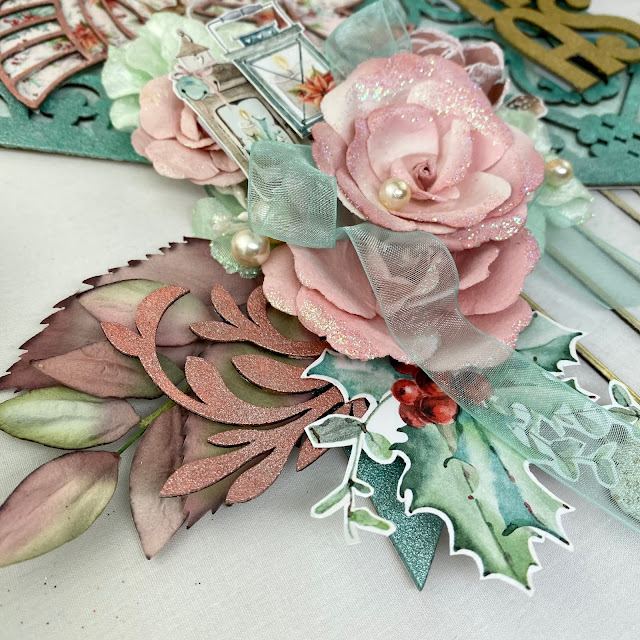
Step 6. Create the flower clusters and add in the Flourish pieces. Then add some
decorative pieces cut from the papers.
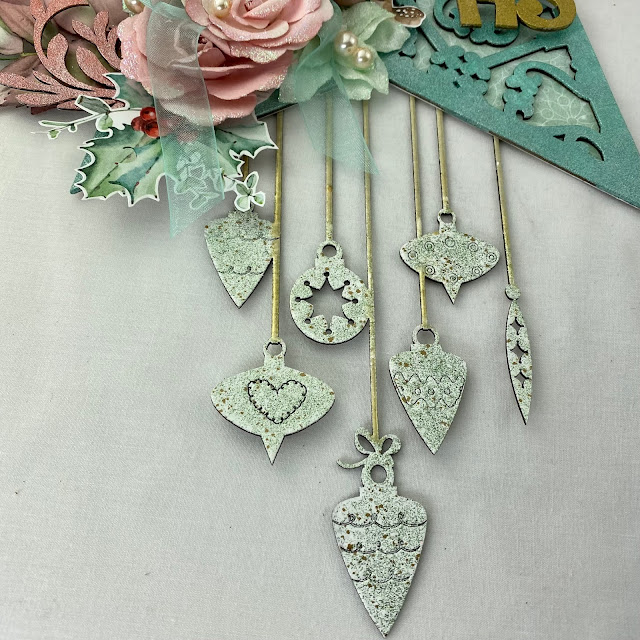
Step 7. Glue some Memory Hardware Pearls over and around the flower
clusters. Finish by attaching the Ornament Sampler to the back of the star with glue.
Thank you for reading my tutorial and I hope you are inspired to create
your own Christmas Decoration with 2Crafty Chipboard.
Until next time...
Charmane x