Showing posts with label Dream loopy font. Show all posts

Wednesday, April 27, 2016

April Inspiration From Marianne Johansson, Norway

"Dream"


Hi all 2Crafty fans!
Today I have two rather different layouts to show you.

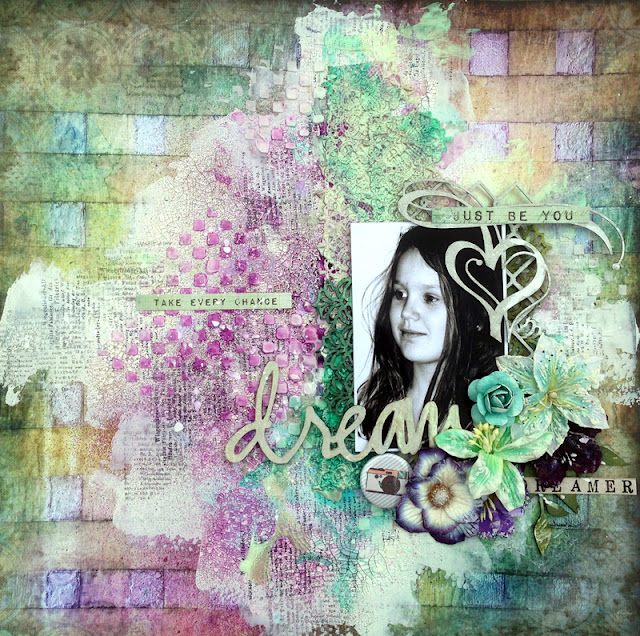
The first one is with an old photo of our youngest daughter. I just 
love this "dreamy" look she has here.


My background is filled with different mediums such as gesso, 
crackle paint, molding past,  mist, paint, stencils and stamps


I have used Gesso on all the chippies and also white watercolor. 
(love when it's really really white)


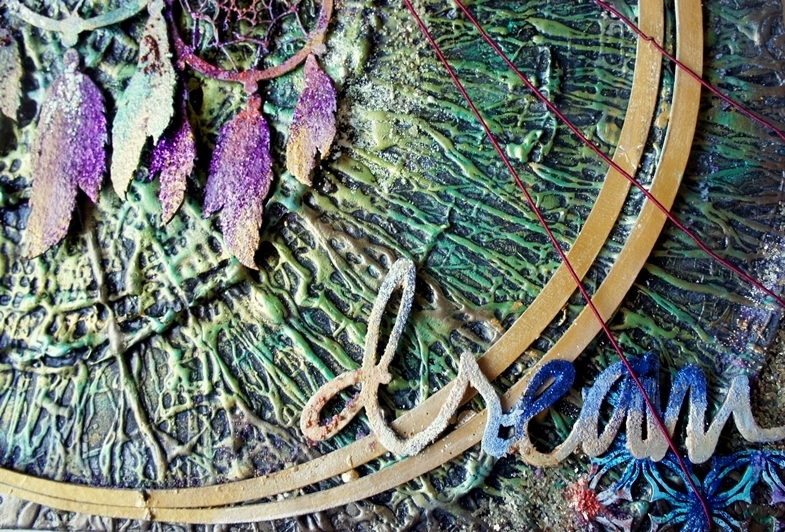
Some "Mini branches"  colored with an ink pad together with the flowers.


Here you see how white the title "Dream" is with the watercolor on top of the Gesso


The "Fencing wire panel" and "French lace Border" under the photo are both
 colored with Gesso, ink pad and mist.

2Crafty products used..


"The Queen and I!"

Well, I'm visisting royalties in London LOL
Here is a layout with a photo of me and Queen Victoria I, from Madame Tussauds in London.


I wanted to get the velvet feeling (from the curtain in the photo) and only had some black ink on the natural chippies this time. And some Inka Gold, also to get the luxury feeling.


Loved the title on this one, guess I could have used it many times on several layouts.


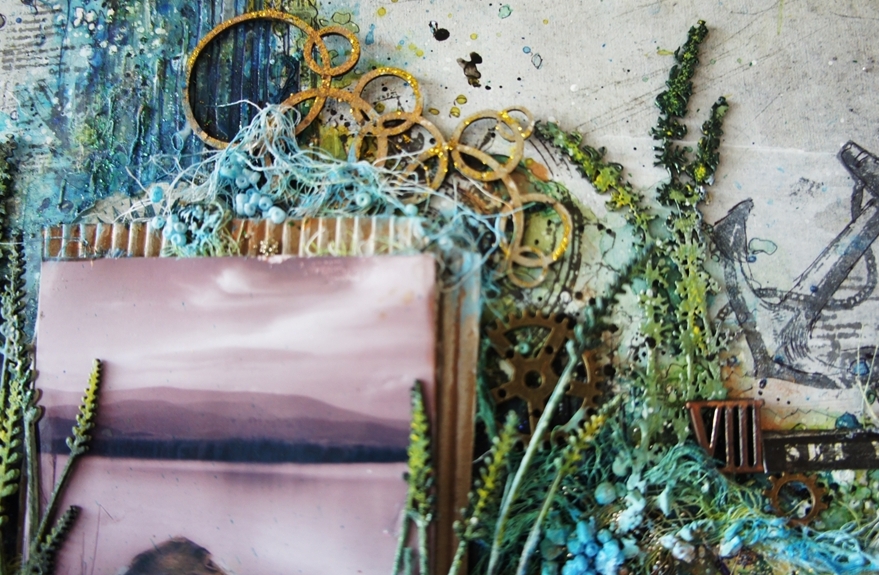
I cut out the "Dottet baubles" and used the circles as embellishments below, as a "flower". The "strings" I used on top of the photo, as "hanging-strings".


I cut the "Avery vines" in several pieces and used them in combination with the flowers, as leaves.


Aren't we cute together? The Queen and I? LOL


My background is rather simple, with only some stamps, stencils, tape and a few drops of paint.


  2Crafty Chipboard used:

Dottet Baubles
Avery vines
Mini Branches
What you see is what you get - title


Photobucket

Friday, March 25, 2016

March Inspirations By Jaya Rahuvanshi

Hello Everyone!
This is Jaya here with you all.
Today I have a few projects to share with you.
 A mixed media canvas and a layout.
 
Before we start
Become a blog follower & leave a blog comment to
be eligible to go in our monthly draw for a great chippie prize pack.

"Dream"
I had been wanting to make a mixed media canvas something like this for so long. 
When I got these chippies in my DT pack, I knew I could go ahead.


These dream catcher chippies are so gorgeous and intricate. It was fun to create 
this canvas with them.

Some close-ups-

Look at that intricate pattern! Isn't it gorgeous? 


I applied some white acrylic paint to my chipboard pieces and once it was dry I mixed 
some glitter with soft matt gel and randomly applied it to the chipboards. Next was
 adding some DecoArt Metallic Lustre in Gold and champagne ice. They look 
absolutely amazing after this treatment! 


On this particular piece I added some embossing enamel and
micro-beads for added texture.


Love that 'Dream loopy font' chippie. I have loads of navy blue glitter on it 
coupled with highlighting with DecoArt champagne ice metallic lustre paint.

The moon like chipboard that you see here is actually a left over from 
Circular leafy frame chipboard. I love how beautifully it mimics moon. I
 painted it with Gold DecoArt metallic lustre paint.


2Crafty Chipboards used-
Dream catchers
Circular leafy frame
Dream loopy font
Circle lace panel


"Amaze Yourself"
For my next project I wanted to make something depicting nature in the raw form. 
So I decided to create something that was  highly textured using just  the shades 
of greens and greys.

 The wonderful chippies from 2Crafty made this possible. I just love those gorgeous 
Anchors and Shrub chippies. Aren't they the most gorgeous and intricate pieces 
to add to your beach/sea theme pages? 
 Have a look at the page-
 

Some close-ups-

I wanted to keep raw look of the chippies but at the same time add some colour and shine. 
So I coloured my chipboard pieces with some brown watercolour pastels and once it was 
dry I added some liquid gold sparkle sparingly to them. Have a look.


I also did some doodling on my anchor chippie to make the lines stand out after
 colouring. The shrubs and leaves were first embossed with dark green and teal embossing
 powders and later I added a hint of yellow at places. It gave them the perfect natural
 look I was aiming for. 


2Crafty Chipboards used-

Lavendar shrubs
Thistle shrubs
Bubble clumps
Amaze yourself


  That is all from me today. I hope you were inspired with these projects.
See you again soon!


Photobucket

Tuesday, September 16, 2014

Dream - Melenia's September Layout

Hello everyone!
It's Melenia here today with a new mixed-media page,
(oh yes, chipboard can be a key-element of mixed media projects
and this is what I want to show you today)
that features the stunning
2Crafty chipboard
Word Circles
Groovy Flowers
Lavender Shrub
Circle Revolution Frames
Dream - Loopy Font
 
"Dream"

First I glued the large Circle Revolution Frame on my background paper and gessoed it.
I misted on a mask, that left its print on the circle and then added some micro-beads
 in different spots, here and there.

 
I always love to create clusters of different kinds of embellishments, 
so I tucked a small Circle Revolution Frame under my photo
and hid a couple of Groovy Flowers (I just can't do without these amazing flowers)
under and over my flowers.
 

In order to have balance in the design of my page,
I paired the circle-shaped chipboards 
with the Lavender Shrub!


I glittered parts of my chipboard pieces,
so that they would shine more and draw the attention on them.

 
What's a layout without a title?
I love the Loopy font
and it happened to match perfectly with the style of my page,
so I put the Dream - Loopy Font word on the left of my cluster,
to serve as a title.
 
 
So this is my mixed-media page!
I hope you like it!
 
 
And remember, to find a 2Crafty stockist near you, drop an email to...
salesat2crafty@optusnet.com.au
Photobucket