
Hi everyone. Robin here, back to share some more gorgeous 2Crafty with you.
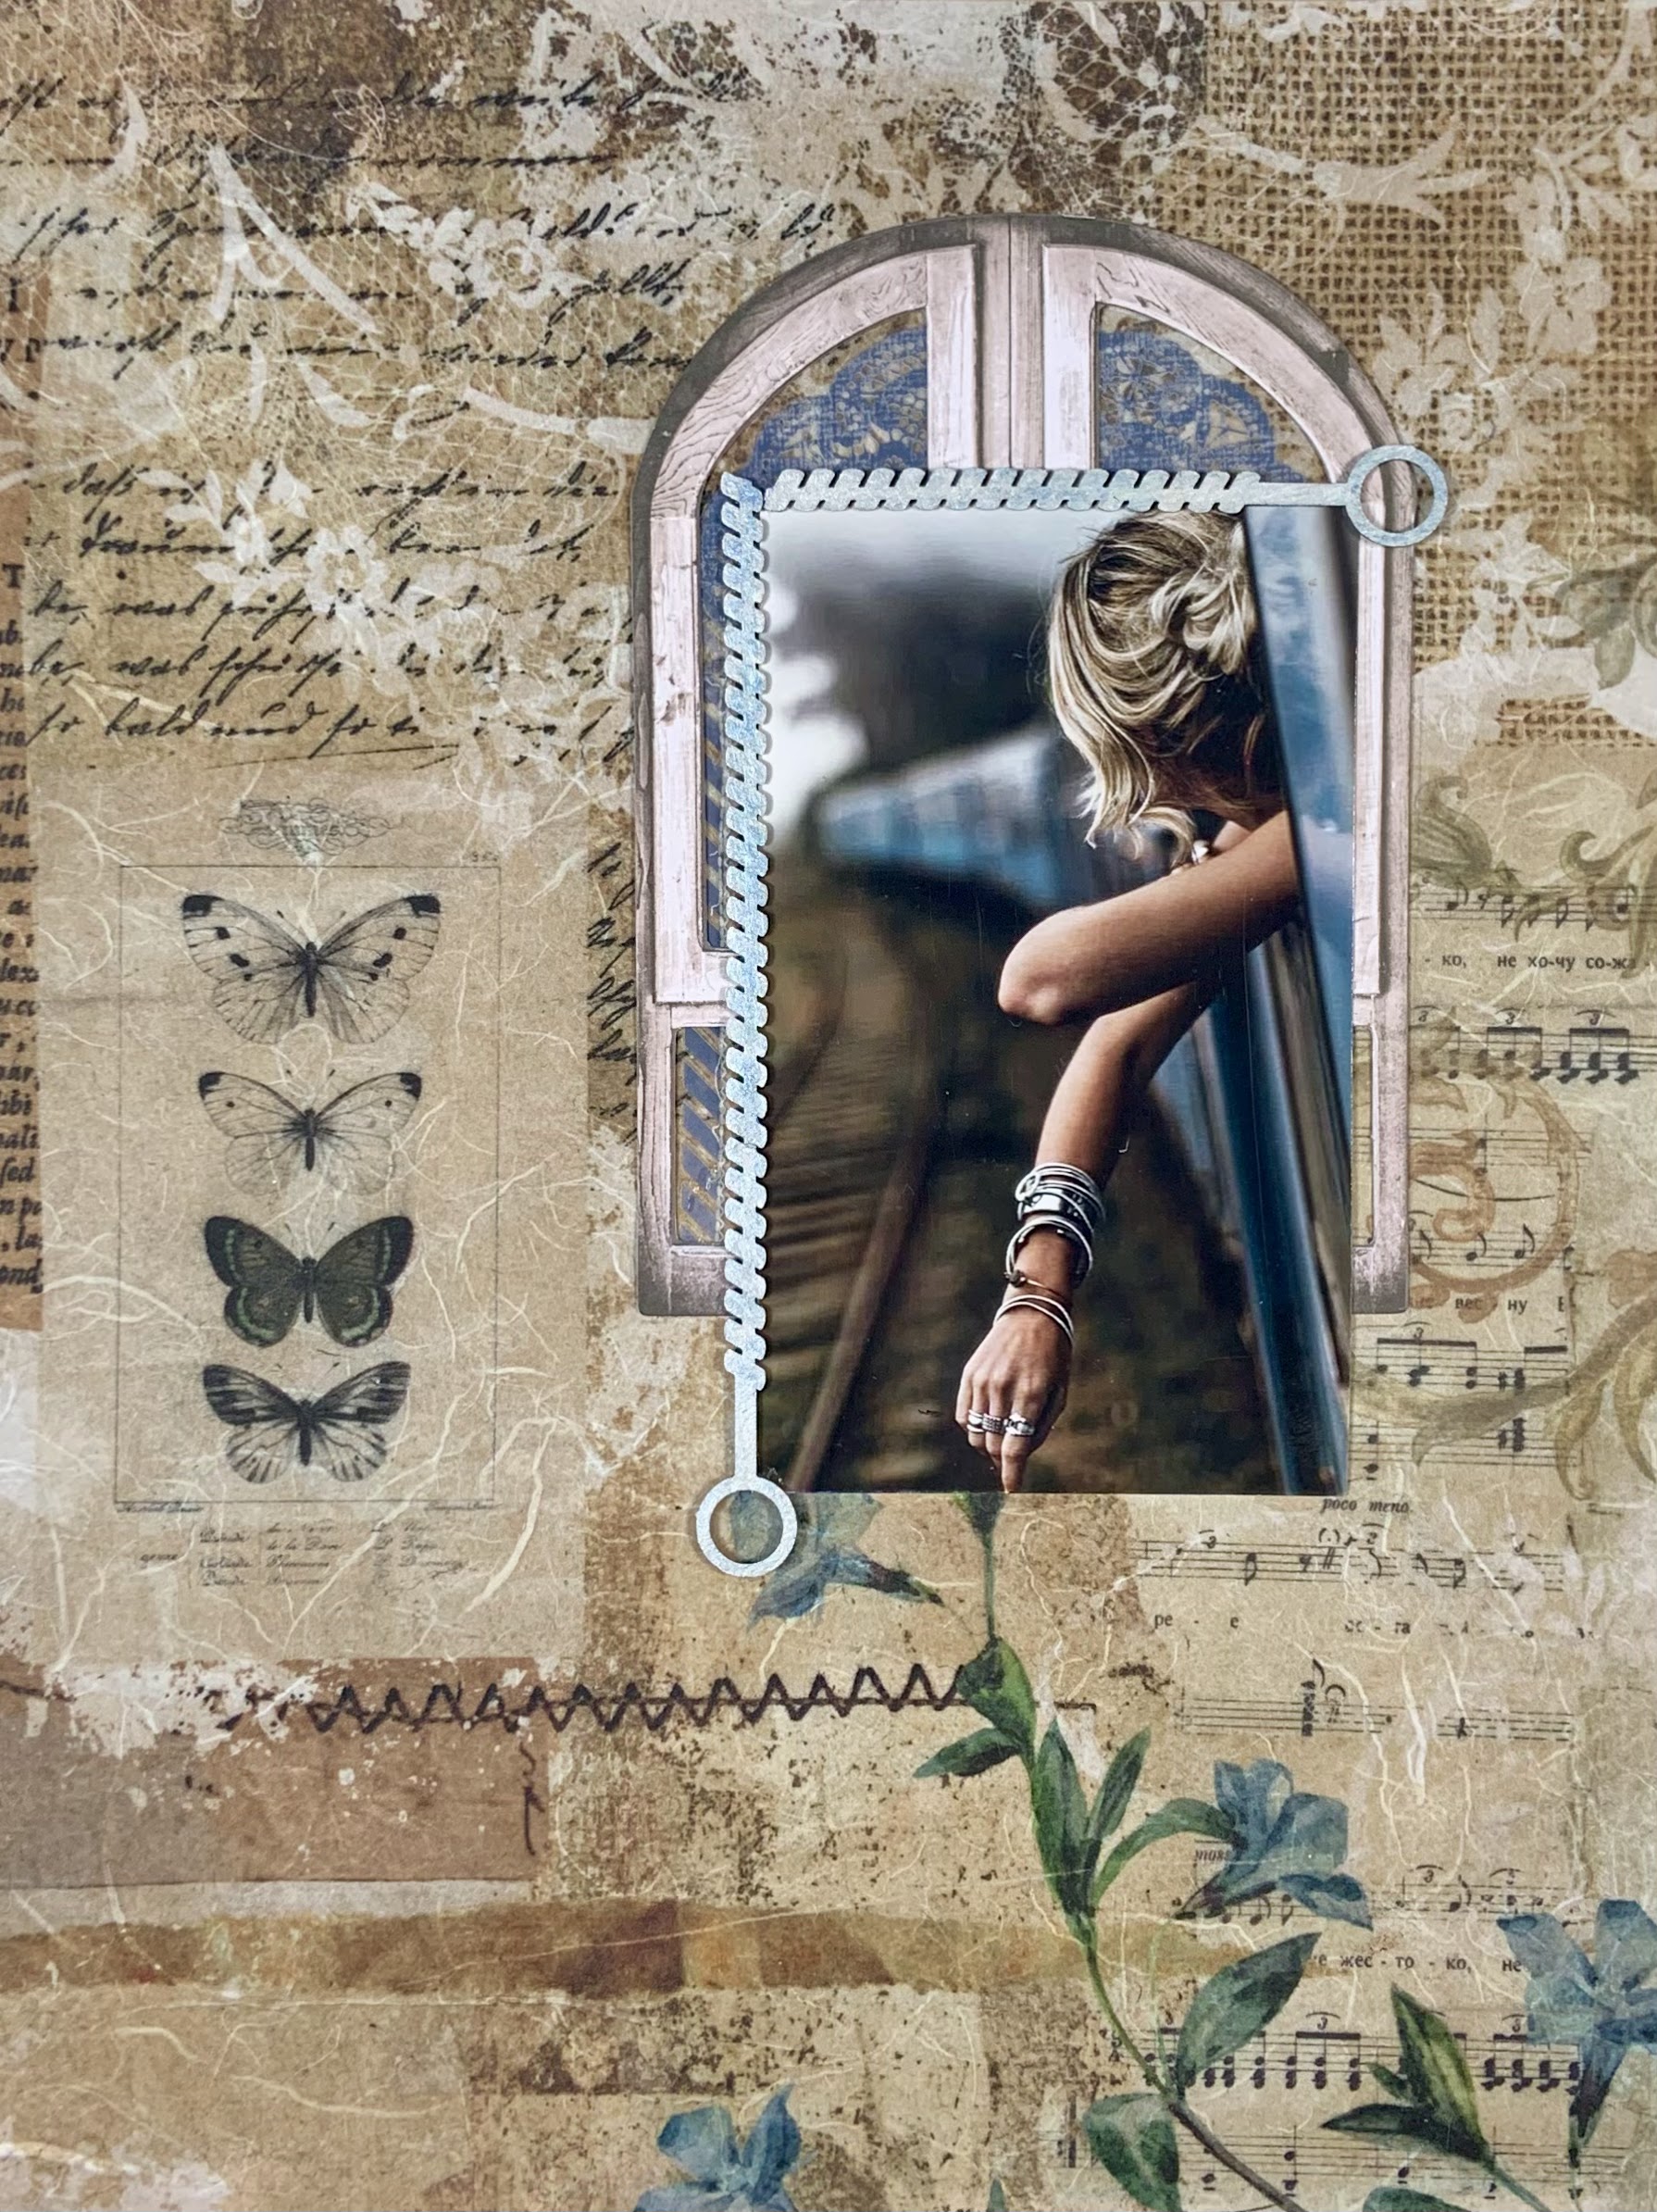
Today I'm sharing a step-by-step tutorial. I love these colors, and I love the photo. Reminds me to slow down and that the journey is indeed the destination!
Hope you will stay awhile and follow along as I explain as best I can how this came to be...
"discover "

2Crafty awesomeness:
Industrial Springs
Steampunk Collage
Vintage Border
Corne Steampunk 4
Steampunk Gears
discover - title
Shrub Set 1


All of the chipboard was first coated with white gesso.
The background is Prima Botanical Sonata Rice Paper. I adhered it to a chipboard backing with Art Basics Soft Matte Gel. A coat on the bottom and a coat on the top.
I used a die cut frame from 49&Market with a transfer glued to the back.
I used 49&Market Vintage Artistry Sky & Navy Transfers all throughout this layout. All of the transfers were rubbed on acetate and cut out. I did this because I could then play around with them before deciding where I wanted them. You know transfers...once they are rubbed on the paper, they're there for life! I know me, and I don't do well with life sentances!!
I used mostly Smooch Pearlized Accent Ink on all the chipboard. I like how easy this is to use, and how well the colors went with this layout.
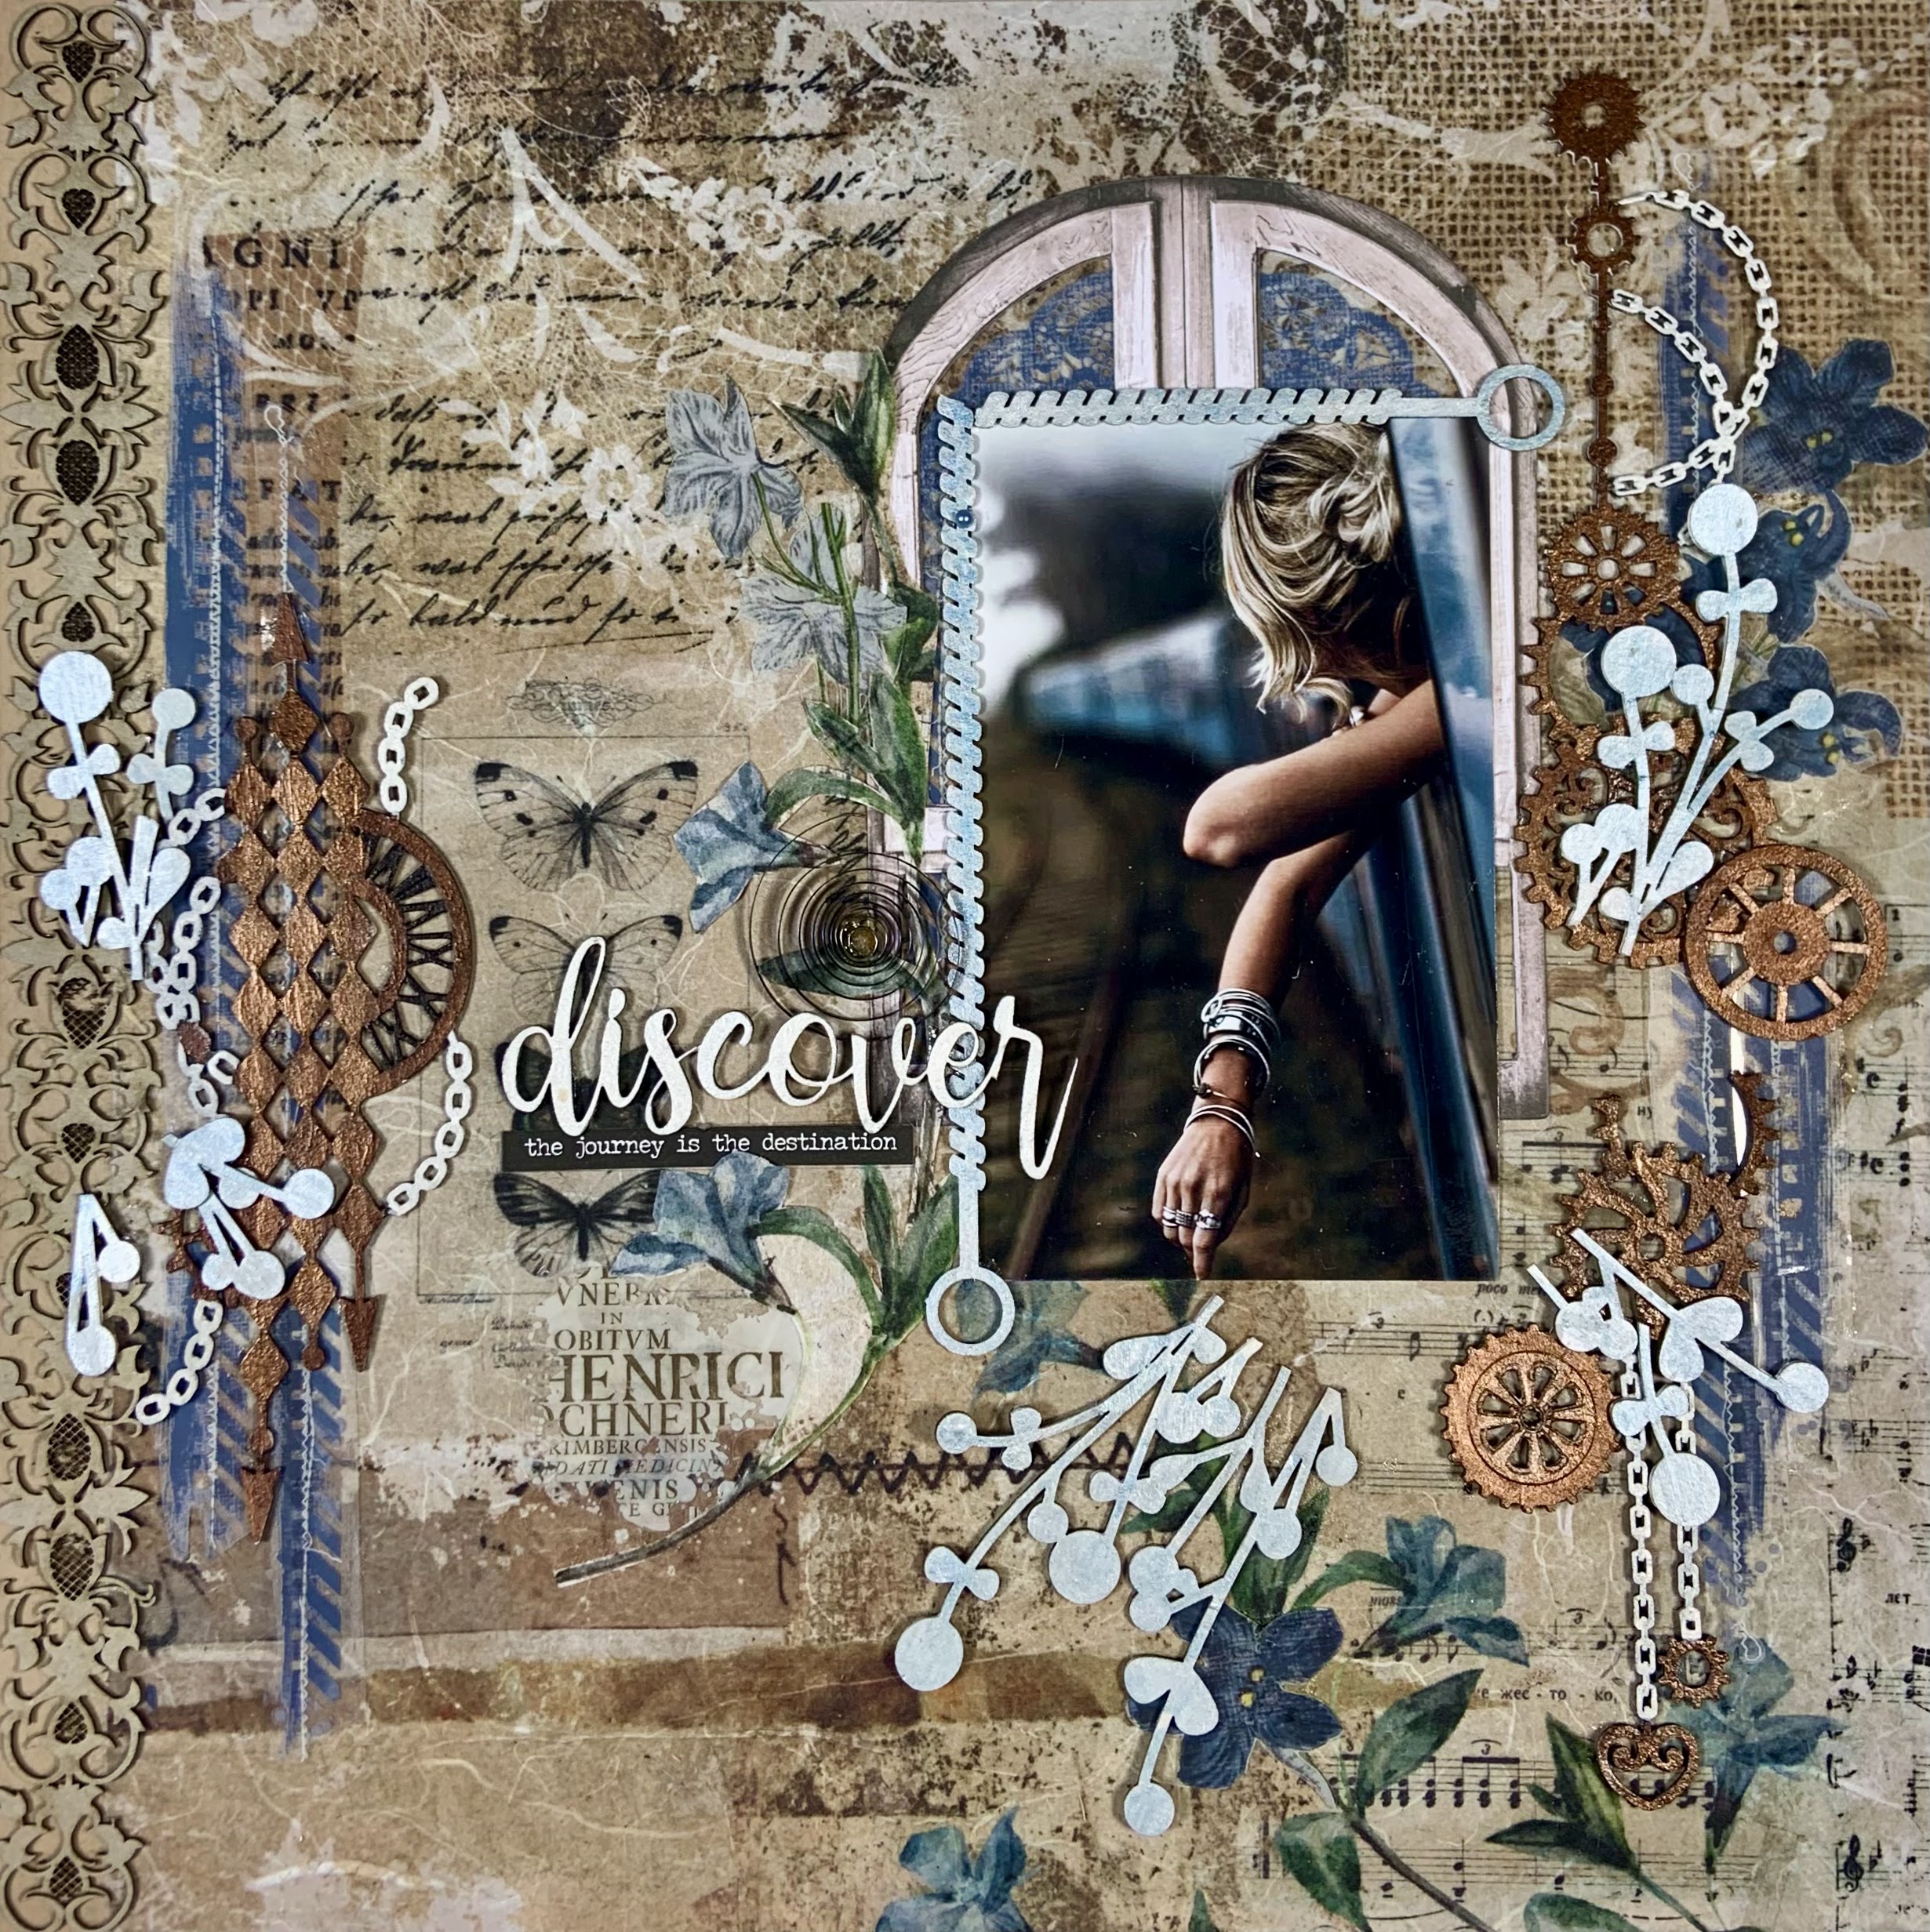
OK, moving on. Once the frame was down, I placed the photo over the frame. Then I cut and placed the Industrial Springs along the top and left on the photo to frame it. I painted them with Smooch - Cape Cod.

The Rice Paper wasn't 12"x12", more like 11"x16". So I used the Vintage Border on the left side to make up for that inch. I left it raw so it would blend in better with the colors of the Rice Paper.
I added some transfers along the side and then placed the Steampunk Collage on top of them. I used Smooch - Molasses, along with a very light coating of Bronze Acrylic Paint.
The little chains were Painted with Smooch - Moonlight, and the clock was painted with Smooch - Tuxedo.

The right side of the layout was done much like left side for continuity. I also used the transfers here as well, adding some blue flower transfers to the top.
The Corner Steampunk 4, and the gear from the Steampunk Gears, were treated the same as the Steampunk Collage. Smooch - Molasses and a very light dab here and there with Bronze Acrylic Paint. The chains here also were painted with Smooch - Moonlight. I cut the Corner Steampunk 4 in half so I could use it vertically along side the photo.

The title area was done between the photo and the left chipboard cluster to bridge that area.
I had some left over Rice Paper because it was a few inches longer than the layout, so I cut a flower stem from it and placed it next to the photo. I like how it adds some color but is not overwhelming. I also added a small transfer of light blue flowers to bring the flower stem up further.
I added an old metal spring above the title piece and a small transfer under the butterfly.
The title, discover, was painted with Smooch - Moonlight. I placed a word strip under the title to extend the title.
Now, for some more 2Crafty goodness... I cut up and painted the Shrub Set 1 and then placed the pieces all over. I wanted them to to be an accent to lighten this dark layout, so I painted them with a light blue color, Smooch - Cape Cod, placing them on the right and left to get an even distribution of brightness.
I also added another Steampunk Gear on the right below the photo.
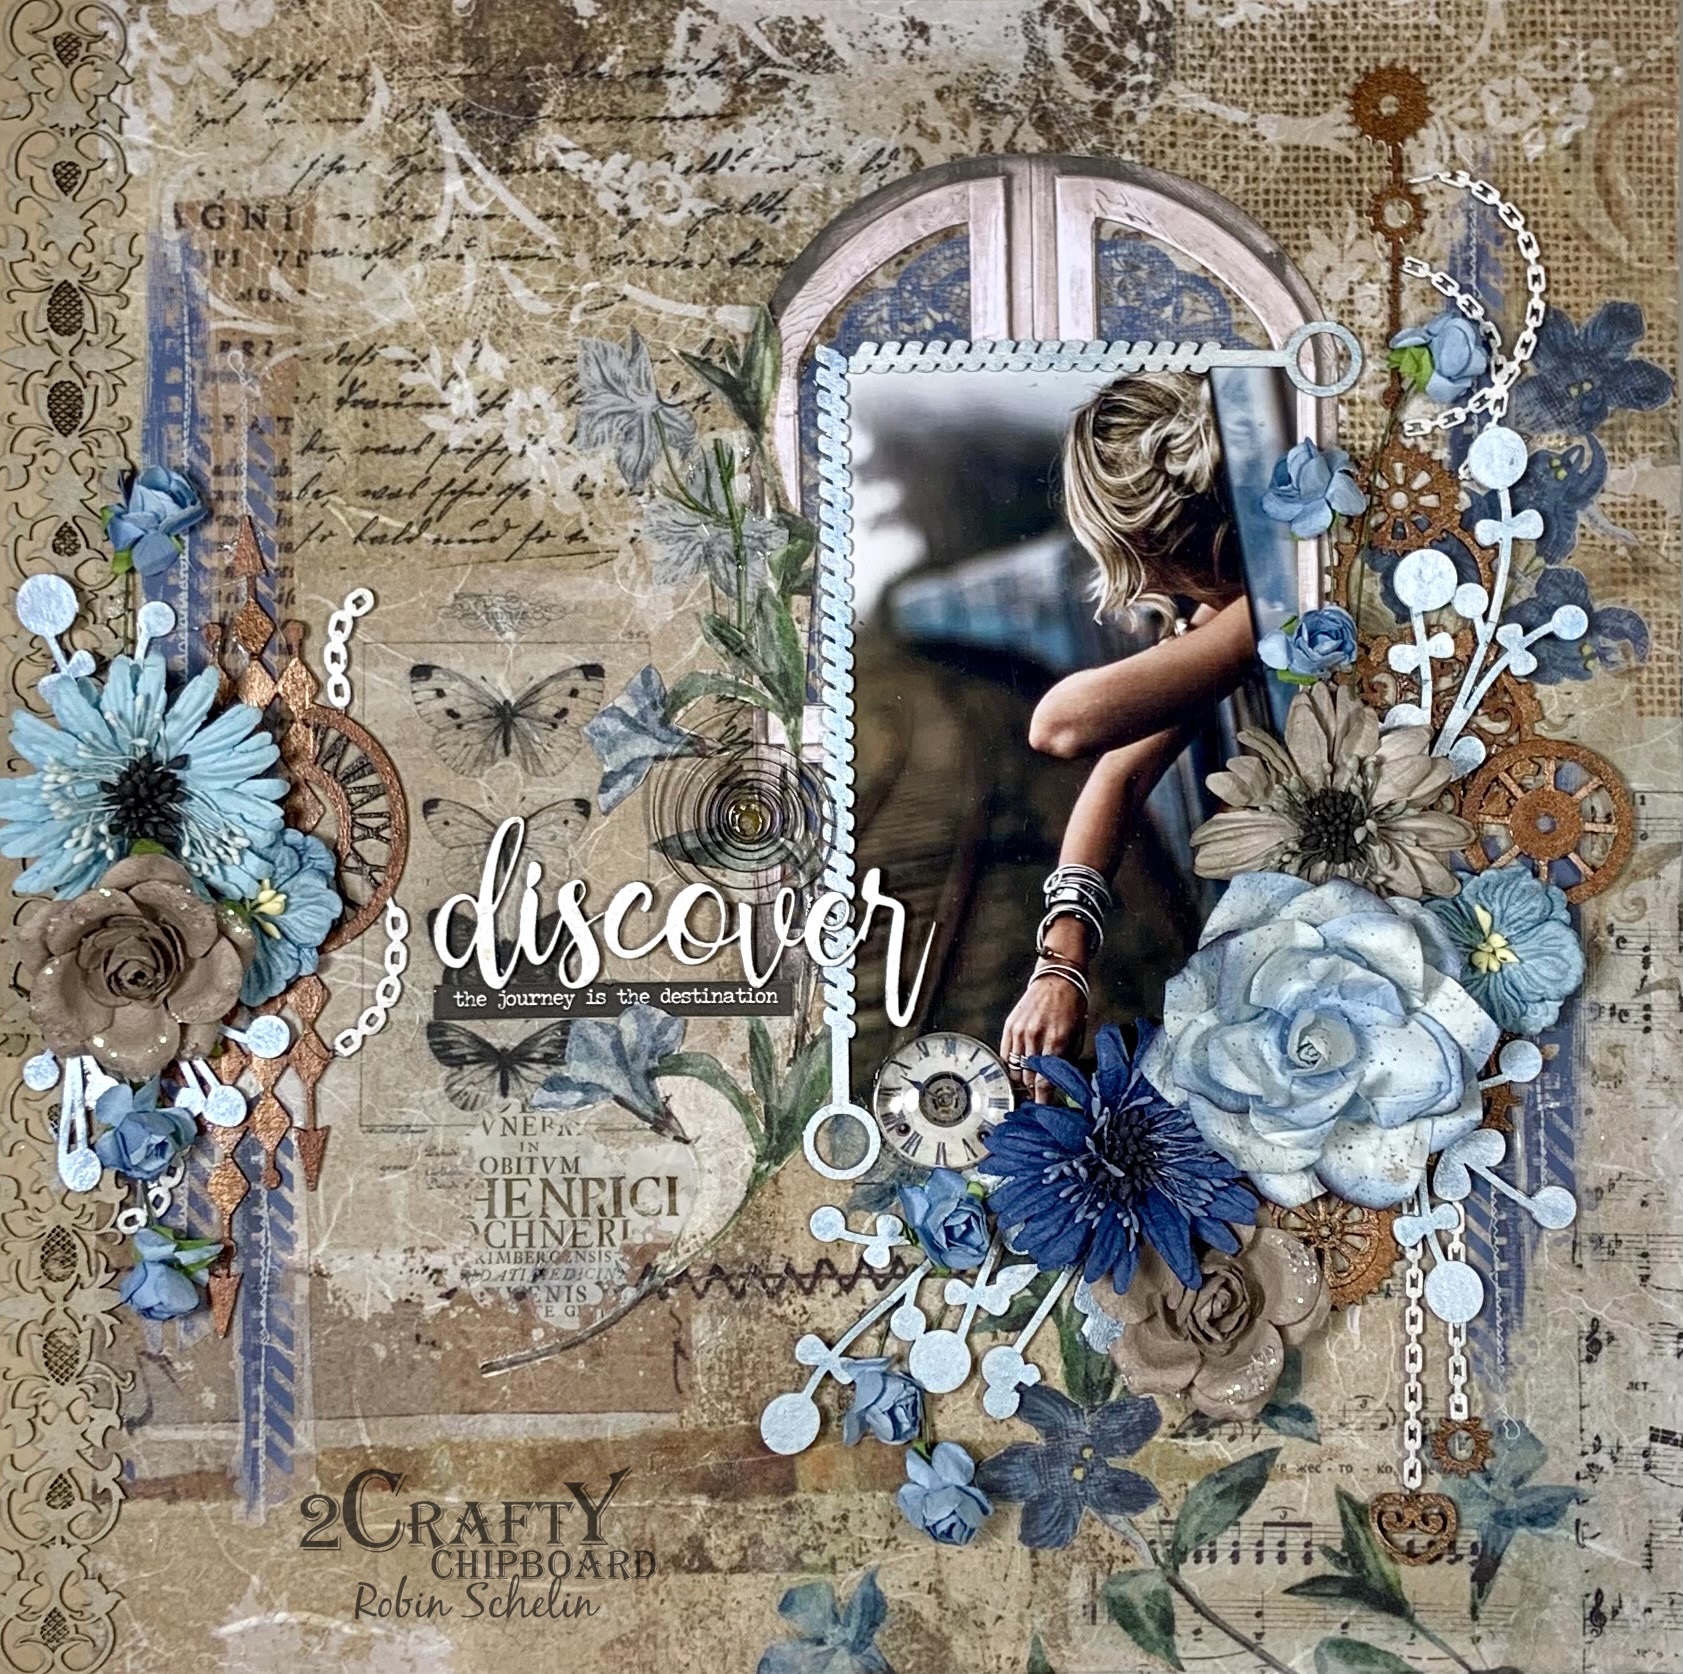
Now to add the finishing touches. Flowers, of course!! I added different shades of blue to bring out the color of the train in the photo with a few brown flowers for accent.
Just a little tip: When attaching the chipboard to the layout, I never glue the whole piece down. I usually just glue down the parts that are going to be covered by the embellishments, flowers, etc. I like to sometimes bend the ends up, or in this case I didn't like the how the Shrub Set 1 piece covered the blue flower on the bottom. Because the whole piece wasn't glue down, I cut part of it off and used it beneath the big blue flower.
Lastly, I added a small glass clock to finish it off.
And it's done.
Hope you were able to follow along and that it has inspired you.
Until next time...
